Tomato Basil Scrambled Eggs

The first time I made Tomato Basil Scrambled Eggs, I knew I had stumbled upon a breakfast game-changer. It was a lazy Sunday morning, and as the aroma of fresh basil and ripe tomatoes wafted through the kitchen, my family slowly emerged from their slumber, drawn by the enticing scent. The combination of creamy eggs, sweet tomatoes, and fragrant basil was not only visually appealing but also a delight to the taste buds. Each bite was a harmonious blend of flavors, and by the time we finished our plates, everyone was asking for seconds. This simple yet elegant dish has since become a staple in our breakfast rotation, loved for its freshness and simplicity.

Ingredients

Before diving into the culinary adventure that is Tomato Basil Scrambled Eggs, it’s crucial to gather all the necessary ingredients. You will need:

  • 6 large eggs
  • 1/4 cup of milk or cream
  • Salt and pepper to taste
  • 2 tablespoons of olive oil or butter
  • 1 cup of cherry tomatoes, halved
  • 1/4 cup of fresh basil leaves, chopped
  • 1/4 cup of grated Parmesan cheese (optional)
  • Toast or crusty bread for serving

These ingredients are not only easy to find but also affordable, making this dish not only delicious but also budget-friendly. The fresh basil and tomatoes add a burst of flavor and color, while the eggs provide a protein-packed base. Using high-quality olive oil or butter can elevate the dish, adding a rich, luxurious texture to the scrambled eggs. For those who enjoy a bit of indulgence, a sprinkle of Parmesan cheese can add a savory depth, enhancing the overall flavor profile.

Instructions

Now that we have our ingredients ready, let’s move on to the cooking process. Preparing Tomato Basil Scrambled Eggs is straightforward and doesn’t require advanced culinary skills, making it perfect for both beginner cooks and seasoned chefs. Here’s how you do it:

  1. Whisk the eggs and milk: In a medium bowl, whisk together the eggs, milk or cream, salt, and pepper until well combined. This step is crucial for achieving fluffy scrambled eggs, as the milk helps to create a creamy texture.
  2. Heat the oil or butter: In a non-stick skillet, heat the olive oil or butter over medium heat. Once hot, add the cherry tomatoes and a pinch of salt. Sauté the tomatoes for about 2-3 minutes until they start to soften and release their juices.
  3. Add the eggs: Pour the egg mixture into the skillet with the tomatoes. Reduce the heat to low and let the eggs cook gently, stirring occasionally with a spatula. This slow cooking method ensures that the eggs remain tender and creamy.
  4. Incorporate the basil: Just before the eggs are fully set, stir in the chopped basil. The residual heat will wilt the basil slightly, releasing its aromatic oils.
  5. Finish with cheese: If using, sprinkle the grated Parmesan cheese over the scrambled eggs. Stir gently to incorporate the cheese, allowing it to melt and blend with the eggs.
  6. Serve immediately: Remove the skillet from the heat and serve the scrambled eggs on warm toast or crusty bread. The eggs should be soft and slightly runny, with the tomatoes and basil evenly distributed throughout.

These steps highlight the simplicity of the recipe while emphasizing the importance of patience and care in achieving the perfect scramble. The key is to cook the eggs slowly, allowing them to set gradually and absorb the flavors of the tomatoes and basil.

Nutrition Facts

Understanding the nutritional value of a dish is essential, especially for those mindful of their dietary intake. The Tomato Basil Scrambled Eggs recipe serves approximately 3-4 people, making it ideal for a small family breakfast or brunch gathering. On average, a serving contains around 250 calories, though this can vary slightly depending on the specific brands and quantities of ingredients used. Here’s a rough breakdown:

  • Calories: 250 per serving
  • Protein: 15g
  • Carbohydrates: 8g
  • Fat: 18g
  • Cholesterol: 300mg
  • Sodium: 300mg

This nutritional profile showcases the dish’s balanced composition, making it a hearty and satisfying meal. The eggs provide a substantial amount of protein while the olive oil or butter adds healthy fats. The tomatoes contribute a small amount of carbohydrates, alongside dietary fiber and essential vitamins. If you opt to include Parmesan cheese, be mindful that it can slightly increase the sodium and fat content.

Preparation Time

One of the many reasons Tomato Basil Scrambled Eggs has become a beloved recipe in my household is its quick preparation time. From start to finish, you can have a delicious breakfast ready in just about 15-20 minutes. Here’s a breakdown:

  • Prep Time: 5 minutes
  • Cook Time: 10-15 minutes
  • Total Time: 15-20 minutes

This short prep and cook time make it an excellent choice for busy mornings when you want something nourishing without spending too much time in the kitchen. The efficiency of the recipe doesn’t compromise on flavor, ensuring that you can enjoy a gourmet meal with minimal effort. Whether you’re rushing to get the kids to school or looking for a quick bite before heading to work, Tomato Basil Scrambled Eggs offers a time-saving solution without skimping on taste.

How to Serve

While the Tomato Basil Scrambled Eggs are delightful on their own, enhancing the serving presentation can make your breakfast feel even more special. Here are some ideas on how to serve this dish:

  • On Toast: Serve the scrambled eggs on top of a slice of wholegrain or sourdough toast for added texture and flavor. The crunch of the toast complements the creamy eggs perfectly.
  • With Avocado: Add sliced avocado on the side for a creamy, nutritious addition that pairs well with the flavors of tomato and basil.
  • As a Wrap: For a portable option, wrap the scrambled eggs in a warm tortilla or flatbread. This makes it easy to enjoy your breakfast on the go.
  • With Fresh Fruit: Balance the savory eggs with a side of fresh fruit like berries or orange slices for a refreshing contrast.
  • With a Salad: Pair the eggs with a simple green salad dressed with olive oil and lemon juice for a light yet satisfying brunch.

These serving suggestions not only enhance the visual appeal of the dish but also add variety, ensuring that you can enjoy Tomato Basil Scrambled Eggs in different forms according to your mood and occasion.

Additional Tips

To ensure your Tomato Basil Scrambled Eggs turn out perfectly every time, consider these additional tips:

  • Use Fresh Ingredients: Fresh basil and ripe tomatoes make a significant difference in flavor. Whenever possible, opt for organic or homegrown produce for the best results.
  • Cook Low and Slow: Cooking the eggs over low heat is crucial for achieving a creamy texture. Avoid high heat, which can cause the eggs to become rubbery.
  • Don’t Over-Stir: Stirring occasionally is key to maintaining the texture of the scrambled eggs. Over-stirring can lead to a crumbly consistency.
  • Experiment with Herbs: While basil is a classic choice, feel free to experiment with other herbs like chives, parsley, or cilantro for a different twist.
  • Adjust Seasoning: Taste the eggs before serving and adjust the seasoning as necessary. A dash of extra salt or a grind of black pepper can enhance the flavors.

These tips are designed to help you customize and perfect your cooking process, ensuring that each batch of Tomato Basil Scrambled Eggs you prepare is as delicious as the last.

FAQ Section

As you explore the world of Tomato Basil Scrambled Eggs, you might have a few questions. Here are some frequently asked questions and their answers:

Q: Can I use dried basil instead of fresh?

A: While fresh basil provides the best flavor and aroma, you can substitute it with dried basil in a pinch. Use about one-third of the amount as dried herbs are more concentrated. However, the flavor profile may not be as vibrant.

Q: Can I make this dish ahead of time?

A: Tomato Basil Scrambled Eggs are best enjoyed fresh. If you need to prepare them in advance, consider cooking the components separately and combining them just before serving. This will help maintain texture and flavor.

Q: What can I use instead of eggs for a vegan option?

A: For a vegan version, consider using tofu as a scramble base. Crumble firm tofu and cook it with the tomatoes and basil. You can add nutritional yeast for a cheesy flavor.

Q: How can I add more protein to the dish?

A: To increase the protein content, consider adding cooked chicken, turkey, or beans to the scrambled eggs. You can also serve it with a side of Greek yogurt or cottage cheese.

Q: Can I freeze leftovers?

A: It’s not recommended to freeze scrambled eggs as they can become watery upon reheating. If you have leftovers, store them in an airtight container in the refrigerator and consume within 2 days for best quality.

These questions and answers aim to provide clarity and guidance, ensuring that you can enjoy Tomato Basil Scrambled Eggs with confidence and creativity.

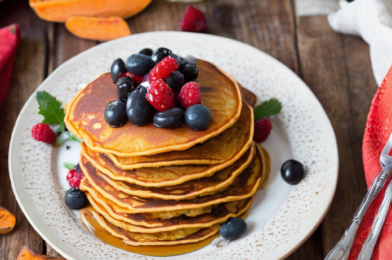
Sweet Potato Pancakes

As a passionate home cook and dedicated food blogger, I am always in search of recipes that not only tantalize the taste buds but also bring joy to my family gatherings. Recently, I stumbled upon a delightful recipe for sweet potato pancakes, and I must confess, it has quickly become a family favorite. The combination of the natural sweetness of the sweet potatoes and the fluffy pancake texture is nothing short of a breakfast revelation. My family, especially the kids, absolutely adored them, and they have since become a staple at our weekend brunches. This dish has not only brought smiles to our faces but also added a touch of warmth to our mornings.

Ingredients

To recreate these heavenly sweet potato pancakes in your kitchen, you will need the following ingredients:

  • 2 cups of sweet potato puree (about 2 medium sweet potatoes)
  • 1 cup of all-purpose flour
  • 1 tablespoon of baking powder
  • 1/2 teaspoon of salt
  • 1/2 teaspoon of ground cinnamon
  • 1/4 teaspoon of ground nutmeg
  • 1 cup of milk (dairy or plant-based)
  • 2 large eggs
  • 1 tablespoon of maple syrup
  • 1 teaspoon of vanilla extract
  • 2 tablespoons of melted butter
  • Extra butter or oil for cooking

Instructions

Creating these sweet potato pancakes is a straightforward process that even novice cooks will find manageable. Here’s a step-by-step guide to ensure your pancakes turn out perfectly every time:

  1. Begin by preparing the sweet potatoes. Peel and chop them into chunks, then steam or boil them until they are tender. Once cooked, mash them into a smooth puree.
  2. In a large bowl, combine the flour, baking powder, salt, cinnamon, and nutmeg. Stir these dry ingredients together until they are well mixed.
  3. In another bowl, whisk together the milk, eggs, maple syrup, vanilla extract, and melted butter. Once combined, add in the sweet potato puree, mixing until the texture is smooth and uniform.
  4. Gradually add the wet ingredients to the dry ingredients, stirring gently until just combined. Be careful not to overmix, as this can result in dense pancakes.
  5. Preheat a non-stick skillet or griddle over medium heat. Add a small amount of butter or oil to coat the surface.
  6. Pour about 1/4 cup of the pancake batter onto the skillet for each pancake. Cook for 2-3 minutes or until bubbles start to form on the surface and the edges appear set.
  7. Flip the pancakes carefully and cook for an additional 2 minutes, or until they are golden brown on both sides and cooked through.
  8. Remove from the skillet and repeat with the remaining batter, adding more butter or oil as needed.
  9. Serve the pancakes warm, drizzled with extra maple syrup or your favorite toppings.

Nutrition Facts

These sweet potato pancakes are not only delicious but also packed with nutritional benefits. Here’s a breakdown of the nutrition facts per serving:

  • Servings: 4
  • Calories per serving: 250

Preparation Time

One of the great aspects of this sweet potato pancake recipe is its manageable preparation time, making it ideal for leisurely weekend mornings or quick late-morning brunches. Here’s a breakdown of the preparation time required:

  • Preparation Time: 20 minutes
  • Cooking Time: 20 minutes
  • Total Time: 40 minutes

How to Serve

Sweet potato pancakes are versatile and can be served in a variety of delicious ways. Here are some serving suggestions to elevate your pancake experience:

  • Classic: Serve with a pat of butter and a generous drizzle of maple syrup.
  • Nutty Delight: Top with chopped pecans or walnuts for added crunch.
  • Fruity Twist: Add a handful of fresh berries or sliced bananas.
  • Whipped Cream Heaven: Dollop with whipped cream for a dessert-like treat.
  • Savory Option: Pair with crispy bacon or sausage for a balanced meal.

Additional Tips

To ensure your sweet potato pancakes turn out perfect every time, consider these additional tips and tricks:

  1. Make Ahead: Prepare the sweet potato puree in advance and store it in the refrigerator for up to three days to save time on busy mornings.
  2. Consistency: If the batter is too thick, add a splash of milk to reach your desired consistency.
  3. Don’t Overmix: To keep the pancakes light and fluffy, mix the batter just until the ingredients are combined.
  4. Keep Warm: Place cooked pancakes in a warm oven (around 200°F) to keep them warm until serving.
  5. Freeze for Later: Cooked pancakes freeze well. Layer them with parchment paper and store in an airtight container for up to two months.

FAQ Section

Here are some frequently asked questions about sweet potato pancakes, along with their answers, to help you make the most of this recipe:

  1. Can I use canned sweet potato puree?
    Yes, canned sweet potato puree can be a convenient substitute. Just ensure it’s unsweetened and pure.
  2. Can I make these pancakes gluten-free?
    Absolutely! Substitute the all-purpose flour with a gluten-free flour blend to make the pancakes gluten-free.
  3. What milk alternatives work best?
    Almond milk, soy milk, or oat milk are great alternatives that can be used in this recipe.
  4. How can I make these pancakes vegan?
    Use plant-based milk, replace eggs with flax eggs, and use coconut oil instead of butter for a vegan version.
  5. Can I add spices to enhance the flavor?
    Certainly! Feel free to add a pinch of ginger or a dash of cardamom for extra warmth and spice.

Coconut Chia Pudding with Berries

There’s something undeniably magical about a dessert that is both indulgent and healthy, and that’s exactly what you get with Coconut Chia Pudding with Berries. This delightful recipe has been a hit in my household, captivating the taste buds of everyone from the youngest to the oldest. The creamy texture of the coconut milk combined with the slight crunch of chia seeds creates a satisfying base that is elevated by the burst of freshness from the berries. This pudding is a perfect balance of flavors and textures, providing a nutritious dessert that doesn’t compromise on taste. Every time I make it, there’s not a single spoonful left, and it’s quickly becoming a family favorite.

Ingredients

To bring this delightful dessert to life, you’ll need the following ingredients:

  • 1 cup coconut milk
  • 1/4 cup chia seeds
  • 2 tablespoons maple syrup or honey (adjust to taste)
  • 1 teaspoon vanilla extract
  • 1 cup mixed berries (such as strawberries, blueberries, raspberries)
  • Optional toppings: shredded coconut, nuts, or granola

Instructions

Creating Coconut Chia Pudding with Berries is as simple as it is rewarding. Follow these easy steps:

  1. In a medium-sized bowl, combine the coconut milk, chia seeds, maple syrup, and vanilla extract. Stir well to ensure the chia seeds are evenly distributed and won’t clump together.
  2. Cover the bowl and place it in the refrigerator to set for at least 4 hours, or overnight for best results. This allows the chia seeds to absorb the liquid and form a pudding-like consistency.
  3. Once the chia pudding has set, give it a good stir to break up any clumps. Taste and adjust the sweetness if necessary.
  4. Divide the pudding into serving dishes and top with fresh mixed berries.
  5. For added texture and flavor, sprinkle on your choice of optional toppings like shredded coconut, nuts, or granola.
  6. Serve immediately and enjoy!

Nutrition Facts

This recipe yields approximately 4 servings. Each serving contains around 200 calories, making it a guilt-free indulgence that can be enjoyed at any time of the day.

Preparation Time

The preparation time for Coconut Chia Pudding with Berries is delightfully minimal. You can expect to spend about 10 minutes gathering and mixing the ingredients. The majority of the time is spent allowing the pudding to set in the refrigerator, which takes at least 4 hours or overnight. This makes it an ideal make-ahead dessert that you can prepare the night before and have ready for a quick breakfast or dessert the next day.

How to Serve

Serving this pudding can be a fun and creative process. Here are some suggestions:

  • Individual servings: Portion the pudding into small mason jars or bowls for a convenient grab-and-go breakfast or snack.
  • Layered parfaits: Create a beautiful layered effect by alternating layers of chia pudding with layers of berries in a clear glass.
  • Family-style: Serve the pudding in a large bowl and let everyone scoop their own portions, topping with berries and other toppings of their choice.
  • Party presentation: Arrange the pudding and toppings on a platter, allowing guests to build their own custom creations.
  • For brunch: Pair the pudding with other brunch favorites like granola, yogurt, or fresh fruit platters.

Additional Tips

To ensure your Coconut Chia Pudding with Berries is a success, consider these tips:

  • Use full-fat coconut milk: This gives the pudding a rich and creamy texture. Light versions can be used for a lower calorie option, but they may result in a thinner consistency.
  • Sweeten to taste: Adjust the amount of sweetener based on your preference and the natural sweetness of your berries.
  • Experiment with flavors: Add a pinch of cinnamon, nutmeg, or cardamom for a spicy twist.
  • Make it vegan: Use maple syrup instead of honey to keep the recipe vegan-friendly.
  • Get creative with toppings: Try adding sliced bananas, kiwi, or a drizzle of nut butter to change up the flavors.

FAQ Section

Here are some common questions about Coconut Chia Pudding with Berries:

  1. Can I use other types of milk? Yes, you can substitute coconut milk with almond, soy, or any other plant-based milk, but keep in mind that it might alter the flavor and texture slightly.
  2. How long does chia pudding last in the fridge? Chia pudding can be stored in an airtight container in the refrigerator for up to 5 days, making it a fantastic option for meal prep.
  3. Can I use frozen berries? Absolutely, frozen berries can be used when fresh ones are not available. Just thaw them slightly before adding them to the pudding.
  4. What if my pudding is too runny? If your pudding doesn’t thicken as desired, try adding more chia seeds and letting it set for a few more hours.
  5. Can I add protein powder? Yes, you can mix in a scoop of your favorite protein powder to boost the protein content, just adjust the liquid accordingly to maintain the right consistency.

Peanut Butter Energy Balls

Peanut Butter Energy Balls have become a staple in my household, offering a delightful blend of flavor and nutrition that everyone seems to love. These little bite-sized treats are not only incredibly easy to make but also provide a convenient snack option that is both satisfying and nourishing. Whether it’s for a quick breakfast on the go or a mid-afternoon pick-me-up, these energy balls have become my family’s go-to snack. The combination of peanut butter, oats, and other wholesome ingredients creates a chewy, delicious, and energy-boosting treat that truly feels indulgent yet guilt-free. Even the kids, who can be quite picky, adore them and often ask for them in their lunchboxes. Needless to say, this recipe has quickly become a family favorite.

Ingredients

To make these Peanut Butter Energy Balls, you’ll need the following ingredients:

  • 1 cup of creamy peanut butter
  • 1/2 cup of honey or maple syrup
  • 1 teaspoon of vanilla extract
  • 2 cups of rolled oats
  • 1/2 cup of mini chocolate chips
  • 1/4 cup of ground flaxseed (optional for added nutrition)
  • 1/4 teaspoon of salt

Instructions

These energy balls are incredibly simple to prepare. Just follow these steps:

  1. In a medium-sized mixing bowl, combine the peanut butter, honey or maple syrup, and vanilla extract. Stir until the mixture is smooth and well combined.
  2. Add the rolled oats, chocolate chips, ground flaxseed, and salt to the peanut butter mixture. Use a spatula or your hands to mix everything together until it’s fully incorporated.
  3. Once the mixture is well combined, use a tablespoon to scoop out portions of the mixture. Roll each portion into a ball using your hands. If the mixture is too sticky, you can refrigerate it for about 10 minutes before rolling.
  4. Place the energy balls on a baking sheet lined with parchment paper. Once all the balls are formed, place the baking sheet in the refrigerator to let the balls set for at least 30 minutes.
  5. After they have set, transfer the energy balls to an airtight container and store them in the refrigerator for up to a week or in the freezer for longer storage.

Nutrition Facts

This recipe yields approximately 20 energy balls. Each serving (1 ball) contains about 100 calories, making it a perfectly portioned snack option.

Preparation Time

The total time required to make these Peanut Butter Energy Balls is about 40 minutes, including the time needed for setting in the refrigerator. The hands-on preparation time is only about 10 minutes, making it a quick and easy recipe to whip up at any time.

How to Serve

These energy balls are incredibly versatile and can be enjoyed in a variety of ways:

  • As a quick and easy breakfast on busy mornings.
  • As a healthy snack to pack in lunchboxes for kids and adults alike.
  • As a pre- or post-workout snack to fuel your body.
  • As a sweet treat to enjoy with a cup of tea or coffee.
  • As a delightful addition to a party platter or potluck spread.

Additional Tips

  1. Customize the Ingredients: Feel free to swap out the mini chocolate chips for dried fruits or nuts to add variety and texture.
  2. Adjust the Sweetness: If you prefer a less sweet version, reduce the amount of honey or maple syrup or use unsweetened peanut butter.
  3. Make it Vegan: Use maple syrup instead of honey and ensure that the chocolate chips are dairy-free.
  4. Use a Cookie Scoop: To make uniform-sized balls, consider using a small cookie scoop.
  5. Chill the Mixture: If the mixture is too sticky to handle, chill it in the refrigerator for a few minutes to make it easier to roll.

FAQ

Q: Can I use chunky peanut butter instead of creamy?

A: Yes, chunky peanut butter can be used if you prefer a bit more texture in your energy balls.

Q: How long do these energy balls last?

A: When stored in an airtight container in the refrigerator, they should last up to a week. They can also be frozen for up to three months.

Q: Can I omit the flaxseed?

A: Yes, the flaxseed is optional and can be left out if desired. However, it adds an extra boost of nutrition.

Q: Are these energy balls suitable for kids?

A: Absolutely! They are a healthy snack option for kids and can be easily packed in their lunchboxes.

Q: Can I use other nut butters instead of peanut butter?

A: Yes, you can substitute peanut butter with almond butter, cashew butter, or any other nut butter of your choice.

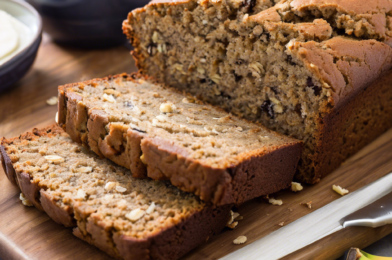
Gluten-Free Banana Bread

There is something incredibly comforting about a warm slice of banana bread, fresh out of the oven. Whether it’s the delightful aroma that fills the kitchen as it’s baking, or the soft, moist texture with hints of sweetness that tantalize the taste buds, banana bread is a universally beloved treat. However, for those who follow a gluten-free diet, enjoying this classic treat can be a challenge. Enter the gluten-free banana bread recipe—an adaptation that ensures everyone can enjoy this delicious baked good without compromising on flavor or texture. When I first tried this gluten-free version, I was skeptical, but the result was nothing short of amazing. My family, who are not even gluten-sensitive, couldn’t tell the difference and devoured it just as eagerly as the traditional version.

Ingredients

The ingredients list for gluten-free banana bread is straightforward, with a few substitutions to make it gluten-free. Here’s what you’ll need:

  • 3 ripe bananas, mashed
  • 1/3 cup melted coconut oil
  • 1/2 cup honey or maple syrup
  • 2 eggs
  • 1 teaspoon vanilla extract
  • 1 teaspoon baking soda
  • Pinch of salt
  • 1 3/4 cups gluten-free all-purpose flour blend
  • Optional: 1/2 cup of chopped nuts or chocolate chips

Instructions

Making gluten-free banana bread is as simple as its ingredient list. Follow these steps for a perfect loaf:

  1. Preheat your oven to 350°F (175°C) and grease a 9×5-inch loaf pan.
  2. In a large mixing bowl, combine the mashed bananas, melted coconut oil, and honey or maple syrup. Mix well.
  3. Add the eggs and vanilla extract to the banana mixture, stirring until everything is well combined.
  4. Sprinkle the baking soda and salt over the mixture, then gently fold in the gluten-free flour until just combined. Be careful not to overmix.
  5. If using, fold in the nuts or chocolate chips.
  6. Pour the batter into the prepared loaf pan and smooth the top with a spatula.
  7. Bake for 50-60 minutes, or until a toothpick inserted into the center comes out clean.
  8. Let the bread cool in the pan for about 10 minutes before transferring it to a wire rack to cool completely.

Nutrition Facts

This recipe yields about 10 servings. Each serving contains approximately:

  • Calories: 210
  • Total Fat: 8g
  • Saturated Fat: 6g
  • Cholesterol: 35mg
  • Sodium: 180mg
  • Total Carbohydrates: 32g
  • Dietary Fiber: 2g
  • Sugars: 13g
  • Protein: 3g

Preparation Time

The preparation time for gluten-free banana bread is relatively short, making it an ideal recipe for a quick baking session. Here’s the breakdown:

  • Preparation Time: 10 minutes
  • Cooking Time: 50-60 minutes
  • Total Time: Approximately 1 hour and 10 minutes

How to Serve

Gluten-free banana bread is incredibly versatile and can be enjoyed in various ways. Here are some serving suggestions:

  • Warm with Butter: Serve a slice warm with a pat of butter for a simple yet satisfying treat.
  • With Nut Butter: Spread almond or peanut butter on top for added flavor and protein.
  • As Dessert: Top with a scoop of vanilla ice cream and a drizzle of chocolate syrup for an indulgent dessert.
  • French Toast: Dip slices in egg and milk, then fry for a unique take on French toast.
  • With Coffee: Enjoy a slice with your morning coffee for a delightful breakfast pairing.

Additional Tips

To ensure your gluten-free banana bread turns out perfect every time, consider these additional tips:

  • Choose Ripe Bananas: The riper the bananas, the sweeter and more flavorful your bread will be. Look for bananas with lots of brown spots.
  • Don’t Overmix: Overmixing the batter can lead to a dense loaf. Mix until the ingredients are just combined.
  • Let it Cool: Allow the bread to cool completely before slicing to prevent it from crumbling.
  • Experiment with Add-Ins: Feel free to add your favorite mix-ins like dried fruits, seeds, or spices for a personalized touch.
  • Storage: Store the bread in an airtight container at room temperature for up to three days or freeze for longer preservation.

FAQ Section

Here are some frequently asked questions about gluten-free banana bread:

Q: Can I use regular flour instead of gluten-free flour?

A: Yes, you can substitute regular all-purpose flour if gluten-free is not a requirement for your diet. Use the same measurement.

Q: Can I make this recipe vegan?

A: Absolutely! Substitute the eggs with flax eggs (1 tablespoon ground flaxseed mixed with 2.5 tablespoons water per egg) and use maple syrup instead of honey.

Q: What can I use instead of coconut oil?

A: You can use melted butter or a neutral vegetable oil as a substitute for coconut oil.

Q: How can I ensure my banana bread is moist?

A: Ensuring your bananas are ripe and not overbaking the bread are key to maintaining moisture. Also, adding a tablespoon of yogurt can help.

Q: Can I add other fruits to this recipe?

A: Yes, you can add fruits like blueberries or chopped apples, but be sure to adjust the baking time slightly as needed due to extra moisture.

Apple Cinnamon Pancakes

There’s something inherently comforting about the combination of apples and cinnamon. It evokes memories of crisp autumn days and cozy moments spent at home. So, when I stumbled upon the recipe for Apple Cinnamon Pancakes, I knew I had to give it a try. To my delight, they were a hit with my family. The warm aroma filled the kitchen, and the pancakes themselves were fluffy and flavorful, with just the right amount of sweetness. My kids devoured them, asking for seconds, and even my husband, who is usually more of a savory breakfast person, couldn’t resist their charm. It’s safe to say that these Apple Cinnamon Pancakes have earned a permanent spot in our breakfast rotation.

Ingredients

To create these delightful Apple Cinnamon Pancakes, you’ll need the following ingredients:

  • 1 cup of all-purpose flour
  • 2 tablespoons of granulated sugar
  • 1 teaspoon of baking powder
  • 1/2 teaspoon of baking soda
  • 1/4 teaspoon of salt
  • 1 teaspoon of ground cinnamon
  • 1 cup of buttermilk
  • 1 large egg
  • 2 tablespoons of melted butter
  • 1 teaspoon of vanilla extract
  • 1 apple, peeled, cored, and finely chopped

Instructions

Making Apple Cinnamon Pancakes is a straightforward process, and with a little preparation, you’ll have breakfast ready in no time:

  1. In a large mixing bowl, combine the flour, sugar, baking powder, baking soda, salt, and ground cinnamon. Whisk these dry ingredients together until they are well blended.
  2. In another bowl, whisk together the buttermilk, egg, melted butter, and vanilla extract until smooth.
  3. Pour the wet ingredients into the dry ingredients and gently stir until just combined. Be careful not to overmix; a few lumps are okay.
  4. Fold in the finely chopped apple pieces, ensuring they are evenly distributed throughout the batter.
  5. Preheat a non-stick skillet or griddle over medium heat and lightly grease it with butter or cooking spray.
  6. Scoop about 1/4 cup of batter onto the skillet for each pancake. Cook until bubbles form on the surface and the edges look set, then flip and cook the other side until golden brown.
  7. Repeat the process with the remaining batter, greasing the skillet as needed.
  8. Serve the pancakes warm, topped with your choice of maple syrup, additional apple slices, or a dusting of cinnamon sugar.

Nutrition Facts

These Apple Cinnamon Pancakes offer a delightful balance of flavor and nutrition. Each serving contains:

  • Servings: 4
  • Calories per serving: Approximately 250 calories

Preparation Time

One of the great things about this recipe is how quickly it comes together. From start to finish, you’ll need approximately:

  • Preparation Time: 10 minutes
  • Cooking Time: 15 minutes
  • Total Time: 25 minutes

How to Serve

Apple Cinnamon Pancakes are versatile and can be served in various ways to suit your preferences. Here are some serving suggestions:

  • Drizzle with warm maple syrup for a classic touch.
  • Top with fresh apple slices for added texture and flavor.
  • Sprinkle with cinnamon sugar for extra sweetness and spice.
  • Add a dollop of whipped cream or yogurt for a creamy contrast.
  • Serve with a side of crispy bacon or sausage for a hearty breakfast.

Additional Tips

To ensure your Apple Cinnamon Pancakes turn out perfectly every time, consider these helpful tips:

  • Choose the Right Apple: Opt for a sweet-tart apple variety like Honeycrisp or Granny Smith to add a burst of flavor.
  • Don’t Overmix: When combining wet and dry ingredients, be gentle to avoid overmixing, which can result in tough pancakes.
  • Adjust the Heat: If the pancakes are browning too quickly, reduce the heat slightly to ensure they cook through without burning.
  • Keep Pancakes Warm: As you cook the pancakes, keep them warm in a low oven (around 200°F) until you’re ready to serve.
  • Experiment with Add-ins: Consider adding chopped nuts, raisins, or a hint of nutmeg to customize the flavor to your liking.

FAQ

Here are some frequently asked questions about Apple Cinnamon Pancakes:

  • Can I use whole wheat flour instead of all-purpose flour? Yes, you can substitute whole wheat flour, but the pancakes may be denser. Consider using a mix of whole wheat and all-purpose flour for a lighter texture.
  • Can I make the batter ahead of time? It’s best to make the batter fresh, but you can prepare the dry and wet ingredients separately and combine them just before cooking.
  • What can I use as a substitute for buttermilk? If you don’t have buttermilk, you can make a substitute by adding 1 tablespoon of lemon juice or vinegar to 1 cup of milk and letting it sit for 5 minutes.
  • How do I store leftover pancakes? Store leftover pancakes in an airtight container in the refrigerator for up to 3 days. Reheat in the toaster or microwave before serving.
  • Can I freeze Apple Cinnamon Pancakes? Absolutely! Allow the pancakes to cool completely, then freeze in a single layer on a baking sheet. Once frozen, transfer to a freezer-safe bag or container. Reheat in the toaster or oven as needed.

Broccoli and Cheddar Breakfast Casserole

As a food enthusiast and a passionate home cook, I’m always on the lookout for recipes that not only satisfy my family’s taste buds but also bring a sense of comfort and warmth to our dining table. The Broccoli and Cheddar Breakfast Casserole is one such recipe that has become a staple in our household. This delightful dish combines the earthy flavor of broccoli with the creamy richness of cheddar cheese, all encased in a fluffy egg mixture. My family absolutely adores this casserole, and it’s become a weekend favorite, especially during lazy Sunday brunches. It’s hearty, nutritious, and has the perfect balance of flavors that keep everyone coming back for seconds.

Ingredients

Creating the Broccoli and Cheddar Breakfast Casserole requires a handful of simple ingredients that you likely already have in your pantry and refrigerator. Here’s what you’ll need:

  • 1 tablespoon olive oil
  • 1 medium onion, finely chopped
  • 2 cups fresh broccoli florets
  • 8 large eggs
  • 1 cup milk
  • 1 cup shredded cheddar cheese
  • 1/2 teaspoon salt
  • 1/4 teaspoon black pepper
  • 1/4 teaspoon garlic powder
  • 1/4 teaspoon red pepper flakes (optional)
  • 1 cup cubed day-old bread

Instructions

Preparing the Broccoli and Cheddar Breakfast Casserole is straightforward and can be done in a few simple steps. Let’s dive into the process:

  1. Preheat the oven: Begin by preheating your oven to 375°F (190°C). This ensures that the casserole cooks evenly.
  2. Sauté the vegetables: In a large skillet, heat the olive oil over medium heat. Add the chopped onion and sauté until it becomes translucent. Add the broccoli florets and cook for another 5 minutes, or until they are tender-crisp.
  3. Prepare the egg mixture: In a large mixing bowl, whisk together the eggs, milk, salt, black pepper, garlic powder, and red pepper flakes, if using. Stir in the shredded cheddar cheese.
  4. Assemble the casserole: Grease a 9×13 inch baking dish. Layer the cubed bread evenly at the bottom. Spread the sautéed vegetables over the bread. Pour the egg and cheese mixture over the top, ensuring everything is evenly coated.
  5. Bake: Place the dish in the preheated oven and bake for 30-35 minutes, or until the eggs are set and the top is golden brown. A toothpick inserted into the center should come out clean.
  6. Serve: Allow the casserole to cool for a few minutes before serving. This dish can be enjoyed warm or at room temperature.

Nutrition Facts

This Broccoli and Cheddar Breakfast Casserole is not only delicious but also packed with nutrients. Here’s a quick look at the nutrition facts:

  • Servings: 6
  • Calories per serving: Approximately 250 calories

Preparation Time

One of the many perks of this recipe is its simplicity and the relatively short time it takes to prepare. Here’s a breakdown of the preparation time:

  • Preparation time: 15 minutes
  • Cooking time: 35 minutes
  • Total time: 50 minutes

How to Serve

This versatile casserole can be served in various ways to suit different occasions and tastes. Here are a few serving suggestions:

  • Pair with a fresh green salad for a light brunch.
  • Serve with a side of crispy bacon or sausage for a hearty breakfast.
  • Add a dollop of sour cream or a sprinkle of chives for extra flavor.
  • Enjoy it as a standalone dish with a glass of freshly squeezed orange juice.
  • Leftovers can be reheated and served as a quick weekday breakfast.

Additional Tips

To ensure your Broccoli and Cheddar Breakfast Casserole turns out perfect every time, here are some additional tips:

  1. Choose fresh ingredients: Fresh broccoli and cheddar cheese will make a significant difference in the flavor of your casserole.
  2. Customize the recipe: Feel free to add other vegetables like bell peppers or mushrooms for added variety.
  3. Make it ahead: This casserole can be assembled the night before and baked fresh in the morning.
  4. Use day-old bread: Slightly stale bread absorbs the egg mixture better, giving the casserole a nice texture.
  5. Experiment with spices: Try adding different herbs and spices, such as thyme or paprika, to suit your taste preferences.

FAQ Section

Here are some frequently asked questions about the Broccoli and Cheddar Breakfast Casserole:

Q: Can I use frozen broccoli instead of fresh?

A: Yes, you can use frozen broccoli. Just make sure to thaw and drain it well before adding it to the casserole.

Q: Can I substitute the cheese with a different type?

A: Absolutely! While cheddar is the classic choice, you can use other cheeses like mozzarella, gouda, or Monterey Jack.

Q: Can I make this casserole gluten-free?

A: Yes, simply use gluten-free bread cubes to make the dish suitable for a gluten-free diet.

Q: How long can leftovers be stored?

A: Leftovers can be stored in an airtight container in the refrigerator for up to 3 days. Reheat in the oven or microwave before serving.

Q: Can I add meat to this casserole?

A: Definitely! Cooked bacon, ham, or sausage can be added to the casserole for extra flavor and protein.

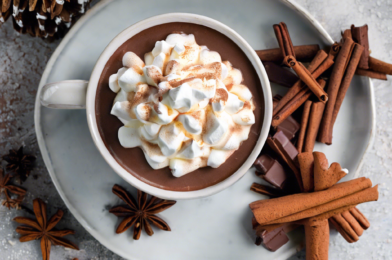
Spiced Hot Cocoa with Whipped Cream

As the chill of winter sets in and the days grow shorter, there’s nothing quite like wrapping your hands around a steaming cup of spiced hot cocoa, topped with a generous dollop of whipped cream. This recipe has become a beloved staple in our household, transforming those dreary, cold evenings into cozy, delightful moments. Each sip of this rich, creamy beverage is like a warm hug that not only comforts but also excites the senses with its aromatic blend of spices. My family, from the youngest to the oldest, waits eagerly for the moment I announce that the cocoa pot is ready. It’s not just a drink; it’s an experience that brings warmth and joy, and reminds us of the simple pleasures of life.

Ingredients

The magic of this spiced hot cocoa lies in its simplicity coupled with the depth of flavor from the spices. Here’s what you’ll need to recreate this comforting beverage at home:

  • 4 cups of whole milk
  • 2 tablespoons of unsweetened cocoa powder
  • 2 ounces of dark chocolate (at least 70% cocoa), finely chopped
  • 3 tablespoons of sugar
  • 1 teaspoon of ground cinnamon
  • 1/2 teaspoon of ground nutmeg
  • 1/4 teaspoon of ground cardamom
  • 1/4 teaspoon of ground ginger
  • 1 teaspoon of vanilla extract
  • A pinch of salt
  • Whipped cream, for topping
  • Chocolate shavings or a sprinkle of cinnamon, for garnish

Instructions

Creating this spiced hot cocoa is a straightforward process that fills the kitchen with an inviting aroma. Follow these steps to ensure a perfect cup every time:

  1. In a medium saucepan over medium heat, combine the milk, cocoa powder, and sugar. Stir constantly until the sugar and cocoa powder are fully dissolved.
  2. Add the finely chopped dark chocolate and continue stirring until the chocolate has completely melted into the milk mixture.
  3. Reduce the heat to low, and add the cinnamon, nutmeg, cardamom, ginger, and a pinch of salt. Stir well to incorporate the spices into the mixture.
  4. Allow the mixture to heat gently for about 5 minutes, stirring occasionally, to allow the flavors to meld together.
  5. Remove the saucepan from the heat and stir in the vanilla extract.
  6. Pour the hot cocoa into mugs, leaving some space at the top for the whipped cream.
  7. Top each mug with a generous helping of whipped cream, and finish with a sprinkle of chocolate shavings or a dash of cinnamon for an extra touch of flavor and presentation.
  8. Serve immediately and enjoy your cozy, spiced beverage.

Nutrition Facts

This spiced hot cocoa recipe yields approximately 4 servings. Each serving contains about 250 calories, depending on the specific brands of ingredients used. It’s a delightful treat that offers a balance of indulgence and comfort, perfect for those cold winter nights.

Preparation Time

The preparation time for this spiced hot cocoa is refreshingly short, making it an ideal choice for a quick and satisfying treat. From start to finish, you can expect to spend about 15 minutes preparing this beverage, including the time it takes to heat the milk and allow the spices to infuse their warm flavors.

How to Serve

Serving this spiced hot cocoa can be as creative or as straightforward as you like. Here are a few suggestions to elevate your cocoa-drinking experience:

  • Classic Style: Serve the hot cocoa in your favorite mug with a mountain of whipped cream on top.
  • Festive Flair: Add a candy cane or a cinnamon stick to each mug for a festive, holiday touch.
  • Gourmet Touch: Drizzle some melted chocolate or caramel sauce over the whipped cream for an extra touch of decadence.
  • Spice It Up: For those who love a bit of heat, sprinkle a tiny pinch of cayenne pepper on top of the whipped cream.
  • Elegant Presentation: Serve in clear glass mugs to showcase the rich color of the cocoa and the creamy topping.

Additional Tips

To ensure your spiced hot cocoa is the best it can be, consider these tips:

  1. Quality Ingredients: Use high-quality cocoa powder and chocolate for the richest flavor.
  2. Spice Balance: Adjust the spice levels to your taste preference. Start with the recommended amounts and increase if desired.
  3. Whipped Cream: Make your own whipped cream for a fresh, rich taste. Simply whip heavy cream with a bit of sugar and vanilla until soft peaks form.
  4. Milk Alternatives: For a dairy-free option, substitute whole milk with almond, soy, or oat milk.
  5. Storage: If you have leftovers, store the cocoa in an airtight container in the refrigerator and reheat gently on the stovetop.

FAQ Section

Here are some common questions about spiced hot cocoa with whipped cream:

Q: Can I make this hot cocoa ahead of time?

A: Yes, you can prepare the cocoa in advance and store it in the refrigerator for up to 3 days. Reheat it gently on the stovetop and add whipped cream just before serving.

Q: Can I use milk chocolate instead of dark chocolate?

A: Absolutely! Milk chocolate will result in a sweeter cocoa, so you might want to reduce the added sugar slightly.

Q: Can I omit the spices if I want traditional hot cocoa?

A: Yes, you can leave out the spices for a classic hot cocoa. The base recipe will still be delicious and comforting.

Q: How can I make this drink vegan?

A: To make a vegan version, use plant-based milk and ensure the chocolate is dairy-free. Substitute the whipped cream with a vegan alternative.

Q: What can I use instead of whipped cream?

A: If you prefer not to use whipped cream, you can top your cocoa with marshmallows or a dairy-free whipped topping for a similar effect.

Whether you’re looking to impress guests or simply indulge in a little self-care, this spiced hot cocoa with whipped cream is a surefire way to warm the soul and delight the senses. Enjoy every sip!

Raspberry Almond Overnight Oats

There’s something magical about waking up to a ready-made breakfast that not only tastes delicious but also starts your day on a healthy note. Raspberry Almond Overnight Oats fit the bill perfectly. When I first tried this recipe, I was amazed by the creamy texture and the burst of flavor from the raspberries. My family, who are usually picky eaters, absolutely loved it. The combination of sweet and tart flavors, along with the crunchiness of almonds, creates a delightful experience that feels indulgent yet nourishing. It’s become a staple in our breakfast rotation, and I can’t recommend it enough for those busy mornings when you want something quick but satisfying.

Ingredients

To prepare this delightful breakfast, you will need the following ingredients:

  • 1 cup rolled oats
  • 1 cup almond milk (or milk of choice)
  • 1/2 cup fresh raspberries
  • 2 tablespoons almond butter
  • 1 tablespoon chia seeds
  • 1 tablespoon maple syrup (optional)
  • 1/4 teaspoon vanilla extract
  • A pinch of salt
  • 1/4 cup sliced almonds

Instructions

Making Raspberry Almond Overnight Oats is as simple as mixing the ingredients and letting them sit in the refrigerator overnight. Here’s how you do it:

  1. In a medium-sized bowl or jar, combine the rolled oats, almond milk, almond butter, chia seeds, maple syrup, vanilla extract, and a pinch of salt. Stir well to ensure everything is mixed thoroughly.
  2. Gently fold in the fresh raspberries, trying not to crush them too much to maintain their shape and juiciness.
  3. Cover the bowl or jar with a lid or plastic wrap and place it in the refrigerator. Let the mixture sit overnight, or for at least 6-8 hours.
  4. In the morning, give the oats a good stir. You may need to add a splash more almond milk if they have absorbed too much liquid and appear too thick.
  5. Top with sliced almonds for an added crunch, and if desired, a few more fresh raspberries for extra freshness.
  6. Enjoy cold, or if you prefer, you can heat it slightly in the microwave.

Nutrition Facts

This recipe makes approximately 2 servings. Each serving contains about 300 calories, making it a perfect breakfast choice for those who are mindful of their calorie intake while seeking a nutrient-dense meal to start their day.

Preparation Time

The beauty of overnight oats is in their simplicity and time efficiency. The preparation for Raspberry Almond Overnight Oats takes just about 10 minutes. Once mixed, the oats do all the work while you sleep, so you wake up to a ready-to-eat breakfast.

How to Serve

Here are some serving suggestions to elevate your Raspberry Almond Overnight Oats experience:

  • Serve in a mason jar for a portable breakfast option.
  • Top with a dollop of Greek yogurt for extra creaminess and protein.
  • Sprinkle with a bit of cinnamon or nutmeg for added flavor complexity.
  • Drizzle with honey or agave syrup if you prefer a sweeter taste.
  • Pair with a side of fresh fruit like sliced bananas or strawberries for a vibrant and nutritious meal.

Additional Tips

To ensure your Raspberry Almond Overnight Oats are perfect every time, here are some tips:

  1. Use fresh raspberries: Fresh fruits make a big difference in flavor and texture, adding a burst of juiciness.
  2. Adjust sweetness to taste: Everyone’s sweetness preference is different, so feel free to adjust the amount of maple syrup or sweetener.
  3. Experiment with milk alternatives: If almond milk isn’t your favorite, try using coconut or oat milk for a different flavor profile.
  4. Mix up your toppings: Changing the toppings can keep things exciting. Try different nuts or seeds to add variety.
  5. Make it vegan: This recipe is naturally vegan, but always check your ingredients to ensure they fit your dietary needs.

FAQ Section

  1. Can I use frozen raspberries instead of fresh?

    Yes, frozen raspberries can be used, but they may release more liquid, which could slightly alter the texture of the oats. Consider reducing the almond milk slightly if using frozen berries.

  2. How long can I store the overnight oats in the fridge?

    Overnight oats can be stored in the refrigerator for up to 3 days. Just give them a good stir before eating and adjust the consistency with a bit more milk if needed.

  3. Can I add protein powder to the recipe?

    Absolutely! Adding a scoop of protein powder can boost the protein content, making it an even more satisfying meal. Just mix it in with the other ingredients before refrigerating.

  4. What can I use instead of almond butter?

    If you have a nut allergy or simply want a different flavor, consider using sunflower seed butter or tahini as an alternative.

  5. Is it necessary to let the oats sit overnight?

    While allowing them to sit overnight offers the best texture and flavor, letting them sit for at least 4-6 hours can also work if you’re in a pinch.

In conclusion, Raspberry Almond Overnight Oats are a versatile, delicious, and healthy breakfast option that can easily fit into any busy lifestyle. With its ease of preparation and ability to customize, this recipe is sure to become a favorite in your household, just as it has in mine. Enjoy the delightful balance of flavors and start your mornings with a smile.

Sweet Corn and Zucchini Fritters

Sweet corn and zucchini fritters have become a cherished staple in my household, especially during the late summer months when both corn and zucchini are at their peak. There’s something incredibly satisfying about the combination of fresh, sweet corn kernels and the subtle, earthy flavor of zucchini that creates a dish that is both comforting and nourishing. The first time I made these fritters, I was taken aback by their light yet hearty texture and the way they disappeared within minutes of serving them. My family, who are often my most honest critics, couldn’t get enough. Even the kids, who sometimes shy away from vegetables, were asking for seconds. These fritters are not only a delightful way to enjoy seasonal produce but have also become a beloved tradition in our kitchen.

Ingredients

The beauty of sweet corn and zucchini fritters lies in their simplicity and the use of fresh, vibrant ingredients. To prepare these fritters, you will need the following:

  • 2 cups of fresh sweet corn kernels (about 3 ears of corn)
  • 1 medium zucchini, grated
  • 1/2 cup all-purpose flour
  • 1/4 cup cornmeal
  • 1/2 teaspoon baking powder
  • 2 large eggs
  • 1/4 cup milk
  • 1/4 cup chopped scallions
  • 1/4 cup finely chopped fresh cilantro
  • Salt and pepper to taste
  • Vegetable oil, for frying

These ingredients come together to create a batter that is both flavorful and easy to work with. The cornmeal adds a delightful crunch, while the fresh herbs provide a burst of flavor that complements the sweetness of the corn and the mild taste of the zucchini.

Instructions

The process of making sweet corn and zucchini fritters is straightforward and perfect for cooks of all skill levels. Begin by preparing the zucchini. Grate it and place it in a clean kitchen towel, then squeeze out as much moisture as possible. This step is crucial to ensure that the fritters hold together and don’t become soggy.

In a large mixing bowl, combine the flour, cornmeal, baking powder, salt, and pepper. In a separate bowl, whisk together the eggs and milk. Add the wet ingredients to the dry ingredients and stir until just combined. Fold in the grated zucchini, corn kernels, scallions, and cilantro.

Heat a generous amount of vegetable oil in a large skillet over medium-high heat. Once the oil is shimmering, carefully spoon the batter into the skillet, using about 1/4 cup per fritter. Cook for 3-4 minutes on each side, or until golden and crispy. Transfer the fritters to a paper towel-lined plate to drain excess oil.

Repeat the process with the remaining batter, adding more oil to the skillet as needed. Serve the fritters warm with your choice of dipping sauce or a dollop of sour cream.

Nutrition Facts

These fritters are not only delicious but also quite nutritious. This recipe yields approximately 12 fritters, serving 4 people. Each serving contains approximately 200 calories.

The nutritional breakdown includes carbohydrates from the corn and flour, healthy fats from the vegetable oil, and protein from the eggs. The addition of fresh herbs and vegetables provides vitamins and minerals, making these fritters a well-rounded dish.

Preparation Time

One of the many advantages of sweet corn and zucchini fritters is their quick preparation time. From start to finish, you can have these delightful bites ready in about 30 minutes.

The prep work, which involves grating the zucchini and shucking the corn, takes about 10-15 minutes. Cooking the fritters requires an additional 15 minutes, making this recipe a convenient option for a weeknight meal or a last-minute gathering.

How to Serve

Sweet corn and zucchini fritters are versatile and can be served in a variety of ways:

  • As a snack or appetizer with a side of salsa or guacamole.
  • As a main course, paired with a fresh green salad.
  • As a side dish to complement grilled meats or fish.
  • Topped with a poached egg for a delightful brunch option.
  • With a generous spoonful of yogurt or sour cream for added creaminess.

These serving suggestions highlight the fritters’ adaptability and make them suitable for any occasion.

Additional Tips

To ensure your sweet corn and zucchini fritters turn out perfectly, consider these additional tips:

  1. Use fresh, in-season ingredients: The fresher your corn and zucchini, the better the flavor of the fritters.
  2. Don’t skip the moisture removal: Removing excess water from the zucchini is crucial for achieving a crispy texture.
  3. Adjust the seasoning: Taste the batter before cooking and adjust salt and pepper according to your preference.
  4. Keep the oil temperature consistent: Ensure the oil is hot enough before frying to prevent the fritters from absorbing too much oil.
  5. Experiment with flavors: Add spices like cumin or paprika for an extra kick, or include cheese for added richness.

FAQ Section

Here are some frequently asked questions about sweet corn and zucchini fritters:

Q: Can I make these fritters gluten-free?

A: Yes, you can substitute the all-purpose flour with a gluten-free flour blend to make these fritters gluten-free. Ensure the cornmeal you use is also gluten-free.

Q: Can I use frozen corn instead of fresh?

A: Absolutely! If fresh corn is not available, frozen corn can be used. Just make sure to thaw and drain it well before adding it to the batter.

Q: How can I store leftovers?

A: Store any leftover fritters in an airtight container in the refrigerator for up to three days. Reheat them in the oven or on a skillet to maintain their crispiness.

Q: Can I prepare the batter in advance?

A: Yes, you can prepare the batter a few hours in advance and store it in the refrigerator. Stir it well before cooking the fritters.

Q: What are some alternative herbs to use?

A: If you don’t have cilantro or scallions, feel free to use parsley, basil, or chives for a different flavor profile.

Sweet corn and zucchini fritters are a delightful, versatile dish that can be enjoyed in numerous ways. Their ease of preparation and the vibrant flavors they offer make them a must-try for anyone looking to enjoy the best of seasonal produce. Whether you’re serving them as a snack, a main course, or a side, these fritters are sure to impress and satisfy any crowd.