Lemon Bars with Shortbread Crust

There’s something inherently comforting about the tangy sweetness of lemon bars, especially when paired with a buttery shortbread crust. This recipe for lemon bars has become a staple in my household, delighting family members and guests alike with its perfect balance of flavors. Whether served at a casual get-together or a formal dinner party, these lemon bars never fail to impress. The combination of zesty citrus and rich, crumbly shortbread creates a delightful symphony of textures and tastes, making it a favorite dessert in our family. Even those who aren’t usually fans of lemon desserts find themselves reaching for a second piece, proving that this recipe is a true crowd-pleaser.

Ingredients

The magic of these lemon bars lies in their simplicity, requiring only a handful of ingredients that you likely already have in your kitchen. For the shortbread crust, you will need:

  • 1 cup (2 sticks) unsalted butter, softened
  • 1/2 cup granulated sugar
  • 2 cups all-purpose flour
  • 1/4 teaspoon salt

For the lemon filling, gather the following:

  • 4 large eggs
  • 1 1/2 cups granulated sugar
  • 1/4 cup all-purpose flour
  • 2/3 cup freshly squeezed lemon juice (about 3-4 lemons)
  • Zest of 2 lemons
  • Powdered sugar, for dusting

Instructions

To begin, preheat your oven to 350°F (175°C) and line a 9×13-inch baking dish with parchment paper, leaving an overhang on the sides to easily lift the bars out later. In a large mixing bowl, cream together the softened butter and granulated sugar until light and fluffy. Gradually add in the flour and salt, mixing until a dough forms. Press the dough evenly into the bottom of the prepared baking dish, using your fingers or the back of a spoon to smooth it out. Bake the crust for 15-20 minutes, or until lightly golden brown.

While the crust is baking, prepare the lemon filling. In a separate bowl, whisk together the eggs and sugar until well combined. Add the flour and whisk until smooth, then stir in the lemon juice and zest. Pour the lemon mixture over the hot crust, spreading it evenly with a spatula. Return the baking dish to the oven and bake for an additional 20-25 minutes, or until the filling is set and no longer jiggly in the center. Allow the bars to cool completely in the pan before lifting them out using the parchment overhang. Dust with powdered sugar before slicing and serving.

Nutrition Facts

This recipe yields approximately 24 servings, depending on how large you cut the bars. Each serving contains about 150 calories, making it a relatively light dessert option that doesn’t compromise on flavor. The balance of fat from the butter, carbohydrates from the sugar and flour, and the refreshing zing of the lemon ensures that each bite is both satisfying and indulgent.

Preparation Time

The beauty of this recipe is not only in its taste but also in its efficiency. With a total preparation and cooking time of just under an hour, it’s perfect for those who are short on time but still want to impress with a homemade dessert. The shortbread crust comes together quickly, and while it bakes, you can effortlessly prepare the lemon filling. Once baked, the bars need to cool, making them an ideal make-ahead dessert for entertaining.

How to Serve

  • Serve chilled for a refreshing treat, especially on warm days.
  • Pair with a scoop of vanilla ice cream for a delightful contrast of warm and cold.
  • Top with fresh berries, such as raspberries or blueberries, for added color and flavor.
  • Accompany with a cup of tea or coffee for a perfect afternoon snack.
  • Garnish with a sprig of mint for an elegant presentation at dinner parties.

Additional Tips

Here are some tips to ensure your lemon bars turn out perfectly every time:

  1. Use fresh lemons: Freshly squeezed lemon juice is essential for the best flavor. Bottled lemon juice can be too acidic and alter the taste of the filling.
  2. Room temperature ingredients: Ensure that the butter and eggs are at room temperature for easier mixing and a smoother texture.
  3. Chill before cutting: Allow the bars to cool completely, and even refrigerate them for an hour before slicing to achieve clean cuts.
  4. Parchment paper is your friend: Lining the baking dish with parchment paper helps remove the bars effortlessly and keeps the edges neat.
  5. Adjust sweetness to taste: If you prefer a less sweet dessert, you can reduce the sugar in the filling by a quarter cup without affecting the texture.

FAQ Section

Q: Can I use a different type of crust?

A: Absolutely! While the shortbread crust is traditional, you can experiment with graham cracker crusts or even a nut-based crust for a different flavor profile.

Q: How long do these lemon bars keep?

A: When stored in an airtight container in the refrigerator, these lemon bars can last up to a week. They can also be frozen for up to three months.

Q: Can I make these bars gluten-free?

A: Yes, you can substitute the all-purpose flour with a gluten-free flour blend in equal amounts to make this recipe gluten-free.

Q: What if I don’t have fresh lemons?

A: If fresh lemons are unavailable, you can use bottled lemon juice, but keep in mind that the flavor may not be as vibrant. Adding a bit of lemon zest can help enhance the taste.

Q: Can I add other flavors to the filling?

A: Certainly! You can experiment by adding a teaspoon of vanilla extract or a pinch of lavender for a unique twist on the classic lemon bar.

Peanut Butter Rice Krispie Treats

There’s something undeniably nostalgic about making Peanut Butter Rice Krispie Treats. As I embarked on creating this classic dessert, I was flooded with childhood memories of sticky fingers and sweet, crunchy bites. My family, who often serve as my taste-testers, were delighted when they saw what I was whipping up in the kitchen. The combination of peanut butter, marshmallows, and crispy rice cereal is a timeless favorite that brings smiles to faces young and old. This recipe didn’t disappoint; it had everyone reaching for seconds, and the empty tray was a testament to its deliciousness.

Ingredients

The magic of Peanut Butter Rice Krispie Treats lies in its simplicity and the quality of its ingredients. You’ll need:

  • 3 tablespoons of unsalted butter
  • 1 package (10 oz) of mini marshmallows
  • 1/2 cup of creamy peanut butter
  • 6 cups of Rice Krispies cereal
  • 1/2 teaspoon of vanilla extract (optional)
  • A pinch of salt (to balance the sweetness)

These ingredients come together to create a treat that’s both crunchy and creamy, with the perfect amount of sweetness and a hint of saltiness to balance it out.

Instructions

Creating these delectable treats is as straightforward as it is rewarding. Here’s how you can make them at home:

  1. Start by melting the butter in a large saucepan over low heat. Once melted, add the mini marshmallows and stir continuously until they are completely melted and smooth.
  2. Remove the saucepan from heat and stir in the peanut butter, making sure it’s well combined with the marshmallow mixture. Add the vanilla extract and a pinch of salt, stirring until everything is mixed thoroughly.
  3. Gradually add the Rice Krispies cereal to the mixture, stirring until all the cereal is evenly coated with the marshmallow and peanut butter blend.
  4. Transfer the mixture into a greased 9×13 inch baking dish. Use a greased spatula or wax paper to press the mixture firmly and evenly into the dish.
  5. Let the treats cool completely at room temperature before cutting them into squares. Enjoy!

With these simple steps, you’ll have a batch of irresistible Peanut Butter Rice Krispie Treats ready to enjoy.

Nutrition Facts

These treats offer a delightful balance of taste and texture, but it’s also important to know what you’re consuming. Each serving, which is approximately a 2-inch square, contains:

  • Servings: Makes about 20 squares
  • Calories per serving: Approximately 150 calories

While these treats are a delightful indulgence, moderation is key to enjoying them as part of a balanced diet.

Preparation Time

One of the best things about this recipe is how quickly it comes together. In total, you’ll need about:

  • Preparation time: 10 minutes
  • Cooking time: 10 minutes
  • Total time: 20 minutes

In just under half an hour, you can have a sweet treat ready to share with family and friends.

How to Serve

These treats are incredibly versatile and can be served in various ways to suit any occasion. Here are some serving suggestions:

  • As a snack: Perfect for an afternoon pick-me-up or a sweet treat in lunchboxes.
  • At parties: Cut into smaller squares and serve on a platter for easy snacking at gatherings.
  • With ice cream: Top a scoop of vanilla ice cream with a piece of Peanut Butter Rice Krispie Treat for an indulgent dessert.
  • Gift idea: Wrap individual squares in wax paper and tie with a ribbon for a homemade gift.
  • For holidays: Use cookie cutters to create festive shapes for holiday celebrations.

Additional Tips

To ensure your Peanut Butter Rice Krispie Treats turn out perfectly every time, consider these additional tips:

  1. Use fresh marshmallows: Fresh marshmallows melt more smoothly than stale ones, ensuring a silky texture.
  2. Don’t overheat the marshmallows: Melting them over low heat prevents them from becoming tough and chewy.
  3. Grease your tools: Lightly grease your spatula and hands to prevent the mixture from sticking while pressing it into the pan.
  4. Experiment with toppings: Drizzle melted chocolate or sprinkle crushed nuts over the top for added flavor and texture.
  5. Store properly: Keep the treats in an airtight container to maintain their freshness and prevent them from becoming stale.

FAQ Section

Here are some frequently asked questions about Peanut Butter Rice Krispie Treats and their answers:

  1. Can I use chunky peanut butter instead of creamy? Yes, you can! Chunky peanut butter will add a bit of texture with the peanut pieces, which can be a delightful twist.
  2. How long do these treats last? When stored in an airtight container at room temperature, they can last up to a week, although they’re usually gone much faster!
  3. Can I make these treats vegan? Absolutely. Use vegan marshmallows and a plant-based butter substitute to make these treats vegan-friendly.
  4. Is it possible to use other cereals? Certainly! While Rice Krispies are traditional, you can experiment with other cereals like Corn Flakes or Cheerios for different flavors and textures.
  5. Can I freeze Peanut Butter Rice Krispie Treats? Yes, you can freeze them. Wrap each square individually in plastic wrap or wax paper, then place them in a freezer-safe container for up to a month. Thaw at room temperature before serving.

These questions and answers should help you achieve the best results with your Peanut Butter Rice Krispie Treats.

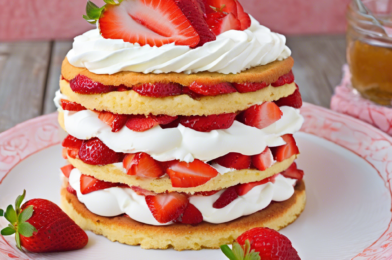
Strawberry Shortcake

There’s something irresistibly charming about the classic dessert, Strawberry Shortcake. Its simplicity, combined with the freshness of ripe strawberries and the lightness of whipped cream, creates a timeless treat that has been delighting taste buds for generations. As a professional food blogger, I’ve had the pleasure of trying countless variations of this dessert, but there’s one recipe that truly stands out. My family absolutely adores it, and it’s often requested for special occasions. The balance of flavors and textures makes it a favorite at our gatherings, and I’m excited to share this delightful recipe with you.

Ingredients

To achieve the perfect Strawberry Shortcake, you’ll need a selection of fresh and high-quality ingredients. Here’s what you’ll need:

  • 2 cups all-purpose flour
  • 1 tablespoon baking powder
  • 1/2 teaspoon salt
  • 1/4 cup granulated sugar
  • 1/2 cup unsalted butter, chilled and cubed
  • 2/3 cup whole milk
  • 1 teaspoon vanilla extract
  • 1 pound fresh strawberries, hulled and sliced
  • 1/4 cup granulated sugar (for strawberries)
  • 1 cup heavy cream
  • 2 tablespoons powdered sugar
  • 1 teaspoon vanilla extract (for whipped cream)

Instructions

Creating the perfect Strawberry Shortcake involves several key steps. Each part of the process contributes to the final product’s delicious taste and appealing presentation. Here’s how to do it:

  1. Preheat your oven: Start by preheating your oven to 425°F (220°C). This ensures that your shortcakes will bake evenly.
  2. Prepare the shortcake dough: In a large mixing bowl, combine the flour, baking powder, salt, and sugar. Add the chilled butter and use a pastry cutter or your fingers to blend until the mixture resembles coarse crumbs. Stir in the milk and vanilla extract until just combined.
  3. Shape the shortcakes: Turn the dough out onto a lightly floured surface and gently knead it a few times. Roll it out to about 1/2-inch thickness. Using a round cutter, cut out shortcake rounds and place them on a baking sheet lined with parchment paper.
  4. Bake the shortcakes: Bake in the preheated oven for 12-15 minutes, or until the tops are golden brown. Remove from the oven and let them cool on a wire rack.
  5. Prepare the strawberries: While the shortcakes are baking, toss the sliced strawberries with 1/4 cup of sugar in a bowl. Let them sit for about 20-30 minutes to macerate and release their juices.
  6. Make the whipped cream: In a chilled mixing bowl, combine the heavy cream, powdered sugar, and vanilla extract. Beat with an electric mixer until soft peaks form.
  7. Assemble the shortcakes: Once the shortcakes are cool, slice them in half horizontally. Spoon a generous amount of macerated strawberries onto the bottom half, add a dollop of whipped cream, and place the top half of the shortcake on top. Add another spoonful of strawberries and a final dollop of whipped cream.
  8. Serve immediately: Strawberry Shortcakes are best enjoyed fresh, so serve them right away for the best taste and texture.

Nutrition Facts

This recipe serves 8 people, with each serving containing approximately 350 calories. It’s a delightful treat that offers a balanced combination of sweetness, creaminess, and a bit of crunch from the shortcakes.

Preparation Time

The total time to prepare and serve this Strawberry Shortcake is about 45 minutes. This includes 15 minutes for preparation, 15 minutes for baking, and another 15 minutes for assembling and serving.

How to Serve

Strawberry Shortcake can be served in a variety of ways to enhance the dining experience:

  • Serve with a side of freshly brewed tea or coffee for a delightful afternoon treat.
  • Add a scoop of your favorite vanilla ice cream on the side for an extra indulgent dessert.
  • Garnish with a sprig of mint for a touch of color and a hint of freshness.
  • For a more decadent option, drizzle with a bit of melted chocolate or caramel sauce.
  • Consider using a decorative dessert plate to elevate the presentation when serving guests.

Additional Tips

Here are some additional tips to ensure your Strawberry Shortcake turns out perfectly every time:

  1. Chill the butter: Ensure your butter is very cold before incorporating it into the flour mixture. This helps create a flaky texture in the shortcakes.
  2. Don’t overmix the dough: Mix the dough just until it comes together. Overmixing can result in tough shortcakes.
  3. Macerate the strawberries: Allowing the strawberries to sit with sugar draws out their natural juices, creating a delicious syrup that enhances the flavor of the dessert.
  4. Chill the mixing bowl and beaters: When making whipped cream, chilling the equipment helps stabilize the cream and allows it to whip up more quickly.
  5. Experiment with flavors: For a twist, try adding a bit of lemon zest to the shortcake dough or a splash of balsamic vinegar to the strawberries for added depth of flavor.

FAQ Section

Here are some common questions about Strawberry Shortcake and their answers:

  1. Can I use frozen strawberries instead of fresh ones? Yes, you can use frozen strawberries if fresh ones are not available. Thaw them completely and drain excess liquid before macerating with sugar.
  2. Can I make the shortcakes in advance? Yes, you can bake the shortcakes a day ahead. Store them in an airtight container at room temperature and reheat briefly in the oven before serving.
  3. Is there a dairy-free option for this recipe? Yes, you can substitute the butter with a plant-based alternative and use coconut cream instead of heavy cream for a dairy-free version.
  4. How do I store leftovers? Store any leftover shortcakes in an airtight container at room temperature. The strawberries and whipped cream should be stored separately in the refrigerator and assembled just before serving.
  5. Can I use other fruits instead of strawberries? Absolutely! This recipe works well with other fruits like blueberries, raspberries, or peaches. Adjust the sugar in the fruit mixture according to the sweetness of the fruit you choose.

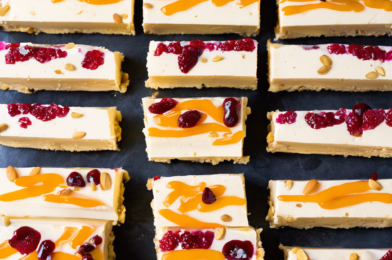
No-Bake Cheesecake Bars

When I first stumbled upon the recipe for No-Bake Cheesecake Bars, I was a bit skeptical. After all, how could something so simple, requiring no baking, compete with the rich and intricate flavors of a traditional baked cheesecake? But after trying it, I was blown away by how delicious and satisfying these bars were. My family couldn’t get enough, and I found myself making them repeatedly for gatherings and casual dinners alike. These bars have become a staple dessert in our household, appreciated for their creamy texture, delightful flavor, and ease of preparation.

Ingredients

The ingredients for No-Bake Cheesecake Bars are straightforward and likely items you already have in your pantry. You’ll need:

  • 1 1/2 cups of graham cracker crumbs
  • 1/4 cup of granulated sugar
  • 1/2 cup of melted butter
  • 16 ounces of cream cheese, softened
  • 1 cup of powdered sugar
  • 1 teaspoon of vanilla extract
  • 1/4 cup of sour cream
  • 2 cups of heavy whipping cream

Instructions

Creating these delectable No-Bake Cheesecake Bars is a simple process that doesn’t require any advanced culinary skills. Here’s how you can make them:

Start by preparing the crust. In a medium-sized bowl, mix the graham cracker crumbs, granulated sugar, and melted butter until the mixture resembles wet sand. Press this mixture firmly into the bottom of a lined 9×13 inch pan, ensuring it’s evenly distributed. Place the crust in the refrigerator to set while you prepare the filling.

For the filling, beat the softened cream cheese in a large mixing bowl until smooth and creamy. Add the powdered sugar, vanilla extract, and sour cream, and continue to beat until the ingredients are well combined. In a separate bowl, whip the heavy cream until stiff peaks form. Gently fold the whipped cream into the cream cheese mixture, being careful not to deflate the whipped cream. Pour the filling over the chilled crust, spreading it out evenly.

Cover the pan with plastic wrap and refrigerate for at least 3 hours or until the filling is set. Once set, slice into bars and serve. These bars can be stored in the refrigerator for up to a week, though they rarely last that long!

Nutrition Facts

This recipe yields approximately 24 bars. Each bar contains about 230 calories, making it a relatively indulgent treat. However, the richness and satisfying nature of these bars mean you can enjoy a small piece without feeling deprived.

Preparation Time

The beauty of No-Bake Cheesecake Bars is their simplicity and speed. The preparation time is around 20 minutes, with an additional 3 hours required for chilling. This makes it an ideal dessert for those who want to prepare something in advance and have it ready to serve without the need for last-minute efforts.

How to Serve

These cheesecake bars are versatile and can be served in various ways to suit different occasions:

  • Classic Style: Serve the bars plain to enjoy the pure, creamy flavor of the cheesecake.
  • With Fruit Toppings: Add fresh berries or fruit compote on top for a refreshing twist.
  • Chocolate Drizzle: Drizzle melted chocolate over the bars for a decadent touch.
  • Nutty Crunch: Sprinkle chopped nuts on top for an added crunch.
  • Festive Flair: Decorate with edible flowers or sprinkles for special occasions.

Additional Tips

Here are some additional tips to ensure your No-Bake Cheesecake Bars turn out perfectly every time:

  • Use Room Temperature Ingredients: Make sure your cream cheese is at room temperature for easier mixing and a smoother texture.
  • Chill Thoroughly: Allow the bars to chill for at least 3 hours, or overnight for best results, to ensure they set properly.
  • Customize the Crust: Experiment with different types of cookies for the crust, such as Oreos or digestive biscuits, to change the flavor profile.
  • Use Quality Vanilla Extract: A good quality vanilla extract will significantly enhance the flavor of your cheesecake filling.
  • Don’t Overbeat the Whipped Cream: Be gentle when folding the whipped cream into the cream cheese mixture to maintain its light and airy consistency.

FAQ Section

Here are some frequently asked questions about No-Bake Cheesecake Bars:

Q: Can I use low-fat cream cheese?
A: Yes, you can use low-fat cream cheese; however, the texture may not be as rich and creamy as when using full-fat cream cheese.

Q: Can I freeze the cheesecake bars?
A: Yes, you can freeze them. Wrap each bar individually in plastic wrap and store in an airtight container. Thaw in the refrigerator before serving.

Q: What can I use instead of graham crackers for the crust?
A: You can use digestive biscuits, Oreos, or any other cookie of your choice for a different flavor.

Q: How long can I store these bars in the refrigerator?
A: These bars can be stored in the refrigerator for up to a week. Ensure they are covered to prevent them from absorbing other odors.

Q: Can I make these bars gluten-free?
A: Absolutely! Use gluten-free cookies for the crust, and ensure all other ingredients are labeled gluten-free.

Chocolate-Dipped Coconut Macaroons

Chocolate-dipped coconut macaroons are a delightful treat that can bring joy to any gathering or personal indulgence. Recently, I decided to try out this recipe, and it was a hit with my family. The blend of chewy coconut and rich chocolate proved to be irresistible. Even those who were initially skeptical about coconut found themselves reaching for seconds. This recipe is not only easy to follow but also delivers a gourmet experience with minimal effort. If you’re looking for a dessert that impresses both in taste and presentation, these coconut macaroons are a perfect choice.

Ingredients

Before diving into the recipe, let’s gather all the necessary ingredients. You’ll need:

  • 14 ounces of sweetened shredded coconut
  • 14 ounces of sweetened condensed milk
  • 1 teaspoon of pure vanilla extract
  • 2 large egg whites
  • 1/4 teaspoon of kosher salt
  • 8 ounces of semisweet chocolate, melted

These ingredients come together to create a harmonious blend of flavors. The shredded coconut provides a chewy texture, while the sweetened condensed milk adds richness. The vanilla extract enhances the sweetness with its aromatic essence, and the egg whites give the macaroons structure. Finally, dipping them in melted chocolate elevates the macaroons to a decadent level.

Instructions

Now that we have our ingredients ready, let’s get started with the preparation:

  1. Preheat your oven to 325°F (163°C) and line a baking sheet with parchment paper.
  2. In a large mixing bowl, combine the shredded coconut, sweetened condensed milk, and vanilla extract. Stir until well mixed.
  3. In a separate bowl, beat the egg whites and salt on high speed until medium peaks form.
  4. Gently fold the egg whites into the coconut mixture, being careful not to deflate the egg whites.
  5. Using a small ice cream scoop or tablespoon, drop mounds of the mixture onto the prepared baking sheet, spacing them about an inch apart.
  6. Bake the macaroons for 25-30 minutes, or until the tops are golden brown.
  7. Remove from the oven and let them cool on the baking sheet for about 5 minutes, then transfer to a wire rack to cool completely.
  8. Once cooled, dip the bottoms of the macaroons in the melted chocolate and place them on the parchment paper to set.
  9. Allow the chocolate to harden before serving.

Following these steps will ensure that your macaroons are perfectly crisp on the outside and chewy on the inside, with a luscious chocolate coating to top it all off.

Nutrition Facts

For those mindful of their nutritional intake, here’s a breakdown of the nutrition facts for these chocolate-dipped coconut macaroons:

  • Servings: Approximately 20 macaroons
  • Calories per serving: 150 calories

These macaroons are not only delicious but also relatively low in calories, making them a guilt-free indulgence when enjoyed in moderation.

Preparation Time

Time is of the essence, especially when planning a meal or a party. Here’s a quick overview of the preparation time for this recipe:

  • Preparation time: 15 minutes
  • Cooking time: 30 minutes
  • Total time: 45 minutes

In less than an hour, you can have a batch of these delectable macaroons ready to serve, making them an excellent choice for last-minute gatherings or sweet cravings.

How to Serve

Once your macaroons are ready, here are a few ways to serve them to enhance the experience:

  • Arrange them on a decorative platter as a centerpiece dessert.
  • Serve them with a side of fresh berries to add a touch of color and freshness.
  • Pair them with a cup of coffee or tea for an afternoon treat.
  • Include them in a dessert buffet with other bite-sized treats.
  • Wrap them in cellophane bags tied with a ribbon for thoughtful homemade gifts.

These serving suggestions not only make the macaroons more appealing but also add a personal touch to their presentation.

Additional Tips

To ensure your chocolate-dipped coconut macaroons turn out perfectly every time, keep these tips in mind:

  1. Use fresh coconut: If possible, use freshly grated coconut for a more intense flavor.
  2. Chill the mixture: Refrigerate the coconut mixture for 30 minutes before baking to help the macaroons hold their shape better.
  3. Watch the oven: Keep an eye on the macaroons while baking to prevent over-browning.
  4. Experiment with chocolate: Try using different types of chocolate, such as dark or white, to suit your taste preference.
  5. Store properly: Keep the macaroons in an airtight container at room temperature for up to a week.

These tips will help you refine your baking skills and make the most out of this delightful recipe.

FAQ Section

Here are some frequently asked questions about chocolate-dipped coconut macaroons:

  1. Can I use unsweetened coconut? Yes, but you may need to adjust the sweetness by adding a bit more sweetened condensed milk or sugar.
  2. Can I make these macaroons ahead of time? Absolutely! They can be made a day or two in advance and stored in an airtight container.
  3. Can I freeze the macaroons? Yes, they freeze well. Place them in a single layer in a freezer-safe container, and they’ll keep for up to three months.
  4. What can I do if my macaroons spread too much? Chilling the mixture before baking and ensuring the egg whites are properly beaten can help prevent this issue.
  5. Are these macaroons gluten-free? Yes, as long as the chocolate used is gluten-free, these macaroons are naturally gluten-free.

These FAQs should address any concerns you might have when preparing these delicious treats.

Chocolate-dipped coconut macaroons are a simple yet indulgent dessert that anyone can make at home. With this recipe, you’re sure to impress friends and family, whether you’re a seasoned baker or a beginner. Enjoy the process and savor the flavors!

One-Pot Lemon Herb Orzo

One-pot meals have become a staple in modern kitchens, offering convenience without compromising flavor. Among these, the One-Pot Lemon Herb Orzo has carved a niche as a beloved dish in my household. This recipe’s simplicity and bright, refreshing flavors make it a go-to for both weeknight dinners and casual gatherings. The first time I prepared this dish, I was captivated by how the aromas of citrus and herbs filled the kitchen, enticing even the pickiest eaters to gather eagerly around the table. My family adored it; the tangy lemon perfectly complemented the earthy herbs, creating a harmonious blend that left everyone craving seconds. The ease of preparation was a bonus, making it a stress-free addition to our meal rotation.

Ingredients

For this delightful One-Pot Lemon Herb Orzo, you’ll need a well-curated list of fresh ingredients that come together to craft a dish that is both nutritious and bursting with flavor. Here’s what you’ll need to gather:

  • 2 tablespoons of olive oil
  • 1 small onion, finely chopped
  • 3 cloves of garlic, minced
  • 1 cup of orzo pasta
  • 2 cups of vegetable broth
  • 1 lemon, zest and juice
  • 1 teaspoon of dried oregano
  • 1 teaspoon of dried thyme
  • 1 cup of fresh spinach, chopped
  • 1/2 cup of grated Parmesan cheese
  • Salt and pepper to taste
  • Fresh parsley, chopped (for garnish)

Instructions

Creating the One-Pot Lemon Herb Orzo is as straightforward as its ingredient list. Start by heating the olive oil in a large skillet over medium heat. Add the finely chopped onion and sauté until it becomes translucent, releasing its sweet aroma. Next, stir in the minced garlic, allowing it to cook until fragrant, which will take just about a minute.

Introduce the orzo pasta to the skillet, toasting it lightly. This step enhances the orzo’s flavor, giving it a nuttier profile. Once the orzo is lightly browned, pour in the vegetable broth, followed by the zest and juice of one lemon. Sprinkle in the dried oregano and thyme, stirring to combine all ingredients thoroughly.

Bring the mixture to a gentle simmer, allowing the orzo to absorb the broth as it cooks. Stir occasionally to prevent sticking. After about 10 minutes, check the orzo for doneness. It should be tender yet firm to the bite.

At this point, fold in the fresh spinach, letting it wilt into the orzo. Remove the skillet from heat, and stir in the grated Parmesan cheese until it melts and combines with the orzo, creating a creamy texture. Season with salt and pepper as desired. Serve the dish garnished with freshly chopped parsley for an added burst of freshness.

Nutrition Facts

This recipe serves approximately four people, with each serving containing about 320 calories. The dish offers a balanced meal with carbohydrates from the orzo, healthy fats from the olive oil, and a good dose of vitamins from the spinach and herbs. The Parmesan cheese adds a touch of protein and richness, making this dish not only delicious but also nourishing.

Preparation Time

The beauty of the One-Pot Lemon Herb Orzo lies in its efficiency. From start to finish, the dish takes about 30 minutes to prepare. This makes it an ideal choice for those busy weekdays when time is of the essence, yet a home-cooked meal is desired. The brief prep and cook times also mean you can enjoy more time with family and less time cleaning up, thanks to the minimal use of cookware.

How to Serve

  • Serve as a main dish with a side salad for a light yet satisfying meal.
  • For a heartier option, pair it with grilled chicken or salmon.
  • Top with additional Parmesan for extra cheesiness.
  • Garnish with lemon slices for a decorative and flavorful touch.
  • Enjoy it warm or at room temperature as part of a picnic spread.

Additional Tips

To elevate your One-Pot Lemon Herb Orzo, consider these helpful tips:

  1. Use Fresh Herbs: While dried herbs are convenient, fresh herbs can enhance the dish’s flavor profile. Try using fresh oregano and thyme if available.
  2. Experiment with Vegetables: Feel free to add other vegetables like cherry tomatoes or zucchini for added nutrition and color.
  3. Adjust the Lemon: If you prefer a more pronounced lemon flavor, add extra zest or juice to taste.
  4. Make it Creamier: For a creamier texture, stir in a tablespoon of cream or a dollop of Greek yogurt before serving.
  5. Add a Kick: A pinch of red pepper flakes can add a subtle heat to balance the citrus notes.

FAQ Section

Q1: Can I use chicken broth instead of vegetable broth?

A1: Yes, you can substitute chicken broth for vegetable broth if you prefer. It will add a richer flavor to the dish, which complements the orzo beautifully.

Q2: Is it possible to make this recipe vegan?

A2: Absolutely! Simply omit the Parmesan cheese or use a vegan cheese alternative. Ensure your broth is vegetable-based, and the dish will be entirely plant-based.

Q3: How do I store leftovers?

A3: Store any leftovers in an airtight container in the refrigerator for up to three days. Reheat gently on the stovetop or in the microwave, adding a splash of broth or water to maintain moisture.

Q4: Can I freeze this dish?

A4: While it’s best enjoyed fresh, you can freeze the orzo for up to a month. Thaw in the refrigerator overnight and reheat, adding a little broth to refresh the flavors.

Q5: What can I use instead of orzo?

A5: If orzo is unavailable, you can substitute it with another small pasta like ditalini or even rice. Adjust the cooking time as needed to ensure the pasta or rice is cooked to your liking.

Vegetable and Cheese Quesadillas

In the bustling world of culinary delights, few dishes bring as much joy and satisfaction as a well-crafted quesadilla. My family recently embarked on a flavorful journey with a homemade Vegetable and Cheese Quesadilla recipe, and the results were nothing short of delightful. Packed with vibrant vegetables and gooey cheese, these quesadillas quickly became a household favorite, leaving us all reaching for seconds. The crispy tortilla enveloping the rich, melted cheese and fresh vegetables created a symphony of textures and flavors that had everyone, from the youngest to the eldest, eager for more. Whether served as a light lunch, a hearty dinner, or a quick snack, these quesadillas never failed to impress. The best part? They were incredibly easy to make, requiring minimal preparation and cooking time.

Ingredients

Creating the perfect Vegetable and Cheese Quesadillas requires a careful selection of fresh ingredients. Here’s what you’ll need:

  • 8 flour tortillas
  • 2 cups shredded cheddar cheese
  • 1 red bell pepper, thinly sliced
  • 1 yellow bell pepper, thinly sliced
  • 1 green bell pepper, thinly sliced
  • 1 cup mushrooms, sliced
  • 1 small red onion, thinly sliced
  • 2 tablespoons olive oil
  • Salt and pepper to taste
  • 1 teaspoon cumin
  • 1 teaspoon chili powder
  • 1 avocado, sliced (optional)
  • Sour cream (optional)
  • Fresh cilantro for garnish (optional)

Instructions

The process of making Vegetable and Cheese Quesadillas is as enjoyable as eating them. Follow these steps to create your culinary masterpiece:

  1. Begin by heating a tablespoon of olive oil in a large skillet over medium heat. Add the sliced onions and sauté until they turn translucent, about 3-4 minutes.
  2. Next, add the bell peppers and mushrooms to the skillet. Season with salt, pepper, cumin, and chili powder. Continue to cook, stirring occasionally, until the vegetables are tender, which should take about 8-10 minutes.
  3. Once the vegetables are cooked, remove them from the skillet and set aside.
  4. Wipe the skillet clean and add the remaining olive oil. Place a tortilla in the skillet, and sprinkle a generous amount of cheese over half of the tortilla.
  5. Top the cheese with a portion of the vegetable mixture, then fold the tortilla in half to cover the filling.
  6. Cook the quesadilla for 2-3 minutes on each side, or until the tortilla is golden brown and the cheese has melted.
  7. Repeat the process with the remaining tortillas and filling.
  8. Slice the quesadillas into wedges and serve hot, garnished with avocado slices, sour cream, and fresh cilantro if desired.

Nutrition Facts

This recipe serves 4, with each serving containing approximately 450 calories. The nutritional value will vary slightly depending on the specific brands of ingredients used and any optional additions like avocado or sour cream.

Preparation Time

One of the many appealing aspects of Vegetable and Cheese Quesadillas is their quick preparation time. The entire process, from start to finish, takes about 30 minutes. This makes them an ideal option for busy weeknights when time is of the essence but you still want to serve something delicious and satisfying.

How to Serve

These quesadillas are incredibly versatile and can be served in a variety of ways:

  • As a Main Course: Pair with a side salad or a bowl of soup for a complete meal.
  • As a Snack: Cut into smaller wedges and serve as a finger food at gatherings or parties.
  • With Dips: Accompany with salsa, guacamole, or a spicy queso dip for added flavor.
  • For Brunch: Add a fried egg on top for a hearty brunch option.
  • Kids’ Menu: Serve with carrot sticks or apple slices for a balanced kids’ meal.

Additional Tips

To elevate your quesadilla-making experience, consider these tips:

  1. Experiment with Cheese: While cheddar is a classic choice, feel free to mix in other cheeses such as Monterey Jack, mozzarella, or a spicy pepper jack for a unique twist.
  2. Get Creative with Vegetables: Don’t limit yourself to bell peppers and mushrooms. Try adding zucchini, spinach, or even corn for additional flavors and textures.
  3. Use Whole Wheat Tortillas: For a healthier option, opt for whole wheat tortillas which add fiber and a nutty flavor.
  4. Spice it Up: If you prefer a spicier dish, add sliced jalapeños or a dash of hot sauce to the vegetable mixture.
  5. Make Ahead: Prepare the vegetable filling in advance and store in the refrigerator for up to 3 days, making it even quicker to assemble the quesadillas when needed.

FAQ Section

Here are some common questions and answers about Vegetable and Cheese Quesadillas:

  1. Can I use corn tortillas instead of flour tortillas? Yes, corn tortillas can be used for a gluten-free option. They offer a different texture and flavor but are equally delicious.
  2. What type of cheese is best for quesadillas? Cheddar, Monterey Jack, and mozzarella are popular choices. It’s best to use a cheese that melts well and complements the other flavors in the quesadilla.
  3. How do I prevent the quesadillas from getting soggy? Ensure that the vegetables are cooked until all moisture is evaporated. Also, avoid over-filling the quesadillas to maintain a crispy texture.
  4. Can I freeze leftover quesadillas? Yes, you can freeze cooked quesadillas. Allow them to cool completely, then wrap individually in foil or plastic wrap and store in a freezer-safe bag for up to 2 months.
  5. What other fillings can I add? You can add cooked chicken, beef, or beans for extra protein. Additionally, experimenting with different herbs and spices can create new flavor profiles.

In conclusion, Vegetable and Cheese Quesadillas are a versatile, quick, and delicious meal option that can be easily adapted to suit different tastes and dietary needs. Whether you’re cooking for a family dinner or a casual gathering with friends, these quesadillas are sure to be a hit. Enjoy the process of making them, and happy cooking!

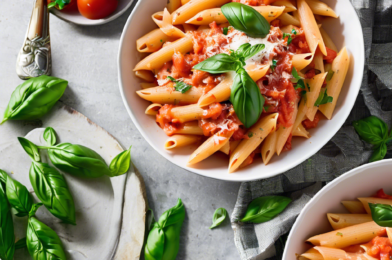
Creamy Tomato Basil Penne

Cooking has always been a cherished tradition in my family, with recipes passing down from generation to generation, each one carrying the warmth and love of shared meals. Recently, I decided to try something different, a dish that combines the comfort of classic Italian cuisine with a modern twist: Creamy Tomato Basil Penne. This recipe quickly became a family favorite, leaving everyone at the table asking for seconds. The creamy texture of the sauce combined with the aromatic basil and the tangy sweetness of ripe tomatoes created a symphony of flavors that danced on our taste buds. The dish was an instant hit with my family, bringing smiles and satisfied sighs all around.

Ingredients

When preparing this delightful Creamy Tomato Basil Penne, you’ll need a well-chosen selection of ingredients that balance flavors and textures perfectly. The star of the dish is, of course, the penne pasta. Opt for high-quality pasta to ensure it holds up well during cooking and provides the right texture to absorb the creamy sauce. You’ll also need a can of crushed tomatoes, which forms the base of the sauce, providing a rich, tangy flavor. Fresh basil leaves are essential, adding a fragrant aroma and a hint of peppery spice to the dish. For the creamy element, heavy cream is used, lending a luxurious texture to the sauce. Garlic cloves, finely chopped, will bring depth and a subtle kick to the flavor profile. Finally, don’t forget to have some freshly grated Parmesan cheese on hand to sprinkle over the final dish, adding a nutty, salty finish.

Instructions

Begin by bringing a large pot of salted water to a boil. Add the penne pasta and cook according to the package instructions until al dente. While the pasta is cooking, heat a tablespoon of olive oil in a large skillet over medium heat. Add the chopped garlic and sauté for about a minute until fragrant, being careful not to let it burn. Pour in the can of crushed tomatoes, stirring to combine with the garlic. Allow the mixture to simmer for about 10 minutes, letting the flavors meld together. Next, pour in the heavy cream, stirring constantly to create a smooth, creamy sauce. Season with salt and pepper to taste. Once the pasta is cooked, drain it and add it to the skillet with the sauce. Toss the pasta in the sauce, ensuring each piece is well coated. Tear fresh basil leaves and add them to the skillet, stirring to combine. Serve the pasta hot, garnished with freshly grated Parmesan cheese and additional basil leaves if desired.

Nutrition Facts

This Creamy Tomato Basil Penne recipe serves four people, with each serving containing approximately 450 calories. The balance of carbohydrates from the pasta, healthy fats from the olive oil and cream, and protein from the Parmesan cheese makes this a satisfying and well-rounded dish. It’s a perfect option for a comforting dinner that doesn’t feel too indulgent, offering a good balance of nutrients and flavors in every bite.

Preparation Time

This dish is perfect for a busy weeknight dinner, as it requires minimal prep work and cooks up quickly. From start to finish, you can have this delicious meal on the table in just 30 minutes. The key is to have all your ingredients prepped and ready to go before you begin cooking, ensuring a smooth process from start to finish. Whether you’re cooking for a family or just for yourself, the short preparation time makes this recipe a convenient yet indulgent option.

How to Serve

  • Family Style: Serve the pasta in a large, decorative bowl, allowing everyone to help themselves at the table. This encourages communal dining and sharing, enhancing the dining experience.
  • Individual Plates: For a more formal setting, portion the pasta onto individual plates, garnishing each with a sprinkle of Parmesan and a fresh basil leaf for presentation.
  • With a Side Salad: Complement the richness of the pasta with a light, refreshing side salad. A simple arugula or mixed greens salad with a lemon vinaigrette works beautifully.
  • Accompanied by Bread: Serve with warm, crusty bread or garlic bread to mop up the sauce. This adds a delightful crunchy texture to the meal.
  • Paired with Wine: A glass of chilled white wine, such as a Sauvignon Blanc or Pinot Grigio, pairs well with the flavors of this dish, enhancing the overall dining experience.

Additional Tips

  1. Fresh Ingredients: Whenever possible, use fresh ingredients, especially basil and garlic, as they significantly enhance the flavor of the dish.
  2. Adjusting Creaminess: If you prefer a thicker sauce, reduce the amount of cream slightly or simmer the sauce a bit longer to thicken.
  3. Adding Protein: For a heartier meal, add grilled chicken or sautéed shrimp to the pasta, incorporating them into the sauce just before serving.
  4. Spice It Up: For those who enjoy a bit of heat, add a pinch of red pepper flakes to the sauce while it’s simmering.
  5. Storing Leftovers: Store any leftovers in an airtight container in the refrigerator for up to three days. Reheat gently on the stove, adding a splash of cream or milk if the sauce has thickened too much.

FAQ Section

Q: Can I use dried basil instead of fresh?

A: While fresh basil offers the best flavor, you can substitute dried basil if necessary. Use about one-third of the amount, as dried herbs are more concentrated in flavor.

Q: Can I make this dish ahead of time?

A: Yes, you can prepare the sauce ahead of time and store it in the refrigerator for up to two days. Cook the pasta fresh when you’re ready to serve for the best texture.

Q: Is there a dairy-free option for this recipe?

A: Absolutely! Substitute the heavy cream with coconut cream or a dairy-free alternative like almond milk, though it may slightly alter the flavor profile.

Q: What type of pasta works best for this dish?

A: Penne is ideal due to its tubular shape, which holds the sauce well. However, feel free to experiment with other pasta shapes like rigatoni or fusilli.

Q: Can I freeze this dish?

A: While the pasta can become a bit soft upon reheating, the sauce itself freezes well. Store it in an airtight container for up to three months, and cook fresh pasta when ready to serve.

Baked Falafel Bowls with Tahini

There’s something truly magical about a meal that can bring the whole family together, and in our household, this Baked Falafel Bowl with Tahini recipe does just that. When I first served it to my family, I wasn’t sure how it would be received. After all, falafel can be a hit or miss, especially when baked instead of fried. However, the moment everyone took their first bite, I knew I had stumbled upon a winner. The falafel was perfectly crispy on the outside and tender on the inside, with a flavor profile that was nothing short of delightful. The accompanying tahini sauce added a creamy, nutty richness that complemented the falafel beautifully. It quickly became a family favorite, and it’s now a staple in our weekly meal rotation.

Ingredients

Here’s a list of everything you’ll need to create these delicious Baked Falafel Bowls:

  • 2 cups dried chickpeas, soaked overnight
  • 1 small onion, roughly chopped
  • 4 cloves garlic
  • 1 cup fresh parsley
  • 1 cup fresh cilantro
  • 2 teaspoons ground cumin
  • 1 teaspoon ground coriander
  • 1/2 teaspoon cayenne pepper
  • 2 teaspoons salt
  • 1 teaspoon baking powder
  • 2 tablespoons flour or chickpea flour
  • Olive oil spray
  • For the Tahini Sauce:
    • 1/2 cup tahini
    • Juice of 1 lemon
    • 2 cloves garlic, minced
    • 1/4 teaspoon salt
    • 1/4 cup water (or more, to desired consistency)
  • Optional toppings: diced tomatoes, cucumbers, red onion, and lettuce
  • Cooked quinoa or rice, for serving

Instructions

Follow these steps to craft the perfect falafel bowls:

  1. Preheat your oven: Start by preheating your oven to 375°F (190°C) to ensure it’s hot enough to crisp up the falafel.
  2. Prepare the falafel mixture: In a food processor, combine the soaked chickpeas, onion, garlic, parsley, cilantro, cumin, coriander, cayenne, and salt. Pulse until the mixture is finely chopped but not pureed. Add the baking powder and flour, then pulse a few more times to combine.
  3. Shape the falafel: Using your hands, form the mixture into small patties or balls, about the size of a walnut. Place them on a baking sheet lined with parchment paper. Spray them lightly with olive oil spray to encourage browning.
  4. Bake the falafel: Bake in the preheated oven for 25-30 minutes, flipping halfway through, until the falafel are golden brown and crisp.
  5. Make the tahini sauce: While the falafel are baking, prepare the tahini sauce. In a bowl, whisk together the tahini, lemon juice, garlic, and salt. Gradually add water until you reach your desired consistency.
  6. Assemble the bowls: In serving bowls, layer a base of cooked quinoa or rice. Top with baked falafel, a generous drizzle of tahini sauce, and your choice of toppings like diced tomatoes, cucumbers, red onion, and lettuce.

Nutrition Facts

This recipe serves 4 people, with each serving containing approximately 450 calories. The dish is not only nutritious but also filling, making it perfect for lunch or dinner.

Preparation Time

The preparation time for this recipe is around 20 minutes, with an additional 30 minutes of cooking time, totaling approximately 50 minutes from start to finish.

How to Serve

Here are some serving suggestions to elevate your dining experience:

  • Serve with a side of warm pita bread for scooping up the falafel and toppings.
  • Add a dollop of hummus on the side for extra creaminess.
  • Garnish with fresh herbs like dill or mint for a burst of freshness.
  • Include a side salad for a well-rounded meal.
  • Pair with a chilled glass of white wine or a refreshing lemonade.

Additional Tips

To ensure the best results, consider these tips:

  1. Use dried chickpeas: Canned chickpeas will not yield the same texture. Soak dried chickpeas overnight for the best results.
  2. Chill the mixture: For easier handling, refrigerate the falafel mixture for about 30 minutes before forming into balls or patties.
  3. Don’t over-process: Make sure not to puree the mixture; it should have a coarse texture.
  4. Adjust seasoning: Feel free to adjust the spices to your taste. More cumin or coriander can add depth, while extra cayenne can increase the heat.
  5. Leftovers: Store any leftover falafel in an airtight container in the fridge for up to 3 days. Reheat in the oven for a few minutes to regain crispiness.

FAQ Section

Here are some commonly asked questions about this recipe:

  1. Can I freeze the falafel?

    Yes, you can freeze the shaped, uncooked falafel. Arrange them on a baking sheet and freeze until solid. Then, transfer to a resealable bag and store in the freezer for up to 3 months. Bake from frozen, adding a few extra minutes to the cooking time.

  2. What can I use instead of chickpeas?

    Lentils or black beans can be used as alternatives, though the flavor and texture will differ slightly. Make sure to adjust the seasoning accordingly.

  3. Is there a gluten-free option?

    Yes, you can use chickpea flour or a gluten-free flour blend instead of regular flour to make the recipe gluten-free.

  4. How can I make the falafel spicier?

    To add more heat, increase the amount of cayenne pepper or add a pinch of red pepper flakes to the mixture.

  5. What if I don’t have a food processor?

    If you don’t have a food processor, you can use a high-powered blender or chop the ingredients finely by hand, though this will require more effort.

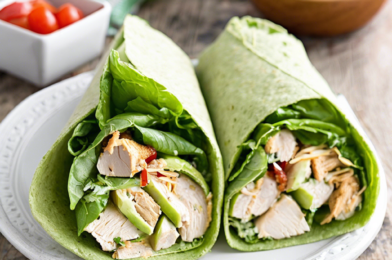
Chicken Caesar Wraps

Chicken Caesar Wraps have become a staple in our household, and they’re more than just a quick meal solution; they are a delightful experience that brings joy to our family gatherings. The combination of succulent chicken, crisp lettuce, and creamy Caesar dressing wrapped in a soft tortilla is simply irresistible. My family loves how every bite brings together a harmony of flavors — the savory goodness of grilled chicken, the crunch of fresh Romaine, and the tangy creaminess of the dressing. These wraps are not only delicious but also incredibly versatile, making them a favorite for lunch, dinner, or even as a party appetizer. This recipe has become a regular request at family dinners, and it’s always a hit when we have guests over. Whether you’re a busy parent or a culinary enthusiast, this recipe is sure to impress your loved ones with its simplicity and taste.

Ingredients

The success of Chicken Caesar Wraps hinges on using fresh and high-quality ingredients. Here’s what you’ll need:

  • 2 boneless, skinless chicken breasts
  • 1 tablespoon olive oil
  • Salt and pepper to taste
  • 1 teaspoon garlic powder
  • 1 teaspoon Italian seasoning
  • 4 large tortillas
  • 1 cup Romaine lettuce, chopped
  • 1/2 cup Caesar dressing
  • 1/4 cup grated Parmesan cheese
  • 1/4 cup croutons, crushed
  • Optional: cherry tomatoes and avocado slices for garnish

Instructions

Creating Chicken Caesar Wraps is a straightforward process, perfect for both novice and experienced cooks. Here’s how you can make them:

Step 1: Prepare the Chicken
Begin by preheating your grill or skillet over medium-high heat. While it’s heating, rub the chicken breasts with olive oil, then season them generously on both sides with salt, pepper, garlic powder, and Italian seasoning. Grill the chicken for about 6-7 minutes on each side, or until fully cooked and juices run clear. Once done, remove the chicken from the grill and let it rest for a few minutes before slicing it into thin strips.

Step 2: Assemble the Wraps
Lay out the tortillas on a clean surface. Spread a generous layer of Caesar dressing over each tortilla, leaving a little space around the edges. Next, layer the chopped Romaine lettuce evenly across the tortillas. Add the sliced chicken on top of the lettuce, followed by a sprinkle of Parmesan cheese and crushed croutons. If you’re using cherry tomatoes and avocado, add them now for additional flavor and texture.

Step 3: Wrap and Serve
Fold in the sides of the tortilla, then roll it up tightly to enclose the filling. Use a sharp knife to slice the wraps in half diagonally. Serve immediately, or wrap them in foil or parchment paper if you’re planning to enjoy them later.

Nutrition Facts

Chicken Caesar Wraps are not only delicious but also provide a balanced meal option. Here’s a breakdown of the nutrition facts:

Servings: 4
Calories per Serving: Approximately 450 calories

Preparation Time

One of the best things about Chicken Caesar Wraps is how quickly they come together. From start to finish, you can have a delicious meal ready in about 30 minutes, making it perfect for those busy weeknights or when you need a quick meal solution.

How to Serve

Chicken Caesar Wraps are incredibly versatile, and there are several ways to enjoy them:

  • As a casual lunch or dinner entrée, paired with a side salad or soup.
  • Cut into smaller pieces and served as appetizers at parties or gatherings.
  • In a picnic basket, wrapped in foil for a perfect outdoor meal.
  • As a make-ahead meal for busy weekdays, simply prepare and store in the refrigerator.
  • Accompanied by a variety of dipping sauces for added flavor and fun.

Additional Tips

To enhance your Chicken Caesar Wrap experience, consider these tips:

  • Marinate the Chicken: For extra flavor, marinate the chicken in a mixture of olive oil, lemon juice, and herbs for at least an hour before grilling.
  • Use Whole Wheat Tortillas: For a healthier option, opt for whole wheat tortillas, which add fiber and a nutty flavor.
  • Make It Spicy: Add a dash of hot sauce or sliced jalapeños to give your wraps a spicy kick.
  • Experiment with Cheese: Try different types of cheese, such as feta or cheddar, to change up the flavor profile.
  • Keep It Fresh: Prepare ingredients fresh and assemble wraps just before serving to maintain the crispness of the lettuce and the overall freshness.

FAQ Section

Here are some common questions about Chicken Caesar Wraps:

Q: Can I use store-bought Caesar dressing?
A: Yes, store-bought Caesar dressing is convenient and works well. However, if you have time, making your own dressing can provide a fresher taste.

Q: Can these wraps be made vegetarian?
A: Absolutely! Substitute the chicken with grilled vegetables or chickpeas for a vegetarian version of the wraps.

Q: How can I store leftovers?
A: Wrap the assembled wraps tightly in foil and store them in the refrigerator for up to 2 days. Avoid adding too much dressing if you plan to store them, as it can make the wraps soggy.

Q: Can I make these wraps gluten-free?
A: Yes, simply use gluten-free tortillas and ensure that all other ingredients, like croutons and dressing, are also gluten-free.

Q: What can I serve alongside these wraps?
A: Pair the wraps with a light soup, a refreshing salad, or even some roasted vegetables for a complete meal.

Chicken Caesar Wraps are a delightful fusion of taste and convenience. They bring together the best of flavors and textures, making them a beloved choice for any occasion. With this recipe, you have the foundation to create a meal that’s both satisfying and adaptable to your personal taste preferences. Whether you’re hosting a dinner or needing a quick meal, these wraps are sure to become a favorite in your culinary repertoire. Enjoy every bite, and don’t hesitate to experiment with different ingredients to make these wraps your own!