Caramel Popcorn Clusters

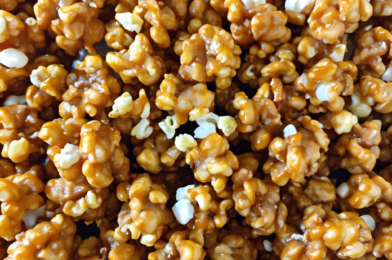
When it comes to delightfully crunchy and sweet snacks, caramel popcorn clusters are a beloved treat in many households. Their sticky-sweet aroma and satisfying crunch make them an irresistible choice for movie nights, parties, or just a cozy evening at home. I recently made a batch for my family, and the reaction was overwhelmingly positive. My kids couldn’t get enough of them, and my partner praised the balance of sweetness and saltiness. It’s a recipe that not only brings smiles but also fills the house with a delightful aroma, making it a winner for any occasion.

Ingredients

The beauty of this caramel popcorn clusters recipe lies in its simplicity and the way the ingredients come together to create a truly mouth-watering snack. Here’s what you’ll need:

  • 10 cups of popped popcorn
  • 1 cup of packed brown sugar
  • 1/2 cup of unsalted butter
  • 1/4 cup of light corn syrup
  • 1/2 teaspoon of baking soda
  • 1/4 teaspoon of salt
  • 1 teaspoon of vanilla extract
  • 1 cup of roasted peanuts (optional)

Instructions

Now that you have all your ingredients ready, let’s dive into the step-by-step process of making these delicious caramel popcorn clusters:

  1. Preheat your oven to 250°F (120°C). Line a large baking sheet with parchment paper.
  2. Spread the popped popcorn evenly on the baking sheet. If using, sprinkle the roasted peanuts over the popcorn.
  3. In a medium saucepan, combine the brown sugar, butter, and corn syrup over medium heat. Stir constantly until the mixture begins to boil.
  4. Once boiling, let it cook for about 5 minutes without stirring. Remove from heat and carefully stir in the baking soda, salt, and vanilla extract. The mixture will bubble up, so be cautious.
  5. Pour the caramel mixture over the popcorn and peanuts, using a spatula to toss and coat evenly.
  6. Bake in the preheated oven for 45 minutes, stirring every 15 minutes to ensure even coating.
  7. Allow the popcorn to cool completely on the baking sheet before breaking into clusters.

Nutrition Facts

This recipe serves approximately 10 people, with each serving containing around 200 calories. It’s a treat meant to be enjoyed in moderation, providing a delightful burst of energy and flavor.

Preparation Time

From start to finish, you can expect the preparation and cooking time to be around 1 hour. This includes the time needed for the popcorn to cool and form clusters after baking.

How to Serve

Caramel popcorn clusters can be served in various ways to enhance your snacking experience:

  • Serve in decorative bowls for a party snack table.
  • Package in small gift bags, tied with a ribbon for a homemade treat gift.
  • Pair with a selection of nuts and dried fruits for a trail mix twist.
  • Enjoy alongside hot cocoa or coffee for a cozy afternoon treat.
  • Include in a dessert platter with other sweet treats like cookies and brownies.

Additional Tips

Here are some tips to ensure your caramel popcorn clusters turn out perfectly every time:

  1. Ensure your popcorn is fully popped with no unpopped kernels to avoid dental surprises.
  2. Use a candy thermometer to ensure the caramel reaches the right temperature for perfect texture.
  3. Experiment with different nuts or add a sprinkle of sea salt for a gourmet twist.
  4. If you prefer a less sweet version, reduce the sugar slightly, but maintain the syrup for consistency.
  5. Store leftover clusters in an airtight container to keep them fresh and crispy.

FAQ Section

Q: Can I use microwave popcorn for this recipe?

A: Yes, microwave popcorn can be used, but make sure it is plain or lightly salted. Avoid butter-flavored varieties to avoid altering the caramel’s taste.

Q: How long do caramel popcorn clusters last?

A: Stored in an airtight container at room temperature, they can last up to two weeks while maintaining their crunch and flavor.

Q: Can I make this recipe vegan?

A: Absolutely! Substitute the butter with a plant-based alternative and ensure your other ingredients are vegan-friendly.

Q: What can I do if my caramel hardens too quickly?

A: If the caramel hardens too quickly, try heating it slightly in the oven before attempting to mix it with the popcorn again.

Q: Is it possible to add chocolate to this recipe?

A: Yes, once the popcorn clusters are cooled, you can drizzle melted chocolate over them for an extra layer of flavor.

With these tips and instructions, you’re well on your way to mastering the art of making caramel popcorn clusters. Whether you’re preparing them for a family gathering or a relaxing snack, this recipe is sure to become a favorite in your household. Enjoy the process, and most importantly, savor the delicious results!

Mixed Berry Crumble

There’s something uniquely comforting about the scent of freshly baked dessert wafting through the house. This past weekend, I decided to treat my family to a delightful dish of Mixed Berry Crumble. The warm, bubbling berries beneath a golden, crispy topping were an instant hit among everyone. My children eagerly awaited the moment it came out of the oven, and my spouse couldn’t resist sneaking a taste before it was cool enough to serve. This recipe didn’t just fill our home with a wonderful aroma; it created a joyful atmosphere and a sense of togetherness that only a homemade dessert can bring.

Ingredients

The beauty of the Mixed Berry Crumble lies in its simplicity and the ability to adapt based on what you have on hand. Here are the ingredients you’ll need to create this delicious dessert:

  • 2 cups of mixed berries (such as strawberries, blueberries, raspberries, and blackberries)
  • 1/3 cup granulated sugar
  • 1 tablespoon lemon juice
  • 1 teaspoon vanilla extract
  • 1 cup all-purpose flour
  • 1/2 cup rolled oats
  • 1/2 cup brown sugar
  • 1/2 teaspoon cinnamon
  • 1/4 teaspoon salt
  • 1/2 cup unsalted butter, cold and cubed

Instructions

Creating the Mixed Berry Crumble is straightforward, making it an ideal choice for both novice and experienced bakers. Follow these simple steps to craft your own delightful dessert:

  1. Preheat your oven to 350°F (175°C). Grease a baking dish lightly with butter or nonstick spray.
  2. In a large bowl, combine the mixed berries, granulated sugar, lemon juice, and vanilla extract. Gently toss the mixture until the berries are evenly coated.
  3. Transfer the berry mixture into the prepared baking dish, spreading it out evenly.
  4. In another bowl, mix the flour, rolled oats, brown sugar, cinnamon, and salt. Add the cold, cubed butter and use your fingers or a pastry cutter to blend the ingredients until the mixture resembles coarse crumbs.
  5. Sprinkle the crumble mixture over the berries, ensuring an even distribution.
  6. Bake for 35-40 minutes, or until the topping is golden brown and the berry juices are bubbling around the edges.
  7. Remove from the oven and let it cool for at least 10 minutes before serving.

Nutrition Facts

This Mixed Berry Crumble recipe serves 6 people. Each serving contains approximately 250 calories, making it a modestly indulgent treat.

Preparation Time

One of the fantastic aspects of this recipe is its quick preparation. You can have this Mixed Berry Crumble ready in just under an hour, with approximately 15 minutes of prep time and 35-40 minutes of baking time.

How to Serve

Serving the Mixed Berry Crumble can be as creative as you’d like. Here are some ideas:

  • Serve warm with a scoop of vanilla ice cream.
  • Top with whipped cream for a light, airy contrast.
  • Pair with a dollop of Greek yogurt for a healthier twist.
  • Sprinkle with toasted nuts for added crunch.
  • Drizzle with honey or maple syrup for extra sweetness.

Additional Tips

To ensure your Mixed Berry Crumble turns out perfectly, consider these additional tips:

  1. Berry Selection: Use a mix of your favorite berries, fresh or frozen. If using frozen berries, no need to thaw them before baking.
  2. Topping Texture: For a crunchier topping, add chopped nuts like walnuts or pecans to the crumble mixture.
  3. Sweetness Level: Adjust the sugar according to the sweetness of your berries. Taste and add more if needed.
  4. Butter Temperature: Keep the butter cold when mixing with the dry ingredients to achieve a crumbly texture.
  5. Storage: Store any leftovers in an airtight container in the refrigerator for up to 3 days. Reheat in the oven for a crisp topping.

FAQ Section

Q: Can I use only one type of berry for this crumble?

A: Absolutely! While the mix of berries offers a complex flavor, using just one type of berry, like blueberries or raspberries, will still yield a delicious result.

Q: What can I substitute for rolled oats?

A: If you don’t have rolled oats, you can use quick oats or leave them out entirely for a softer topping. Alternatively, chopped nuts can provide a similar texture.

Q: Is it possible to make this crumble gluten-free?

A: Yes, you can substitute the all-purpose flour with a gluten-free flour blend to accommodate dietary restrictions without compromising on flavor or texture.

Q: How can I make this recipe vegan?

A: To make the crumble vegan, replace the butter with a plant-based alternative like coconut oil or a vegan butter substitute. Ensure any additional toppings, like yogurt or ice cream, are also plant-based.

Q: Can I prepare the crumble in advance?

A: You can prepare the crumble topping and berry filling separately in advance and store them in the refrigerator. Assemble and bake just before serving for the freshest experience.

Almond Flour Brownies

When it comes to indulgent desserts that cater to both taste and dietary preferences, almond flour brownies stand out as a delightful choice. These rich, fudgy treats are not just a gluten-free alternative to traditional brownies but are also packed with the nutty goodness of almonds. As a food enthusiast, I embarked on a culinary adventure to perfect this beloved recipe, and I must say, the outcome was nothing short of spectacular. My family, notorious for their discerning palates, were unanimous in their praise. The brownies vanished from the plate in record time, and requests for a second batch soon followed. This experience convinced me that almond flour brownies deserve a permanent spot in my baking repertoire, not just for their taste but also for their health benefits.

Ingredients

The foundation of any great dish lies in the quality and choice of ingredients. For almond flour brownies, striking the right balance between flavor and texture is crucial. Here’s what you’ll need to create these delectable brownies:

1 cup almond flour: This acts as the base, providing a moist and tender crumb.

1/2 cup unsweetened cocoa powder: The cocoa gives the brownies their rich, chocolatey flavor.

3/4 cup coconut sugar: A healthier alternative to refined sugar, offering a subtle sweetness.

1/2 teaspoon baking soda: This helps the brownies rise slightly, maintaining a dense yet airy texture.

1/4 teaspoon salt: Enhances the overall flavor profile.

1/2 cup unsalted butter, melted: Adds richness and moisture.

2 large eggs: Essential for binding the ingredients together.

1 teaspoon vanilla extract: Adds a fragrant aroma and depth of flavor.

1/2 cup dark chocolate chips: Optional, but they add an extra layer of indulgence.

Instructions

Creating almond flour brownies is an art that requires attention to detail, but rest assured, this recipe is straightforward enough for even novice bakers to master. Follow these steps for the perfect treat:

Step 1: Preheat your oven to 350°F (175°C). Line an 8×8 inch baking pan with parchment paper, allowing some overhang for easy removal.

Step 2: In a medium-sized bowl, whisk together the almond flour, cocoa powder, coconut sugar, baking soda, and salt until well combined.

Step 3: In a separate bowl, whisk the melted butter, eggs, and vanilla extract until smooth.

Step 4: Gradually incorporate the wet ingredients into the dry ingredients, stirring until just combined. Be careful not to overmix.

Step 5: Fold in the dark chocolate chips, if using, ensuring they’re evenly distributed throughout the batter.

Step 6: Pour the batter into the prepared baking pan, spreading it evenly with a spatula.

Step 7: Bake for 20-25 minutes or until a toothpick inserted into the center comes out with a few moist crumbs attached. Avoid overbaking as this can lead to dry brownies.

Step 8: Allow the brownies to cool in the pan for about 10 minutes before transferring them to a wire rack to cool completely.

Step 9: Once cool, slice into squares and serve.

Nutrition Facts

Understanding the nutritional content of what we consume is essential, especially for those adhering to specific dietary needs. These almond flour brownies are not only a delightful treat but also offer a healthier twist to traditional brownies:

Servings: This recipe yields approximately 12 brownies.

Calories per serving: Each brownie contains approximately 180 calories, making them a guilt-free indulgence when enjoyed in moderation.

Preparation Time

Time is a valuable commodity, and knowing how long a recipe takes from start to finish can help you plan your day better:

The total preparation time for these almond flour brownies is about 35 minutes, including:

  • 10 minutes for preparation: Gathering and mixing ingredients.
  • 25 minutes for baking: Allowing the brownies to cook to perfection.

How to Serve

Presentation can elevate a simple dish, making it more appealing and enjoyable. Here are some serving suggestions for your almond flour brownies:

  • As is: These brownies are delicious on their own, requiring no embellishments.
  • With a scoop of vanilla ice cream: The contrast of cold ice cream with warm brownies is irresistible.
  • Drizzled with chocolate sauce: For an extra chocolatey experience.
  • With fresh berries: Adding a fresh, tangy twist to the rich chocolate flavor.
  • Paired with a hot beverage: A cup of coffee, tea, or hot chocolate complements the brownies perfectly.

Additional Tips

Every recipe has its secrets, and almond flour brownies are no different. Here are some tips to ensure your brownies are a hit every time:

  • Tip 1: Use high-quality almond flour for the best texture and flavor. Blanched almond flour is preferred for its fine consistency.
  • Tip 2: Ensure your eggs are at room temperature for a smoother batter and better rise.
  • Tip 3: Adjust the sweetness to your liking by experimenting with different types of sugar or sweeteners.
  • Tip 4: If you prefer a denser brownie, reduce the baking time slightly.
  • Tip 5: Store leftovers in an airtight container at room temperature for up to three days or freeze for longer storage.

FAQ Section

Even with a detailed recipe, questions often arise. Here are some commonly asked questions about almond flour brownies:

Q1: Can I substitute almond flour with another type of flour?

A1: Almond flour is unique in its texture and moisture content. Substituting it with another flour may alter the results significantly. However, if you must substitute, coconut flour could be an alternative, but you’ll need to adjust the liquid content accordingly.

Q2: How can I make these brownies vegan?

A2: To make vegan almond flour brownies, replace the eggs with flax eggs (1 tablespoon of flaxseed meal mixed with 2.5 tablespoons of water per egg) and use a plant-based butter substitute.

Q3: Can I add nuts or other mix-ins to the batter?

A3: Absolutely! Chopped walnuts, pecans, or even dried fruits can add texture and flavor to your brownies.

Q4: How do I know when the brownies are done?

A4: The brownies are done when the edges are set, and a toothpick inserted into the center comes out with a few moist crumbs. Be cautious not to overbake.

Q5: Can I use a different size pan?

A5: Yes, but keep in mind that the baking time will vary. A larger pan will result in thinner brownies and may require a shorter baking time, while a smaller pan will produce thicker brownies and may need additional time.

Coconut Lime Sorbet

As the summer sun blazes and the days grow longer, there’s nothing quite like the refreshing taste of a chilled dessert to cool you down. Enter the Coconut Lime Sorbet—a delightful blend of tropical flavors that promises to transport your taste buds to a sun-soaked paradise. When I first came across this recipe, I was intrigued by its simplicity and the promise of a flavor profile that sounded both exotic and familiar. I decided to whip it up one weekend for a family gathering, and the results were nothing short of spectacular. The sorbet was a massive hit, with its creamy texture and zesty lime undertones, providing a refreshing counterpoint to the rich coconut base. My family couldn’t get enough, and requests for seconds were almost immediate.

Ingredients

The magic of Coconut Lime Sorbet lies in its simplicity. With just a handful of ingredients, you can create a dessert that feels both luxurious and effortless. Here’s what you’ll need:

  • 1 cup of coconut milk: Opt for full-fat coconut milk for a richer texture, but light coconut milk can be used for a lighter version.
  • 1 cup of water: This helps in achieving the perfect sorbet consistency.
  • 3/4 cup of sugar: Adjust according to your sweetness preference.
  • 1/2 cup of freshly squeezed lime juice: This is the star ingredient that gives the sorbet its tangy zing.
  • Zest of 2 limes: For an added punch of lime flavor.
  • A pinch of salt: To enhance the flavors.

Instructions

Creating this sorbet is a straightforward process that doesn’t require any fancy equipment beyond a good blender or food processor and an ice cream maker. Follow these steps to achieve sorbet perfection:

  1. Combine Ingredients: In a medium saucepan, combine the coconut milk, water, and sugar. Heat over medium heat, stirring until the sugar completely dissolves. Remove from heat.
  2. Add Lime: Stir in the lime juice, lime zest, and salt. Mix well to ensure all ingredients are thoroughly combined.
  3. Chill the Mixture: Allow the mixture to cool to room temperature, then transfer it to the refrigerator. Chill for at least 2 hours, or until completely cold. This step is crucial for the sorbet to churn properly.
  4. Churn the Sorbet: Pour the chilled mixture into your ice cream maker. Churn according to the manufacturer’s instructions, usually about 20-25 minutes, until the mixture thickens and resembles soft-serve ice cream.
  5. Freeze: Transfer the churned sorbet into an airtight container. Freeze for at least 4 hours or until firm.
  6. Serve: Scoop the sorbet into bowls or cones and enjoy!

Nutrition Facts

For those mindful of their dietary intake, here are the nutrition facts for this sorbet:

  • Servings: This recipe serves approximately 4 people.
  • Calories: Each serving contains about 180 calories.

Preparation Time

In terms of preparation time, this Coconut Lime Sorbet is a relatively quick dessert to throw together, especially considering its payoff in flavor:

  • Preparation Time: 15 minutes
  • Chilling Time: 2 hours
  • Churning Time: 25 minutes
  • Freezing Time: 4 hours
  • Total Time: Approximately 6 hours and 40 minutes

How to Serve

Serving Coconut Lime Sorbet can be as creative as you wish. Here are a few ideas to inspire your presentation:

  • In a Bowl: The classic way, topped with a sprig of mint or a slice of lime.
  • In a Cone: Perfect for a handheld treat.
  • With Tropical Fruits: Serve alongside slices of mango, pineapple, or kiwi for a vibrant fruit salad.
  • As a Float: Add a scoop to a glass of sparkling water or soda for a refreshing drink.
  • With a Drizzle of Honey: For an extra touch of sweetness, drizzle some honey over the top before serving.

Additional Tips

To ensure your Coconut Lime Sorbet is the best it can be, consider these additional tips:

  1. Use Fresh Ingredients: Fresh lime juice and zest will yield the best flavor. Avoid bottled lime juice if possible.
  2. Chill the Mixture Thoroughly: Ensure the mixture is completely cold before churning. This helps achieve a smoother texture.
  3. Don’t Overfill the Ice Cream Maker: Leaving some space allows the sorbet to churn properly and incorporate air.
  4. Store Properly: Keep the sorbet in an airtight container in the freezer to prevent ice crystals from forming.
  5. Add a Splash of Rum: For an adult twist, a tablespoon of white rum can enhance the tropical flavor profile.

FAQ Section

To help you troubleshoot and perfect your sorbet-making skills, here are some frequently asked questions:

  1. Can I make this sorbet without an ice cream maker?
    Yes, you can! Pour the mixture into a shallow dish and freeze. Stir every 30 minutes until it reaches the desired consistency.
  2. Can I substitute the sugar with a different sweetener?
    Absolutely. You can use honey, agave syrup, or a sugar substitute. Be sure to adjust the quantities to taste.
  3. How long does the sorbet last in the freezer?
    The sorbet can be stored in the freezer for up to two weeks. Ensure it’s in an airtight container to maintain its texture.
  4. What if my sorbet is too hard to scoop?
    Let it sit at room temperature for a few minutes to soften slightly before serving.
  5. Can I add other flavors to this sorbet?
    Certainly! Consider adding a hint of ginger or basil for a unique twist.

In conclusion, Coconut Lime Sorbet is a versatile and simple dessert that can elevate any occasion. Its combination of creamy coconut and zesty lime makes it a crowd-pleaser and a refreshing treat that’s perfect for summer or any time you need a tropical escape. Whether you’re serving it at a dinner party or enjoying it solo on a warm afternoon, this sorbet is sure to impress. Happy churning!

Chocolate Chip Cookie Dough Bites

Chocolate chip cookie dough bites are a delightful treat that often inspires a sense of nostalgia and a craving for the familiar comfort of homemade cookies. Recently, I decided to try my hand at making these delectable bites, and I must say, they were an instant hit with my family. The joy of savoring the sweet, gooey dough studded with chocolate chips brought smiles all around our kitchen table. Even those who were initially hesitant found themselves reaching for seconds. These bites offer all the indulgence of cookie dough without the worry of raw ingredients, making them a perfect snack for both kids and adults. If you’re seeking a dessert that combines simplicity and satisfaction, look no further than this recipe for chocolate chip cookie dough bites.

Ingredients

Creating these delicious chocolate chip cookie dough bites requires just a few staple ingredients found in most kitchens. Here’s what you’ll need:

  • 1 cup all-purpose flour – The base of your dough that provides structure and texture.
  • 1/2 cup unsalted butter, softened – Adds richness and helps bind the ingredients together.
  • 1/2 cup brown sugar, packed – For a hint of molasses flavor and moisture.
  • 1/4 cup granulated sugar – Balances the sweetness and enhances the texture.
  • 2 tablespoons milk – Used to achieve the perfect dough consistency.
  • 1 teaspoon vanilla extract – Infuses a warm, aromatic flavor.
  • 1/2 teaspoon salt – Enhances the flavors and balances sweetness.
  • 1 cup mini chocolate chips – The star ingredient that makes every bite delightful.

Instructions

Making chocolate chip cookie dough bites is a straightforward process that even novice bakers can enjoy. Follow these steps for a successful batch:

  1. Prepare the flour: Begin by heat-treating the flour to ensure it’s safe to consume raw. Spread the flour on a baking sheet and bake at 350°F (175°C) for about 5 minutes. Allow it to cool completely before using.
  2. Cream the butter and sugars: In a large mixing bowl, combine the softened butter, brown sugar, and granulated sugar. Use an electric mixer to cream the ingredients together until the mixture is light and fluffy.
  3. Add wet ingredients: Mix in the milk and vanilla extract until well combined. This will help incorporate the flavors throughout the dough.
  4. Combine dry ingredients: Gradually add the cooled flour and salt to the wet mixture, stirring until a smooth dough forms.
  5. Fold in chocolate chips: Gently fold in the mini chocolate chips, ensuring they are evenly distributed throughout the dough.
  6. Shape the bites: Use a small cookie scoop or your hands to roll the dough into bite-sized balls, placing them on a parchment-lined baking sheet.
  7. Chill and serve: Refrigerate the bites for at least 30 minutes to allow them to firm up before serving.

Nutrition Facts

For those mindful of their dietary intake, here’s a brief overview of the nutritional facts for these chocolate chip cookie dough bites:

Servings: Approximately 24 bites

Calories per serving: 110 calories

Preparation Time

The preparation time for chocolate chip cookie dough bites is relatively quick, making them an ideal treat when you’re short on time. Here’s a breakdown:

  • Preparation time: 10 minutes
  • Cooking time (heat-treating flour): 5 minutes
  • Chilling time: 30 minutes
  • Total time: 45 minutes

How to Serve

Chocolate chip cookie dough bites are versatile and can be served in a variety of ways:

  • As an afternoon snack with a glass of milk or a cup of coffee.
  • Included in a dessert platter alongside other sweet treats.
  • As a party favor or gift, packaged in small cellophane bags tied with a ribbon.
  • On top of ice cream for an indulgent sundae.
  • As a movie night treat to enjoy with friends and family.

Additional Tips

For those looking to perfect their chocolate chip cookie dough bites, consider these additional tips:

  1. Experiment with flavors: Add a dash of cinnamon or a spoonful of peanut butter for a unique twist.
  2. Use quality chocolate: Opt for premium chocolate chips to enhance the overall taste.
  3. For a firmer texture: If you prefer a denser bite, reduce the milk by half.
  4. Store properly: Keep the bites in an airtight container in the refrigerator to maintain freshness.
  5. Make it gluten-free: Substitute the all-purpose flour with a gluten-free blend for those with dietary restrictions.

FAQ Section

Here are some frequently asked questions about chocolate chip cookie dough bites:

  1. Can I freeze the dough bites? Yes, you can freeze them in an airtight container for up to three months. Thaw in the refrigerator before serving.
  2. Is it safe to eat raw flour? Heat-treating the flour ensures it’s safe to consume, eliminating any potential bacteria.
  3. Can I use regular-sized chocolate chips? While you can use regular-sized chips, mini chocolate chips distribute more evenly throughout the dough.
  4. What can I use as a butter substitute? You can use margarine or a plant-based butter alternative if preferred.
  5. How do I know when the bites are ready to eat? Once they have chilled for at least 30 minutes and feel firm to the touch, they are ready to enjoy.

Blueberry Lemon Loaf Cake

When I first baked the Blueberry Lemon Loaf Cake, it was an instant hit at our family gathering. Its moist texture combined with the zesty tang of lemon and the sweetness of blueberries created an irresistible dessert that left everyone craving more. The cake’s delightful aroma filled the kitchen and, as I later learned, the hearts of my loved ones. This recipe has quickly become a staple in our household, perfect for any occasion from casual brunches to special celebrations. Each bite is a testament to the harmonious blend of flavors, making this cake not only a treat for the taste buds but also a cherished family favorite.

Ingredients

The success of this Blueberry Lemon Loaf Cake lies in its carefully selected ingredients, each playing a vital role in crafting its unique flavor profile. Here is what you’ll need:

  • 1 and 1/2 cups (190g) all-purpose flour
  • 1 teaspoon baking powder
  • 1/2 teaspoon salt
  • 1/2 cup (115g) unsalted butter, softened
  • 1 cup (200g) granulated sugar
  • 2 large eggs
  • 1 teaspoon vanilla extract
  • 1/2 cup (120ml) milk
  • Zest of 1 lemon
  • 2 tablespoons fresh lemon juice
  • 1 cup (150g) fresh or frozen blueberries

Instructions

Creating the perfect Blueberry Lemon Loaf Cake requires attention to detail and a touch of love. Follow these step-by-step instructions to ensure a delightful result:

  1. Preheat your oven to 350°F (175°C) and grease a 9×5 inch loaf pan.
  2. In a medium-sized bowl, whisk together the flour, baking powder, and salt. Set aside.
  3. In a large mixing bowl, cream the butter and sugar together until light and fluffy. This should take about 3 minutes.
  4. Beat in the eggs one at a time, ensuring each is fully incorporated before adding the next. Mix in the vanilla extract.
  5. Gradually add the flour mixture to the wet ingredients, alternating with the milk. Begin and end with the flour mixture.
  6. Gently fold in the lemon zest and lemon juice until just combined.
  7. Toss the blueberries with a tablespoon of flour to prevent them from sinking, then fold them gently into the batter.
  8. Pour the batter into the prepared loaf pan and smooth the top with a spatula.
  9. Bake in the preheated oven for 50-60 minutes, or until a toothpick inserted into the center comes out clean.
  10. Allow the cake to cool in the pan for about 10 minutes before transferring it to a wire rack to cool completely.

Nutrition Facts

This recipe yields approximately 10 servings, with each slice containing about 250 calories. The calorie count may vary slightly depending on the specific brands of ingredients used. It’s a delightful treat that balances indulgence with mindful eating.

Preparation Time

The total preparation time for this Blueberry Lemon Loaf Cake is approximately 1 hour and 20 minutes. This includes 20 minutes for preparation and 60 minutes for baking. While the cake bakes, your kitchen will be filled with the refreshing scent of lemon and blueberries, setting the perfect atmosphere for anticipation.

How to Serve

The Blueberry Lemon Loaf Cake can be served in a variety of delicious ways. Here are some serving suggestions to enhance your cake experience:

  • Plain: Enjoy the cake as it is, allowing the natural flavors to shine through.
  • With a Glaze: Drizzle a simple lemon glaze over the cooled cake for an extra burst of flavor.
  • With Whipped Cream: Serve with a dollop of whipped cream for added richness and texture.
  • Accompanied by Fresh Berries: Garnish with additional fresh blueberries or strawberries for a vibrant touch.
  • With Ice Cream: Pair with a scoop of vanilla ice cream for a delightful dessert duo.

Additional Tips

Here are some additional tips to ensure your Blueberry Lemon Loaf Cake turns out perfectly every time:

  1. Room Temperature Ingredients: Make sure the butter, eggs, and milk are at room temperature before mixing. This helps create a smooth and even batter.
  2. Don’t Overmix: Overmixing the batter can lead to a dense cake. Mix until just combined for a tender crumb.
  3. Flour the Berries: Tossing the blueberries in flour prevents them from sinking to the bottom of the cake.
  4. Use Fresh Lemon: Fresh lemon juice and zest offer the best flavor compared to bottled alternatives.
  5. Cooling is Key: Allow the cake to cool completely before slicing to ensure clean cuts and a better texture.

FAQ Section

Here are some frequently asked questions about the Blueberry Lemon Loaf Cake:

Q: Can I use frozen blueberries?

A: Yes, frozen blueberries can be used. Do not thaw them before adding to the batter to prevent them from releasing too much moisture.

Q: Can I substitute the all-purpose flour with a gluten-free alternative?

A: Absolutely, you can use a 1:1 gluten-free flour blend for a gluten-free version of this cake.

Q: How should I store the cake?

A: Store the cake in an airtight container at room temperature for up to 3 days, or in the refrigerator for up to a week.

Q: Can I freeze the cake?

A: Yes, the cake can be frozen. Wrap it tightly in plastic wrap and store in a freezer-safe container for up to 3 months. Thaw overnight in the refrigerator before serving.

Q: What if I don’t have a loaf pan?

A: If you don’t have a loaf pan, you can use a muffin tin to make blueberry lemon muffins. Adjust the baking time to about 20-25 minutes.

Peach Cobbler with Oat Topping

There’s something inherently comforting about a warm, homemade dessert, especially when it involves the sweet and juicy flavors of peaches. My family recently indulged in a Peach Cobbler with Oat Topping, and it was an absolute hit. This delightful dessert not only filled our home with an irresistible aroma but also brought smiles to everyone’s faces. With each bite, the harmonious blend of tender peaches and the crunchy oat topping offered a perfect balance of sweetness and texture. Whether enjoyed as a standalone treat or paired with a scoop of vanilla ice cream, this peach cobbler has now become a cherished family favorite.

Ingredients

The success of a Peach Cobbler with Oat Topping begins with selecting the right ingredients. Fresh, ripe peaches are key to achieving that juicy, flavorful base. Here’s what you’ll need:

  • 8 cups of sliced peaches – Fresh is best, but frozen works in a pinch.
  • 1 cup of granulated sugar – Adjust based on the sweetness of the peaches.
  • 2 tablespoons of lemon juice – Adds a zesty kick to the fruit.
  • 1 tablespoon of cornstarch – Helps thicken the peach juices.
  • 1 teaspoon of vanilla extract – For a hint of warmth.
  • 1 cup of rolled oats – Provides a satisfying crunch in the topping.
  • 1 cup of all-purpose flour – Forms the base of the crumble.
  • 1 cup of brown sugar – Adds a rich molasses flavor.
  • 1 teaspoon of ground cinnamon – Complements the sweetness of the peaches.
  • 1/2 teaspoon of salt – Enhances the overall flavor.
  • 1/2 cup of unsalted butter, melted – Binds the topping ingredients together.

Instructions

Creating this delectable peach cobbler is a straightforward process that rewards with a dessert that looks as good as it tastes. Follow these steps to achieve perfection:

  1. Preheat your oven to 350°F (175°C). This ensures a consistent temperature for even baking.
  2. In a large mixing bowl, combine the sliced peaches, granulated sugar, lemon juice, cornstarch, and vanilla extract. Stir until the peaches are well-coated.
  3. Transfer the peach mixture to a 9×13-inch baking dish, spreading it evenly to cover the bottom.
  4. In a separate bowl, mix the rolled oats, flour, brown sugar, cinnamon, and salt. Pour in the melted butter and stir until the mixture forms coarse crumbs.
  5. Sprinkle the oat mixture evenly over the peaches, ensuring a uniform layer for the perfect crumble.
  6. Bake in the preheated oven for 40-45 minutes, or until the top is golden brown and the peach juices are bubbling around the edges.
  7. Allow the cobbler to cool slightly before serving, giving the juices time to thicken.

Nutrition Facts

Understanding the nutritional content of your dessert can help you enjoy it in moderation. This Peach Cobbler serves approximately eight people, with each serving containing about 350 calories. This caloric estimate includes the natural sugars from the peaches and the added sugars from both the granulated and brown sugar. The oat topping not only contributes to the calorie count but also offers dietary fiber, making it a slightly healthier dessert option than its all-flour counterparts.

Preparation Time

One of the many advantages of this Peach Cobbler recipe is its relatively quick and easy preparation. From start to finish, you can expect to spend about 1 hour and 15 minutes. This includes 15 minutes of preparation time for slicing the peaches and mixing the ingredients, followed by 40-45 minutes of baking. The remaining time is allotted for cooling, allowing the cobbler to set. It’s a perfect dessert to prepare while wrapping up dinner or as a spontaneous weekend treat.

How to Serve

Serving this Peach Cobbler with Oat Topping can be as straightforward or as creative as you like. Here are a few suggestions to enhance your dining experience:

  • Classic vanilla ice cream – The cool, creamy texture pairs beautifully with the warm cobbler.
  • Whipped cream – Add a dollop for a light and airy complement.
  • Greek yogurt – For a healthier twist, use unsweetened yogurt to balance the sweetness.
  • Fresh mint leaves – A sprig of mint adds a pop of color and a refreshing aroma.
  • Caramel drizzle – For an extra indulgence, a light drizzle of caramel sauce can elevate the flavors.

Additional Tips

To ensure your Peach Cobbler with Oat Topping is nothing short of spectacular, consider these helpful tips:

  1. Choose ripe peaches. Ripe peaches are key to a juicy and flavorful filling. If peaches are out of season, frozen peaches can be a suitable substitute.
  2. Adjust sugar levels. Depending on the natural sweetness of your peaches, you may need to adjust the amount of sugar. Taste your peach mixture before baking.
  3. Use a glass or ceramic dish. These materials distribute heat evenly, ensuring a consistent bake.
  4. Make it gluten-free. Substitute all-purpose flour with a gluten-free flour blend to accommodate dietary restrictions.
  5. Experiment with spices. Adding a pinch of nutmeg or ginger can provide an additional layer of flavor to the cobbler.

FAQ Section

Here are some common questions about Peach Cobbler with Oat Topping:

  1. Can I use canned peaches? Yes, canned peaches can be used, but be sure to drain them well to avoid a soggy cobbler.
  2. How do I store leftovers? Store any leftover cobbler in an airtight container in the refrigerator for up to 3 days. Reheat in the oven for the best texture.
  3. Can I freeze the cobbler? Absolutely! Freeze the baked cobbler in an airtight container for up to two months. Thaw overnight in the refrigerator before reheating.
  4. Is it possible to make this dairy-free? Yes, replace the butter with a non-dairy alternative like coconut oil or vegan butter.
  5. What other fruits can I use? This recipe is versatile; try substituting some or all of the peaches with fruits like apples, berries, or pears for a different flavor profile.

Classic Tiramisu (Alcohol-Free)

There’s something undeniably captivating about a classic tiramisu. This Italian dessert, with its layers of coffee-soaked ladyfingers, creamy mascarpone cheese, and a dusting of cocoa, is a timeless treat that’s hard to resist. Recently, I decided to try my hand at making an alcohol-free version of this beloved dessert, and let’s just say it was a hit in my household. My family, who are usually quite discerning when it comes to desserts, couldn’t get enough of it. The absence of alcohol did not detract from its traditional flavor profile; if anything, it allowed the rich coffee and creamy mascarpone to shine even more. If you’re looking to make a dessert that impresses without the inclusion of alcohol, this tiramisu might just be your new go-to recipe.

Ingredients

Creating a classic tiramisu that stays true to its roots requires some essential ingredients. For this alcohol-free version, you will need:

  • 2 cups strong brewed coffee, cooled to room temperature
  • 24 to 30 ladyfingers (savoiardi)
  • 3 large eggs, separated
  • 3/4 cup granulated sugar
  • 1 pound mascarpone cheese
  • 1 teaspoon vanilla extract
  • Cocoa powder, for dusting
  • Dark chocolate shavings (optional, for garnish)

Instructions

Making tiramisu is a delicate yet rewarding process. Here’s how you can create your own alcohol-free version:

  1. Prepare the Coffee: Brew your coffee and set it aside to cool at room temperature.
  2. Separate the Eggs: Carefully separate the egg yolks from the whites, placing them in two separate bowls.
  3. Make the Mascarpone Mixture: In a bowl, whisk the egg yolks with sugar until it becomes pale and creamy. Add the mascarpone cheese and vanilla extract, mixing until smooth.
  4. Whip the Egg Whites: Beat the egg whites until stiff peaks form, then gently fold them into the mascarpone mixture.
  5. Assemble the Tiramisu: Briefly dip each ladyfinger into the coffee, ensuring they’re soaked but not soggy. Layer them in a dish, followed by a generous layer of the mascarpone mixture. Repeat the layers, finishing with a layer of mascarpone.
  6. Chill and Serve: Refrigerate the tiramisu for at least 4 hours, or overnight if possible, to allow the flavors to meld. Before serving, dust with cocoa powder and garnish with chocolate shavings if desired.

Nutrition Facts

This recipe serves approximately 8 people, with each serving containing around 350 calories. It’s a dessert that offers indulgence without going overboard, making it a perfect treat for special occasions or a family gathering.

Preparation Time

The preparation time for this alcohol-free tiramisu is about 30 minutes, with an additional chilling time of at least 4 hours. While it may require some patience, the end result is well worth the wait.

How to Serve

When serving tiramisu, presentation is key. Here are some ideas to make your dessert look as good as it tastes:

  • Use a clear glass dish to showcase the beautiful layers of the tiramisu.
  • Garnish with a light dusting of cocoa powder just before serving for an elegant touch.
  • Add a few chocolate shavings or curls on top for an extra layer of flavor and decoration.
  • Serve with a side of fresh berries for a burst of color and contrast.
  • Pair the dessert with a cup of espresso to complement the rich coffee flavors.

Additional Tips

Here are some tips to ensure your tiramisu is a success:

  1. Use Quality Ingredients: Choose high-quality mascarpone and fresh eggs to achieve the best flavor and texture.
  2. Don’t Over-Soak the Ladyfingers: Quickly dip them in coffee to prevent them from becoming too soggy.
  3. Chill Thoroughly: Allow the tiramisu to chill for at least 4 hours, or overnight, to enhance the flavors.
  4. Experiment with Garnishes: Consider adding a hint of cinnamon or nutmeg for a twist.
  5. Make Ahead: Tiramisu can be made a day in advance, making it a convenient option for entertaining guests.

FAQ Section

Q: Can I use cream cheese instead of mascarpone?

A: While mascarpone is traditional and gives the best results, you can substitute cream cheese, although the flavor and texture will be slightly different.

Q: Is it safe to use raw eggs in tiramisu?

A: If you’re concerned about using raw eggs, you can use pasteurized eggs or a whisked egg substitute.

Q: Can I make tiramisu without coffee?

A: Yes, you can replace coffee with hot chocolate or a decaffeinated coffee alternative if preferred.

Q: How long can I store tiramisu in the fridge?

A: Tiramisu can be stored in the refrigerator for up to 3 days. Keep it covered to maintain freshness.

Q: Can I freeze tiramisu?

A: Yes, tiramisu can be frozen for up to 2 months. Thaw it in the refrigerator before serving.

Date and Nut Energy Balls

There’s something inherently satisfying about creating a homemade snack that not only pleases the taste buds but also provides a nutritious boost. Date and Nut Energy Balls have become a beloved staple in our household. The chewy texture of dates combined with the crunch of nuts creates a perfect harmony that even the pickiest eater in my family can’t resist. It’s a recipe that brings smiles around the table and is a testament to the idea that healthy can indeed be delicious. Whether it’s a quick breakfast on the go or a midday pick-me-up, these energy balls are versatile and beloved by everyone I’ve shared them with.

Ingredients

The magic of Date and Nut Energy Balls lies in their simplicity and the quality of the ingredients used. Here’s what you’ll need:

  • 1 cup pitted dates: Soft and sticky dates are ideal as they bind everything together.
  • 1 cup nuts: Almonds, walnuts, or a mix can be used according to preference.
  • 2 tablespoons cocoa powder: For a rich, chocolatey flavor.
  • 1 tablespoon chia seeds: These add a boost of omega-3s and fiber.
  • 1 teaspoon vanilla extract: Enhances the sweetness and adds depth.
  • A pinch of salt: Balances the flavors beautifully.

Instructions

Creating these delightful energy balls is a straightforward process that even novice cooks can undertake with confidence. Follow these steps:

  1. Prepare the Dates: If your dates are dry, soak them in warm water for 10 minutes to soften. Drain thoroughly before using.
  2. Blend Ingredients: In a food processor, combine the dates, nuts, cocoa powder, chia seeds, vanilla extract, and salt. Blend until the mixture is well combined and sticky.
  3. Shape the Balls: Scoop out about a tablespoon of the mixture and roll it between your palms to form a ball. Repeat with the remaining mixture.
  4. Chill: Place the energy balls on a tray lined with parchment paper and refrigerate for at least 30 minutes to firm up.
  5. Store: Once chilled, transfer the energy balls to an airtight container. They can be stored in the fridge for up to two weeks.

Nutrition Facts

This recipe makes approximately 12 energy balls. Each serving (1 energy ball) contains about 100 calories. The exact nutritional content may vary based on the specific brands and quantities of ingredients used.

Preparation Time

From start to finish, the preparation of Date and Nut Energy Balls takes about 15 minutes, with an additional 30 minutes of chilling time. This quick recipe means you can have a healthy snack ready in under an hour, perfect for busy lifestyles.

How to Serve

Date and Nut Energy Balls are incredibly versatile and can be enjoyed in a variety of ways:

  • As a quick breakfast option, paired with a cup of your favorite coffee or tea.
  • As a midday snack to enjoy at work or on the go.
  • As a post-workout energy boost to replenish and refuel.
  • As a healthy dessert option, perhaps paired with some fresh fruit.
  • As a thoughtful homemade gift, packaged in a decorative box.

Additional Tips

To ensure the best results and maximum enjoyment from your Date and Nut Energy Balls, consider these tips:

  1. Choose Fresh Dates: The freshness of your dates is crucial for the texture and sweetness of the energy balls. Look for dates that are plump and moist.
  2. Customize to Your Taste: Feel free to experiment with different nuts or add-ins like shredded coconut or dried fruit to suit your personal preferences.
  3. Use a Food Processor: A good quality food processor will make blending the ingredients easier and more efficient, resulting in a smoother mixture.
  4. Consistency is Key: If the mixture is too dry, add a few more dates or a teaspoon of water. If too sticky, add more nuts or cocoa powder.
  5. Chill for Better Texture: Chilling the balls not only helps them firm up but also enhances the flavors as they meld together.

FAQ Section

Here are some frequently asked questions about Date and Nut Energy Balls:

  1. Can I use other types of nuts? Yes, you can use any nuts you prefer or have on hand. Cashews, pecans, or a mix of different nuts work well.
  2. How long do these energy balls last? When stored in an airtight container in the refrigerator, these energy balls can last for up to two weeks.
  3. Are these energy balls vegan? Yes, as long as you use vegan-friendly ingredients, these energy balls are entirely vegan.
  4. Can I freeze these energy balls? Absolutely! These energy balls freeze well and can be kept in the freezer for up to three months. Just thaw them in the fridge overnight before enjoying.
  5. Can I add protein powder to this recipe? Yes, adding a scoop of your favorite protein powder is a great way to increase the protein content. You may need to adjust the moisture level by adding an extra date or a splash of water.

Apple Galette with Cinnamon Sugar

The moment the warm, sweet scent of an apple galette with cinnamon sugar begins to waft through my kitchen, I know it’s going to be a good day. This rustic French dessert has become a beloved staple in my household, so much so that even the mere mention of it sparks smiles and anticipatory nods of approval from family members. The galette is essentially a free-form pie, offering the delightful flavors of an apple pie with a fraction of the effort. Its simplicity in preparation, yet richness in flavor is what makes it a family favorite. The buttery, flaky crust combined with the sweet, spiced apple filling creates a comforting dessert that feels like a warm hug on a chilly day. Whether served as an afternoon treat or the grand finale to a family dinner, this apple galette is always met with enthusiastic praise.

Ingredients

Creating an apple galette with cinnamon sugar involves a few simple ingredients that you likely already have in your pantry. The star of the show is, of course, the apples. I prefer to use a mix of tart and sweet apples, such as Granny Smith and Honeycrisp, to strike a perfect balance in flavor. You’ll need about 3 to 4 medium-sized apples, peeled, cored, and thinly sliced. For the crust, you will need 1 1/4 cups of all-purpose flour, 1/4 cup of granulated sugar, 1/4 teaspoon of salt, and 1/2 cup of unsalted butter, chilled and cubed. Ice water is also necessary to bring the dough together. The filling requires 1/4 cup of granulated sugar, 1 teaspoon of ground cinnamon, and 1 tablespoon of lemon juice to enhance the natural flavors of the apples. A tablespoon of melted butter for brushing and a tablespoon of coarse sugar for sprinkling are optional but add a lovely finish to the galette.

Instructions

Start by preparing the dough. In a large bowl, whisk together the flour, sugar, and salt. Add the chilled butter and use a pastry cutter or your fingers to work the butter into the flour until the mixture resembles coarse crumbs. Gradually add the ice water, one tablespoon at a time, mixing with a fork until the dough begins to come together. Form the dough into a disk, wrap it in plastic wrap, and refrigerate for at least an hour.

While the dough chills, prepare the filling. In a bowl, toss the sliced apples with lemon juice to prevent browning. In a separate small bowl, mix together the sugar and cinnamon, then sprinkle this mixture over the apples, tossing to coat evenly.

Preheat your oven to 400°F (200°C). On a lightly floured surface, roll out the chilled dough into a 12-inch circle. Transfer it onto a parchment-lined baking sheet. Arrange the apple slices in the center of the dough, leaving a 2-inch border around the edges. Fold the edges of the dough over the apples, pleating as necessary to create a rustic look.

Brush the crust with the melted butter and sprinkle the coarse sugar over the entire galette. Bake in the preheated oven for 40-45 minutes, or until the crust is golden brown and the apples are tender. Allow the galette to cool slightly before serving.

Nutrition Facts

This delightful apple galette serves approximately 6-8 people, depending on how generously you slice it. Each serving contains about 250-300 calories, making it a relatively light dessert option. The use of fresh apples provides a dose of fiber and vitamin C, while the cinnamon offers its own set of health benefits, including antioxidant properties. The butter and sugar content means it should be enjoyed in moderation, but rest assured, each bite is worth every calorie.

Preparation Time

One of the many reasons I adore making this apple galette is its reasonable preparation time. From start to finish, you can expect to spend about 1.5 to 2 hours on this dessert. This includes the time needed for the dough to chill, prepare the filling, and bake the galette to golden perfection. For an experienced baker, the process might be quicker, but even for beginners, the steps are straightforward and manageable. The time invested is rewarded with a stunning and delicious result that belies the simplicity of its preparation.

How to Serve

  • Warm and A La Mode: Serve the apple galette warm with a scoop of vanilla ice cream to enhance its comforting flavors.
  • With Whipped Cream: A dollop of freshly whipped cream adds a light, airy contrast to the dense, spiced apples.
  • Drizzled with Caramel: For an extra touch of indulgence, drizzle warm caramel sauce over the top.
  • Paired with a Hot Beverage: Enjoy a slice alongside a cup of coffee or tea for a cozy afternoon treat.
  • As a Breakfast Pastry: Leftover slices make for a delightful breakfast, especially when paired with a hot beverage.

Additional Tips

  1. Chill the Butter: Ensure your butter is cold when making the dough to achieve the flakiest crust possible.
  2. Use a Mix of Apples: Combining different apple varieties provides a depth of flavor and texture in the filling.
  3. Don’t Overfill: Keep the apple slices in a single layer for even cooking and a beautiful presentation.
  4. Experiment with Spices: Add a pinch of nutmeg or cloves for a different spice profile.
  5. Make Ahead: The dough can be prepared up to two days in advance and stored in the refrigerator until ready to use.

FAQ Section

  1. Can I use store-bought pie crust?

    Yes, using a store-bought crust is a convenient shortcut that won’t compromise the flavor of the galette.

  2. What other fruits can I use?

    Pears, peaches, or berries can be substituted or added to the apples for a seasonal twist.

  3. How do I prevent a soggy bottom?

    To avoid a soggy crust, ensure the apples are not too juicy and bake the galette on a preheated baking sheet.

  4. Can I make it vegan?

    Yes, substitute the butter with a vegan alternative and ensure your crust is vegan-friendly.

  5. How do I store leftovers?

    Store any leftover galette in an airtight container at room temperature for up to two days or refrigerate for up to four days.