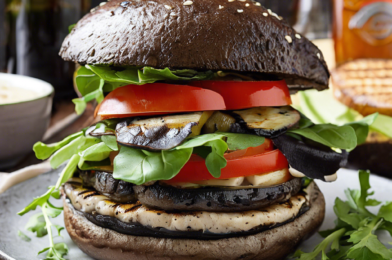
Grilled Portobello Mushroom Burgers

The first time I made Grilled Portobello Mushroom Burgers for my family, the reaction was overwhelmingly positive. Even my meat-loving relatives were surprised by how satisfying and flavorful these burgers were. The mushrooms’ meaty texture and rich, umami flavor made them an instant hit at our dinner table. We enjoyed the smoky aroma that filled the kitchen as the mushrooms grilled to perfection. My family appreciated the healthy twist on a classic burger, and the dish has since become a staple at our gatherings. These burgers are not only delicious but also a wonderful way to introduce more plant-based meals into our diet.

Ingredients

These Grilled Portobello Mushroom Burgers are not only simple to make but also require minimal ingredients, each contributing significantly to the overall flavor and texture. Here’s what you’ll need:

  • 4 large portobello mushroom caps
  • 1/4 cup balsamic vinegar
  • 2 tablespoons olive oil
  • 1 tablespoon soy sauce
  • 2 cloves garlic, minced
  • 4 whole grain burger buns
  • 1/2 cup mayonnaise (optional)
  • 4 slices of provolone cheese (optional)
  • Lettuce leaves, tomato slices, and red onion rings for topping
  • Salt and pepper to taste

Instructions

Creating these flavorful burgers is a straightforward process that even novice cooks can undertake with confidence. Follow these steps to prepare your Grilled Portobello Mushroom Burgers:

  1. Prepare the marinade: In a small bowl, whisk together the balsamic vinegar, olive oil, soy sauce, and minced garlic. This marinade will infuse the mushrooms with a savory, tangy flavor.
  2. Marinate the mushrooms: Place the portobello mushroom caps in a shallow dish, gill side up. Pour the marinade over the mushrooms, ensuring they are well coated. Let them marinate for at least 30 minutes, turning once halfway through to ensure even absorption.
  3. Preheat the grill: While the mushrooms are marinating, preheat your grill to medium-high heat. If using a stovetop grill pan, heat it over medium-high heat.
  4. Grill the mushrooms: Place the marinated mushrooms on the grill, gill side down. Cook for about 5-7 minutes per side, or until they are tender and have developed nice grill marks. During the last minute of grilling, place a slice of provolone cheese on each mushroom cap to melt.
  5. Toast the buns: While the mushrooms are grilling, place the burger buns on the grill for a few seconds until they are lightly toasted.
  6. Assemble the burgers: Spread mayonnaise on the bottom half of each bun. Place a grilled mushroom cap on top, followed by lettuce, tomato slices, and red onion rings. Add the top bun and serve immediately.

Nutrition Facts

These Grilled Portobello Mushroom Burgers are not only delicious but also packed with nutrients. Each serving provides a healthy dose of vitamins and minerals, making them a great choice for health-conscious eaters.

Servings: 4

Calories per serving: Approximately 250 calories without cheese and mayonnaise, 350 calories with cheese and mayonnaise.

Preparation Time

One of the many appealing aspects of these Grilled Portobello Mushroom Burgers is the relatively short preparation time. From start to finish, you can have a delicious meal ready in under an hour. Here’s a breakdown of the time required:

  • Marinating: 30 minutes
  • Prepping the grill and ingredients: 10 minutes
  • Grilling and assembly: 15-20 minutes

Total preparation time: Approximately 55-60 minutes.

How to Serve

Serving these Grilled Portobello Mushroom Burgers can be a fun and creative endeavor. Here are some suggestions to elevate your dining experience:

  • Pair with sides: Serve the burgers with a side of sweet potato fries, a fresh garden salad, or a light coleslaw to complement the flavors of the burgers.
  • Customize the toppings: Experiment with different toppings like avocado slices, pickles, or jalapeños to add various textures and flavors.
  • Make it a feast: Accompany the burgers with a selection of grilled vegetables like zucchini, bell peppers, or corn on the cob for a delightful summer meal.
  • Choose the right beverage: Pair your burgers with a chilled glass of iced tea, lemonade, or a light beer for a refreshing complement.
  • Presentation matters: Serve the burgers on a wooden board or rustic plate to enhance the visual appeal and create an inviting dining experience.

Additional Tips

To ensure your Grilled Portobello Mushroom Burgers turn out perfect every time, consider these helpful tips:

  • Choose fresh mushrooms: Look for firm, fresh portobello mushrooms with no signs of wilting or discoloration for the best flavor and texture.
  • Adjust the seasoning: Feel free to tweak the marinade by adding your favorite herbs or spices, such as thyme, rosemary, or smoked paprika, to customize the flavor profile.
  • Control the grill heat: Keep an eye on the grill temperature to avoid burning the mushrooms. Medium-high heat is ideal for achieving a nice char without overcooking.
  • Check for doneness: Use a fork to test the tenderness of the mushrooms. They should be soft but still hold their shape when ready.
  • Experiment with cheese: If provolone isn’t your favorite, try other cheese varieties like cheddar, mozzarella, or blue cheese for a different taste experience.

FAQ Section

Here are some commonly asked questions about Grilled Portobello Mushroom Burgers:

  • Q: Can I make these burgers in advance?
    A: Yes, you can marinate the mushrooms a day ahead and keep them in the refrigerator. Grill them fresh when ready to serve for the best taste and texture.
  • Q: Can I use a different type of mushroom?
    A: While portobello mushrooms are ideal for their size and texture, you can substitute with larger cremini or shiitake mushrooms if needed. Adjust the grilling time accordingly.
  • Q: Are there vegan options for this recipe?
    A: Absolutely! Simply omit the cheese or replace it with a vegan cheese alternative. Use a vegan mayonnaise or avocado spread instead of regular mayonnaise.
  • Q: What if I don’t have a grill?
    A: No problem! Use a stovetop grill pan or a regular skillet to cook the mushrooms. You can also roast them in the oven at 375°F (190°C) until tender.
  • Q: How do I store leftovers?
    A: Store leftover grilled mushrooms in an airtight container in the refrigerator for up to 3 days. Reheat them gently on the stovetop or in the microwave before serving.

Chickpea and Spinach Curry

There’s something inherently comforting about a warm, flavorful curry simmering away on the stove. Recently, I tried a Chickpea and Spinach Curry that was a hit with my family, and I’m excited to share it with you. This dish combines the earthy taste of chickpeas with the robust flavor of spinach, all enveloped in a spicy, aromatic sauce. My family, including the kids, were pleasantly surprised by how much they enjoyed it. Even my husband, who usually prefers meat-based dishes, went back for seconds. This recipe not only satisfies the taste buds but also offers a nourishing meal full of plant-based goodness.

Ingredients

Before you dive into the culinary adventure of making this Chickpea and Spinach Curry, let’s gather the ingredients. You’ll need:

  • 2 tablespoons of olive oil
  • 1 large onion, finely chopped
  • 3 cloves of garlic, minced
  • 1 tablespoon of fresh ginger, grated
  • 2 teaspoons of ground cumin
  • 2 teaspoons of ground coriander
  • 1 teaspoon of turmeric powder
  • 1 teaspoon of garam masala
  • 1/2 teaspoon of cayenne pepper (optional, for extra heat)
  • 2 cans of chickpeas, drained and rinsed
  • 1 can of diced tomatoes
  • 1 cup of coconut milk
  • 4 cups of fresh spinach leaves
  • Salt and pepper to taste
  • Fresh cilantro, chopped, for garnish
  • Lemon wedges, for serving

Instructions

Embarking on the journey of creating this flavorful curry is both simple and rewarding. Here’s how you can make it:

Step 1: Start by heating the olive oil in a large pot over medium heat. Add the chopped onions and sauté until they become translucent, which should take about 5 minutes.

Step 2: Next, add the minced garlic and grated ginger. Sauté for another 2 minutes until the mixture is fragrant. This step builds the aromatic base that will define your curry.

Step 3: Stir in the spices: cumin, coriander, turmeric, garam masala, and cayenne pepper. Toast the spices for 1-2 minutes, ensuring they don’t burn but release their essential flavors.

Step 4: Add the chickpeas and diced tomatoes to the pot. Stir well to coat the chickpeas with the spices. Let the mixture simmer for about 10 minutes, allowing the flavors to meld together.

Step 5: Pour in the coconut milk and bring the curry to a gentle simmer. Add the fresh spinach leaves, stirring them into the curry until they wilt.

Step 6: Season with salt and pepper to your taste. Let the curry simmer for another 5 minutes, ensuring all the ingredients are well combined and heated through.

Step 7: Serve the curry hot, garnished with fresh cilantro and a squeeze of lemon juice for an added tang.

Nutrition Facts

This Chickpea and Spinach Curry is both delicious and nutritious. Here’s what you need to know:

Servings: 4

Calories per Serving: Approximately 350

The curry is packed with protein from the chickpeas, vitamins from the spinach, and healthy fats from the coconut milk, making it a balanced meal option.

Preparation Time

One of the great things about this recipe is its efficiency. You can have this Chickpea and Spinach Curry ready in about 40 minutes, including prep and cook time. It’s perfect for a quick weeknight dinner or a leisurely weekend lunch.

How to Serve

There are several ways to enjoy this delectable curry:

  • Serve over a bed of fluffy basmati rice to soak up the sauce.
  • Pair with warm naan bread for a delightful scooping experience.
  • Enjoy as a standalone dish for a lighter meal.
  • Accompany with a side salad for added crunch and freshness.
  • Top with a dollop of yogurt for a creamy contrast.

Additional Tips

To make the most out of your Chickpea and Spinach Curry, consider these tips:

  • Tip 1: Use fresh spices for the best flavor. Ground spices lose potency over time, so ensure yours are fresh.
  • Tip 2: Adjust the spice level to suit your taste by varying the amount of cayenne pepper.
  • Tip 3: For a richer flavor, you can replace canned tomatoes with fresh, ripe tomatoes.
  • Tip 4: If you prefer a thicker curry, simmer for a longer time to reduce the liquid.
  • Tip 5: This curry can be made a day ahead, allowing the flavors to deepen overnight in the fridge.

FAQ Section

Here are some common questions about this Chickpea and Spinach Curry:

Q1: Can I use frozen spinach instead of fresh?

A1: Yes, frozen spinach can be used. Just make sure to thaw and drain excess water before adding it to the curry.

Q2: Is there a substitute for coconut milk?

A2: You can use almond milk or heavy cream as substitutes, though they will alter the flavor slightly.

Q3: Can I make this curry in advance?

A3: Absolutely, this curry stores well in the refrigerator for up to 3 days and can be frozen for up to 3 months.

Q4: What can I add for extra protein?

A4: You can add tofu or paneer for extra protein. Simply cube and add them in the last few minutes of cooking.

Q5: How can I make this curry gluten-free?

A5: The curry is naturally gluten-free, but ensure any side dishes, like naan, are specifically labeled gluten-free if necessary.

Vegetable Tikka Masala

Vegetable Tikka Masala is more than just a dish; it’s a symphony of flavors, a celebration of spices, and a testament to the rich culinary tradition of Indian cuisine. When I first tried this recipe, it was nothing short of a revelation for my taste buds. The vibrant colors and the intoxicating aroma wafting through the kitchen were enough to captivate my family’s senses. We gathered around the table, eager to indulge in this vegetarian delight. Each bite was a harmonious blend of earthy vegetables and creamy, spiced sauce. It was a unanimous decision: this recipe was a keeper, destined to become a regular feature in our meal rotations.

Ingredients

Creating a delicious Vegetable Tikka Masala starts with selecting the right ingredients. Here’s what you’ll need:

  • Vegetables: 2 cups of mixed vegetables (such as cauliflower, bell peppers, and carrots), cut into bite-sized pieces.
  • Chickpeas: 1 can of chickpeas, drained and rinsed.
  • Yogurt: 1 cup of plain yogurt for marination.
  • Spices: 1 tablespoon of garam masala, 1 teaspoon of turmeric, 1 teaspoon of cumin, and 1 teaspoon of coriander powder.
  • Ginger and Garlic: 1 tablespoon of ginger-garlic paste.
  • Tomato Puree: 1 cup of tomato puree.
  • Cream: 1/2 cup of heavy cream or coconut milk for a vegan option.
  • Onion: 1 large onion, finely chopped.
  • Oil: 2 tablespoons of vegetable oil.
  • Salt: Salt to taste.
  • Cilantro: Fresh cilantro leaves for garnish.

Instructions

Let’s dive into the preparation of this savory dish:

  1. Marination: In a large bowl, combine the yogurt, ginger-garlic paste, garam masala, turmeric, cumin, coriander powder, and salt. Add the mixed vegetables and chickpeas, ensuring they are well-coated with the marinade. Cover and refrigerate for at least 30 minutes, allowing the flavors to meld.
  2. Sauté the Onions: Heat oil in a large pan over medium heat. Add the chopped onions and sauté until they turn golden brown.
  3. Cook the Vegetables: Add the marinated vegetables and chickpeas to the pan. Cook for about 10-15 minutes, stirring occasionally until the vegetables are tender.
  4. Add Tomato Puree: Pour in the tomato puree, mixing well with the vegetables. Let it simmer for about 5 minutes.
  5. Finish with Cream: Lower the heat and stir in the cream. Simmer for another 5 minutes, allowing the sauce to thicken slightly.
  6. Garnish and Serve: Remove from heat, garnish with fresh cilantro, and serve hot.

Nutrition Facts

Understanding the nutritional profile of Vegetable Tikka Masala can help you keep track of your dietary intake:

  • Servings: This recipe serves 4 people.
  • Calories per Serving: Approximately 350 calories.

Preparation Time

One of the many advantages of Vegetable Tikka Masala is its relatively quick preparation time:

  • Marination Time: 30 minutes.
  • Cooking Time: 30 minutes.
  • Total Time: Approximately 1 hour.

How to Serve

Vegetable Tikka Masala can be served in various ways to enhance your dining experience:

  • With Rice: Serve it over a bed of fluffy basmati rice for a classic pairing.
  • With Naan: Pair it with warm naan or roti to scoop up the delicious sauce.
  • As a Wrap: Use it as a filling for wraps or pita bread for a portable meal option.
  • With Salad: Serve alongside a fresh green salad for a lighter meal.
  • Topped with Yogurt: A dollop of yogurt on top adds a cool contrast to the spices.

Additional Tips

Here are some expert tips to elevate your Vegetable Tikka Masala:

  1. Use Fresh Spices: Freshly ground spices can significantly enhance the flavor of the dish, making it more aromatic and flavorful.
  2. Customize Vegetables: Feel free to use any vegetables you have on hand. Zucchini, peas, or potatoes can be great additions.
  3. Adjust Spice Level: If you prefer a spicier dish, add more chili powder or fresh chilies to the marinade.
  4. Thicken the Sauce: If you prefer a thicker sauce, simmer it a bit longer or add a tablespoon of tomato paste.
  5. Make it Ahead: The flavors develop beautifully if made a day in advance, making it perfect for meal prep.

FAQ Section

To address some common queries, here’s a helpful FAQ section:

  • Can I make this dish vegan? Yes, simply use coconut milk instead of cream and a plant-based yogurt for marination.
  • What can I substitute for garam masala? You can use a blend of cumin, coriander, and a pinch of cinnamon and cloves as a substitute.
  • Is it possible to freeze Vegetable Tikka Masala? Absolutely! This dish freezes well. Store in an airtight container for up to three months.
  • Can I use canned tomatoes instead of puree? Yes, canned tomatoes can be blended to create a puree-like consistency.
  • How can I make it less spicy? Reduce the amount of garam masala and omit any additional chili powder or fresh chilies.

Teriyaki Glazed Salmon

When it comes to family dinners, finding a recipe that pleases everyone can be a daunting task. However, the teriyaki glazed salmon proved to be a delightful exception in our household. The moment the aroma filled the kitchen, my family gathered around with anticipation. The tender, flaky salmon bathed in the sweet and savory teriyaki sauce was an instant hit. My children, who usually shy away from fish, were asking for seconds. It was a joy to see everyone relish each bite, and it has since become a staple in our weekly meal rotation.

Ingredients

The secret to a mouthwatering teriyaki glazed salmon lies in the quality of the ingredients. Here’s what you’ll need:

  • 4 salmon fillets (about 6 ounces each)
  • 1/2 cup soy sauce
  • 1/4 cup brown sugar
  • 2 tablespoons rice vinegar
  • 1 tablespoon sesame oil
  • 2 cloves garlic, minced
  • 1 tablespoon fresh ginger, grated
  • 2 tablespoons honey
  • 1 tablespoon cornstarch
  • 1/4 cup water
  • Sesame seeds and sliced green onions for garnish

Instructions

Creating this delectable dish is straightforward and rewarding. Follow these steps to achieve the perfect teriyaki glazed salmon:

  1. Start by preparing the teriyaki sauce. In a small saucepan, combine soy sauce, brown sugar, rice vinegar, sesame oil, garlic, ginger, and honey. Heat over medium heat, stirring occasionally, until the sugar dissolves and the mixture begins to simmer.
  2. In a small bowl, mix cornstarch and water until smooth. Gradually add this mixture to the saucepan, stirring constantly until the sauce thickens. Remove from heat and set aside.
  3. Preheat your oven to 400°F (200°C).
  4. Place the salmon fillets on a baking sheet lined with parchment paper. Brush each fillet generously with the teriyaki sauce.
  5. Bake in the preheated oven for about 12-15 minutes, or until the salmon flakes easily with a fork. During the last few minutes of baking, you can switch the oven to broil to caramelize the glaze slightly.
  6. Once cooked, remove the salmon from the oven and let it rest for a few minutes. Garnish with sesame seeds and sliced green onions before serving.

Nutrition Facts

This recipe serves four people, with each serving containing approximately 350 calories. The calorie count may vary depending on the portions and specific brands of ingredients used.

Preparation Time

The preparation and cooking time for the teriyaki glazed salmon is approximately 30 minutes, making it a great option for a quick yet satisfying weeknight dinner.

How to Serve

Enhance your dining experience by serving the teriyaki glazed salmon with complementary sides:

  • Steamed jasmine rice or quinoa for a hearty base
  • Stir-fried vegetables like broccoli, bell peppers, and snap peas for added crunch
  • A fresh green salad with a light vinaigrette to balance the richness of the salmon
  • Pickled ginger or a side of kimchi for a tangy contrast
  • A slice of lemon to squeeze over the salmon for an extra burst of freshness

Additional Tips

To ensure your teriyaki glazed salmon turns out perfectly every time, consider these helpful tips:

  1. Choose the Right Salmon: Opt for fresh, high-quality salmon fillets for the best flavor and texture. Wild-caught salmon is often recommended for its rich taste.
  2. Marinate for More Flavor: If time allows, marinate the salmon in the teriyaki sauce for about 30 minutes before baking. This will infuse the fish with deeper flavors.
  3. Watch the Cooking Time: Salmon can overcook easily, so keep an eye on it while baking. It should be opaque and flake easily with a fork when done.
  4. Double the Sauce: Consider making extra teriyaki sauce to serve on the side. It’s delicious drizzled over rice or vegetables.
  5. Experiment with Garnishes: In addition to sesame seeds and green onions, try adding a sprinkle of crushed red pepper for a spicy kick.

FAQ Section

Here are some frequently asked questions about teriyaki glazed salmon:

  1. Can I use frozen salmon for this recipe?

    Yes, you can use frozen salmon fillets. Just be sure to thaw them completely in the refrigerator before cooking to ensure even cooking.

  2. Is there a substitute for sesame oil?

    If you don’t have sesame oil, you can use olive oil or omit it altogether. However, sesame oil adds a distinct flavor that enhances the dish.

  3. Can I grill the salmon instead of baking it?

    Absolutely! Grilling the salmon will add a smoky flavor. Just brush the fillets with the sauce and grill over medium heat for about 4-6 minutes per side.

  4. How long can I store leftover salmon?

    Leftover teriyaki glazed salmon can be stored in an airtight container in the refrigerator for up to 3 days. Reheat gently in the oven or microwave before serving.

  5. What can I use instead of cornstarch to thicken the sauce?

    If you prefer not to use cornstarch, arrowroot powder or tapioca starch are great alternatives that will also thicken the sauce effectively.

Moroccan-Spiced Couscous Bowl

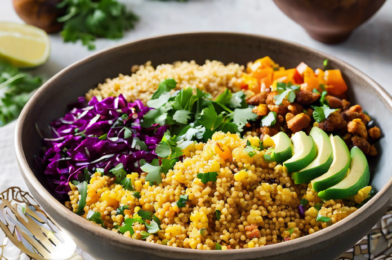
When I first stumbled upon the Moroccan-Spiced Couscous Bowl recipe, I was intrigued by its vibrant colors and aromatic spices. As someone who loves exploring global cuisines, I couldn’t resist the allure of this dish. After preparing it for a family gathering, I was delighted by the overwhelmingly positive reactions. Everyone, from the eldest to the youngest, enjoyed the warm, comforting flavors that seemed to transport us to a bustling Moroccan souk. The combination of spices, fresh ingredients, and fluffy couscous made it a memorable meal that has now become a family favorite.

Ingredients

The essence of a Moroccan-Spiced Couscous Bowl lies in its rich and diverse ingredients, each contributing to its unique taste and texture. Here’s what you’ll need:

  • Couscous: 1 cup of couscous
  • Chickpeas: 1 can (15 ounces) of chickpeas, drained and rinsed
  • Vegetables: 1 bell pepper (any color), 1 zucchini, and 1 red onion, all chopped
  • Spices: 1 teaspoon of ground cumin, 1 teaspoon of ground coriander, 1 teaspoon of paprika, 1/2 teaspoon of turmeric, and a pinch of cayenne pepper
  • Olive oil: 2 tablespoons
  • Lemon juice: Juice of 1 lemon
  • Fresh herbs: A handful of chopped fresh parsley and mint
  • Salt and pepper: To taste

Instructions

Preparing the Moroccan-Spiced Couscous Bowl is a delightful culinary journey that requires some attention to detail but is straightforward enough for cooks of all levels. Here’s how to make it:

  1. Prepare the couscous: In a medium saucepan, bring 1 1/4 cups of water to a boil. Stir in the couscous, cover, and remove from heat. Let it sit for about 5 minutes, then fluff with a fork.
  2. Roast the vegetables: Preheat your oven to 400°F (200°C). Arrange the chopped bell pepper, zucchini, and red onion on a baking sheet. Drizzle with olive oil and season with salt, pepper, cumin, coriander, paprika, turmeric, and cayenne pepper. Toss to coat evenly. Roast for 20-25 minutes or until the vegetables are tender and slightly caramelized.
  3. Prepare the chickpeas: In a skillet over medium heat, add a tablespoon of olive oil. Add the drained chickpeas and sauté for 5-7 minutes until they are slightly crispy. Season with a pinch of salt and any remaining spices.
  4. Assemble the bowl: In a large bowl, combine the couscous, roasted vegetables, and sautéed chickpeas. Drizzle with lemon juice and add the chopped parsley and mint. Toss everything together until well combined.
  5. Serve: Transfer the mixture to serving bowls. Garnish with additional fresh herbs if desired. Enjoy your Moroccan-Spiced Couscous Bowl warm or at room temperature.

Nutrition Facts

This recipe serves approximately 4 people, with each serving containing about 300 calories. It’s a nutritious option packed with protein, fiber, and essential vitamins, making it a wholesome choice for a balanced meal.

Preparation Time

The beauty of this dish is its simplicity and speed. The total preparation and cooking time is around 40 minutes, making it an excellent option for a weeknight dinner or a quick lunch.

How to Serve

Serving the Moroccan-Spiced Couscous Bowl can be as versatile as its flavors. Here are some ideas:

  • As a main course, accompanied by a side of warm pita bread.
  • Topped with a dollop of Greek yogurt for added creaminess.
  • Alongside grilled chicken or lamb skewers for a more substantial meal.
  • With a sprinkle of toasted almonds or pine nuts for extra crunch.
  • Incorporating some crumbled feta cheese for a tangy contrast.

Additional Tips

  • Spice level adjustment: If you prefer a milder dish, reduce the amount of cayenne pepper or omit it altogether.
  • Vegetarian variation: For a vegan version, ensure that any additional toppings or sides, such as yogurt, are plant-based.
  • Herb freshness: Use fresh herbs for the best flavor. If unavailable, dried herbs can suffice but adjust the quantity accordingly.
  • Leftovers: This dish keeps well in the refrigerator for up to three days. It can be enjoyed cold or reheated for a quick meal.
  • Experimentation: Feel free to experiment with other vegetables like eggplant or carrots for added variety.

FAQ Section

1. Can I use whole wheat couscous for this recipe?

Yes, you can substitute whole wheat couscous for a healthier option. The cooking method remains the same, though the texture might be slightly different.

2. What can I use instead of chickpeas?

If you’re not a fan of chickpeas, you can replace them with lentils or black beans. These alternatives will provide a similar protein boost and blend well with the spices.

3. Can I prepare the couscous bowl in advance?

Absolutely. You can prepare the components ahead of time and store them separately. Combine them just before serving to maintain the freshness of the herbs and textures.

4. Is this dish suitable for a gluten-free diet?

While couscous is not gluten-free, you can substitute it with a gluten-free grain such as quinoa or millet to accommodate dietary restrictions.

5. How can I make the dish more filling?

To make the couscous bowl more filling, consider adding grilled protein, such as chicken or tofu, or increasing the quantity of chickpeas. Adding a variety of nuts and seeds can also enhance its satiety.

Grilled Halloumi and Veggie Kebabs

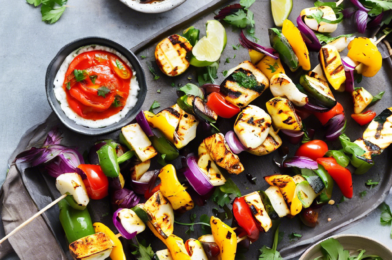
Grilled Halloumi and Veggie Kebabs have become a staple in our household, especially during the summer months when grilling becomes not just a cooking method but a cherished ritual. The moment these kebabs hit the grill, an irresistible aroma fills the air, drawing family members outside, eager to taste the deliciousness that awaits. The combination of smoky, caramelized vegetables and the rich, salty flavor of halloumi cheese is nothing short of a revelation. My family absolutely adored this recipe; even the pickiest eaters couldn’t resist the savory, slightly charred bites. It’s a dish that’s not only pleasing to the palate but also a visual feast, with vibrant colors that make it as delightful to look at as it is to eat.

Ingredients

The beauty of Grilled Halloumi and Veggie Kebabs lies in their simplicity and versatility. Here’s what you’ll need:

  • 1 block of halloumi cheese, cut into 1-inch cubes
  • 1 red bell pepper, cut into 1-inch pieces
  • 1 yellow bell pepper, cut into 1-inch pieces
  • 1 zucchini, sliced into thick rounds
  • 1 red onion, cut into wedges
  • Cherry tomatoes, whole
  • 2 tablespoons olive oil
  • 1 tablespoon balsamic vinegar
  • 1 teaspoon dried oregano
  • Salt and pepper to taste
  • Wooden or metal skewers

Instructions

To create these delectable kebabs, follow these straightforward steps:

  1. Begin by soaking the wooden skewers in water for at least 30 minutes to prevent them from burning on the grill. If using metal skewers, this step can be skipped.
  2. In a large mixing bowl, combine the olive oil, balsamic vinegar, dried oregano, salt, and pepper. Stir well to create a flavorful marinade.
  3. Add the halloumi cubes, bell peppers, zucchini, red onion, and cherry tomatoes to the bowl. Toss everything together until the ingredients are well coated with the marinade.
  4. Thread the marinated ingredients onto the skewers, alternating between the different veggies and halloumi cubes to ensure a variety of flavors in each bite.
  5. Preheat your grill to medium-high heat. Once hot, place the kebabs on the grill and cook for about 8-10 minutes, turning occasionally, until the vegetables are tender and slightly charred, and the halloumi is golden and crisp.
  6. Remove the kebabs from the grill and allow them to cool slightly before serving. Enjoy the kebabs warm for the best taste experience.

Nutrition Facts

These kebabs are not only delicious but also nutritious, making them a great addition to any meal plan. Here are the nutrition details:

  • Servings: 4 kebabs
  • Calories per serving: Approximately 250 calories

Preparation Time

Planning your cooking schedule is important, and this recipe is wonderfully time-efficient:

  • Prep time: 20 minutes
  • Cooking time: 10 minutes
  • Total time: 30 minutes

How to Serve

Serving these kebabs can be as simple or as elaborate as you desire. Here are some serving suggestions:

  • Serve over a bed of couscous or quinoa for a filling meal.
  • Add a side of tzatziki sauce for a refreshing dip.
  • Pair with a fresh Greek salad to enhance the Mediterranean flavors.
  • Include warm pita bread for a complete and satisfying meal.
  • Complement with a glass of chilled white wine for a perfect summer dinner.

Additional Tips

To make the most out of this recipe, consider these additional tips:

  1. Cut Evenly: Ensure all the vegetables and halloumi are cut to similar sizes for even cooking.
  2. Marinate Longer: If time permits, let the ingredients marinate for an hour to deepen the flavors.
  3. Use Fresh Ingredients: Fresh vegetables and good-quality halloumi make a significant difference in taste.
  4. Experiment with Spices: Feel free to add other herbs like thyme or rosemary for a different flavor profile.
  5. Grill Temperature: Maintain a medium-high grill temperature to prevent burning while achieving a nice char.

FAQ Section

Here are some frequently asked questions about Grilled Halloumi and Veggie Kebabs:

  1. Can I use other vegetables? Absolutely! Feel free to experiment with mushrooms, eggplant, or asparagus based on your preference.
  2. What if I don’t have a grill? You can use a grill pan on your stovetop or even bake them in the oven at 400°F until the veggies are tender.
  3. Is there a substitute for halloumi cheese? Paneer or firm tofu can be a great substitute if halloumi is unavailable.
  4. How do I store leftovers? Store any leftover kebabs in an airtight container in the refrigerator for up to 3 days. Reheat them on a grill or in a pan before serving.
  5. Can I make these kebabs in advance? Yes, you can prepare and marinate the ingredients a day ahead and grill them fresh when needed.

Grilled Halloumi and Veggie Kebabs are not only a treat for the tastebuds but also a wholesome addition to any gathering. With this detailed guide, you’re well-equipped to impress your family and friends with a dish that’s both simple to prepare and delightfully complex in flavor. Enjoy the grilling season with this versatile and healthy recipe that promises to bring joy to every table!

Creamy Broccoli Soup with Croutons

There’s something incredibly comforting about a bowl of homemade soup, especially when the weather starts to turn chilly. Recently, I tried a new recipe for Creamy Broccoli Soup with Croutons, and it was an instant hit with my family. The rich and velvety texture of the soup, combined with the crispy croutons, made for a perfect harmony of flavors and textures. My kids, who are usually hesitant about eating greens, couldn’t get enough of it. The soup was so filling and satisfying that it became an instant contender for our weeknight dinner rotation. If you’re looking for a cozy meal to please the entire family, this recipe is a must-try.

Ingredients

  • 2 tablespoons olive oil
  • 1 large onion, chopped
  • 2 cloves garlic, minced
  • 4 cups broccoli florets
  • 4 cups vegetable broth
  • 1 cup heavy cream
  • Salt and pepper to taste
  • 1 cup cubed bread (for croutons)
  • 2 tablespoons butter

Instructions

Start by heating the olive oil in a large pot over medium heat. Add the chopped onion and garlic, cooking until the onion is translucent, about 5 minutes. Carefully add the broccoli florets to the pot and stir them around to coat with the oil, allowing them to cook for another 3-4 minutes. Next, pour in the vegetable broth, bringing the mixture to a boil before reducing the heat to let it simmer. Cover the pot and let the broccoli cook until tender, approximately 10-15 minutes.

Once the broccoli is tender, use an immersion blender to puree the mixture until smooth. If you don’t have an immersion blender, you can carefully transfer the soup to a standard blender, blending it in batches. Return the pureed soup to the pot and stir in the heavy cream. Season with salt and pepper to taste, allowing the soup to heat through on low heat for an additional 5 minutes.

For the croutons, melt the butter in a skillet over medium heat. Add the cubed bread, tossing to coat evenly with butter. Cook the bread cubes, stirring frequently, until golden and crispy, about 5-7 minutes. Remove from heat and set aside.

Nutrition Facts

Servings: 6

Calories per serving: Approximately 250

Preparation Time

Total Time: 40 minutes

Prep Time: 10 minutes

Cook Time: 30 minutes

How to Serve

  • Serve the soup hot, topped with a handful of crispy croutons.
  • Pair with a fresh green salad for a balanced meal.
  • Garnish with shredded cheese or a dollop of sour cream for extra richness.
  • Enjoy with a side of crusty bread to soak up every drop.
  • Sprinkle with chopped chives or parsley for a pop of color.

Additional Tips

  • Tip 1: For a vegan version, substitute the heavy cream with coconut milk and use vegan butter for the croutons.
  • Tip 2: Add a pinch of nutmeg to the soup for a subtle, warming spice.
  • Tip 3: If you prefer a chunkier soup, reserve some broccoli florets before blending and add them back to the soup afterward.
  • Tip 4: Experiment with different types of bread for the croutons, like sourdough or rye, for varied flavors.
  • Tip 5: Store leftovers in an airtight container in the fridge for up to three days, reheating gently before serving.

FAQ Section

Q: Can I use frozen broccoli instead of fresh?

A: Yes, you can use frozen broccoli. Just add it directly to the pot without thawing; it will cook in the same amount of time.

Q: How can I make the soup thicker?

A: To thicken the soup, you can add a peeled and diced potato to the pot while cooking the broccoli. Alternatively, a tablespoon of flour or cornstarch mixed with a little water can be stirred in.

Q: Can I freeze this soup?

A: Yes, you can freeze the soup without the croutons. Allow it to cool completely before transferring it to a freezer-safe container. Thaw and reheat it on the stove over low heat, adding fresh croutons when serving.

Q: What other seasonings can enhance the flavor of the soup?

A: You can try adding a pinch of cayenne pepper for heat, or a teaspoon of dried herbs like thyme or basil for additional flavor.

Q: Can I use milk instead of heavy cream?

A: Yes, you can use milk, but the soup will be less creamy. For a similar texture, consider adding a tablespoon of flour to the milk before mixing it into the soup.

Stuffed Acorn Squash with Quinoa

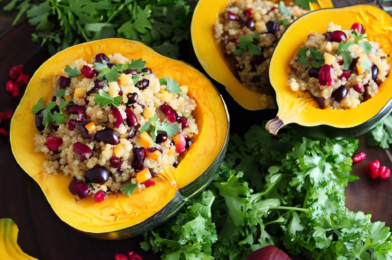
In the cozy ambiance of my kitchen, I recently embarked on a gastronomic adventure with a dish that has quickly become a family favorite: Stuffed Acorn Squash with Quinoa. The first hint of autumn in the air inspired me to seek out a recipe that encapsulates the warmth and richness of the season, and this dish did not disappoint. The sweet, nutty aroma of roasting acorn squash filled the house, drawing my family to the kitchen like moths to a flame. The first bite was a symphony of flavors and textures—the creamy squash paired with the nutty crunch of quinoa, all tied together with a medley of spices and herbs. It was not just a meal but an experience, one that left my family asking for seconds and already anticipating the next time we would indulge in this delightful dish.

Ingredients

Creating a perfect Stuffed Acorn Squash with Quinoa begins with gathering the freshest ingredients. For this recipe, you’ll need:

  • 2 medium acorn squashes, halved and seeds removed
  • 1 cup quinoa, rinsed
  • 2 cups vegetable broth
  • 1 small onion, finely chopped
  • 2 cloves garlic, minced
  • 1 red bell pepper, diced
  • 1 cup mushrooms, diced
  • 1/2 cup dried cranberries
  • 1/2 cup walnuts, chopped
  • 1 teaspoon dried thyme
  • 1 teaspoon dried sage
  • Salt and pepper to taste
  • Olive oil
  • Fresh parsley for garnish

Instructions

To bring this delightful dish to life, follow these steps:

  1. Preheat your oven to 375°F (190°C). Prepare the acorn squashes by cutting them in half and scooping out the seeds. Drizzle with olive oil, and season with salt and pepper. Place them cut side down on a baking sheet lined with parchment paper and roast for about 30 minutes or until tender.
  2. While the squash is roasting, rinse the quinoa under cold water. In a medium saucepan, bring the vegetable broth to a boil, add the quinoa, reduce the heat to low, cover, and simmer for about 15 minutes or until the quinoa is fluffy and the liquid is absorbed.
  3. In a skillet, heat a tablespoon of olive oil over medium heat. Sauté the onions and garlic until they are translucent and fragrant. Add the red bell pepper and mushrooms, cooking until they are soft.
  4. Mix in the cooked quinoa, dried cranberries, walnuts, thyme, and sage into the skillet. Season with salt and pepper to taste. Stir until all ingredients are well combined and heated through.
  5. Remove the squash from the oven and carefully turn them over. Fill each squash half with the quinoa mixture, packing it in gently. Return the stuffed squash to the oven and bake for another 10-15 minutes.
  6. Once baked, remove from the oven and let them cool slightly before garnishing with fresh parsley. Serve warm and enjoy!

Nutrition Facts

This recipe serves four people, with each serving containing approximately 350 calories. It’s a wholesome dish that balances macronutrients effectively, making it ideal for a nutritious dinner.

Preparation Time

From start to finish, preparing Stuffed Acorn Squash with Quinoa takes about 1 hour, making it a perfect choice for a weekend dinner when you have a little more time to spend in the kitchen. The hands-on time is around 30 minutes, with the remainder being passive cooking time.

How to Serve

Serving Stuffed Acorn Squash with Quinoa can be as versatile as the dish itself. Here are a few ideas:

  • As a Main Course: Serve the squash halves warm, with a side salad to complement the hearty flavors.
  • As a Side Dish: Pair with a protein of choice, such as grilled chicken or a plant-based alternative.
  • For a Holiday Spread: This dish makes a beautiful and colorful addition to a festive table.
  • For Meal Prep: Prepare the quinoa filling in advance and store in the fridge for quick weekday dinners.
  • As a Vegetarian Option: Serve as a satisfying vegetarian or vegan dish that’s sure to please everyone at the table.

Additional Tips

Here are some tips to ensure your Stuffed Acorn Squash with Quinoa turns out perfectly every time:

  • Tip 1: When selecting acorn squashes, look for ones that are heavy for their size and have a hard, dark green skin. This indicates ripeness and freshness.
  • Tip 2: For added flavor, consider toasting the walnuts before adding them to the quinoa mixture. This brings out a deeper, richer nutty taste.
  • Tip 3: If you prefer a little heat, add a pinch of red pepper flakes to the quinoa mixture for a subtle kick.
  • Tip 4: To save time, the squash can be roasted a day ahead and stored in the refrigerator. Simply reheat before stuffing and baking.
  • Tip 5: Experiment with different herbs and spices in the quinoa mix, such as cumin or coriander, to bring new dimensions to the flavor profile.

FAQ Section

Here are some common questions about making Stuffed Acorn Squash with Quinoa:

  1. Q: Can I use another grain instead of quinoa?
    A: Yes, you can substitute quinoa with other grains such as farro, bulgur, or brown rice. Adjust the cooking time accordingly based on the grain you choose.
  2. Q: Is it necessary to peel the acorn squash?
    A: No, there’s no need to peel acorn squash. The skin becomes tender after roasting and is edible, adding extra fiber to the dish.
  3. Q: Can I make this dish vegan?
    A: Absolutely! This recipe is already vegan as it uses vegetable broth and plant-based ingredients.
  4. Q: How do I store leftovers?
    A: Store any leftovers in an airtight container in the refrigerator for up to 3 days. Reheat in the oven or microwave before serving.
  5. Q: Can I freeze stuffed acorn squash?
    A: Yes, you can freeze the cooked stuffed acorn squash. Wrap each half in plastic wrap and then in aluminum foil before placing in the freezer. Thaw overnight in the refrigerator and reheat in the oven.

Thai Peanut Noodles with Veggies

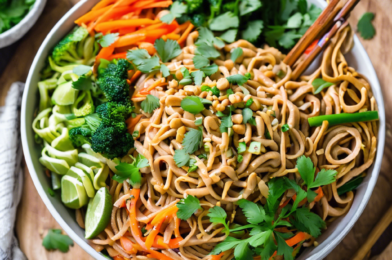
There’s something wonderfully comforting about a bowl of Thai Peanut Noodles with Veggies. The harmonious blend of creamy peanut sauce, fresh vegetables, and tender noodles is not only a delight to the palate but also a feast for the senses. I recently tried out this recipe for a family dinner, and it was met with resounding applause. The rich, nutty flavors balanced with a hint of spice and the freshness of the vegetables made it an instant hit. Even my picky eaters went back for seconds, which in my household, is the highest compliment a dish can receive. It’s a recipe that’s not only delicious but also brings a touch of exotic flavors to the dinner table, making it a favorite we’ll return to time and again.

Ingredients

To craft this delightful dish, you’ll need a mix of fresh and pantry ingredients. Here’s what you’ll need:

  • 8 ounces of rice noodles
  • 1 cup of sliced bell peppers (a mix of red and yellow adds vibrant color)
  • 1 cup of shredded carrots
  • 1 cup of broccoli florets
  • 1/2 cup of sliced green onions
  • 1/2 cup of chopped cilantro
  • 1/4 cup of creamy peanut butter
  • 2 tablespoons of soy sauce
  • 1 tablespoon of lime juice
  • 1 tablespoon of honey or maple syrup
  • 1 tablespoon of sesame oil
  • 1 teaspoon of ginger, minced
  • 1 teaspoon of garlic, minced
  • 1/4 teaspoon of red pepper flakes (adjust to taste)
  • 1/4 cup of roasted peanuts, chopped (for garnish)
  • Salt and pepper to taste

Instructions

Begin by cooking the rice noodles according to the package instructions. Once cooked, drain and rinse them under cold water to prevent sticking. Set aside.

In a large skillet over medium heat, add the sesame oil. Once warm, add the minced garlic and ginger, sautéing until fragrant, about 1 minute. Add the sliced bell peppers, shredded carrots, and broccoli florets to the skillet. Stir-fry the vegetables for about 5 minutes, until they are tender but still crisp.

While the vegetables are cooking, prepare the peanut sauce. In a small bowl, whisk together the peanut butter, soy sauce, lime juice, honey or maple syrup, and red pepper flakes. Adjust the consistency with a bit of water if needed to make a smooth sauce.

Once the vegetables are ready, add the cooked noodles to the skillet, followed by the peanut sauce. Toss everything together until well coated. Cook for an additional 2-3 minutes, allowing the noodles to absorb the flavors of the sauce.

Remove the skillet from heat and stir in the sliced green onions and chopped cilantro. Season with salt and pepper according to your taste.

Serve the noodles hot, garnished with chopped roasted peanuts for a delightful crunch.

Nutrition Facts

This recipe serves 4 people. Each serving contains approximately 450 calories, offering a balanced meal that’s packed with nutrients and flavor.

Preparation Time

The preparation and cooking time for this dish is relatively quick, making it perfect for busy weeknights. You can have this delicious meal ready in just 30 minutes, with 10 minutes for prep and 20 minutes for cooking.

How to Serve

The beauty of Thai Peanut Noodles with Veggies is its versatility. Here are some suggestions on how to serve this delightful dish:

  • As a Main Course: Serve the noodles in large bowls, allowing guests to enjoy the full spectrum of flavors and textures.
  • With a Side Salad: Pair the noodles with a simple green salad dressed in a light vinaigrette to complement the rich peanut flavors.
  • With Grilled Protein: Add grilled chicken or tofu on top for a protein boost, making it a more substantial meal.
  • Family Style: Present the noodles on a large platter for communal eating, perfect for family dinners or gatherings.
  • As Leftovers: These noodles taste great cold or reheated, making them an excellent choice for next-day lunches.

Additional Tips

To make the most out of your Thai Peanut Noodles with Veggies, consider these helpful tips:

  1. Use Fresh Ingredients: Fresh vegetables and herbs enhance the flavors, providing a vibrant and aromatic dish.
  2. Adjust Spice Levels: Customize the heat to your preference by varying the amount of red pepper flakes.
  3. Peanut Butter Alternative: For a nut-free version, swap peanut butter with sunflower seed butter.
  4. Make it Gluten-Free: Ensure the soy sauce is gluten-free or replace it with tamari or coconut aminos.
  5. Prep Ahead: Vegetables can be prepped in advance, making the cooking process quicker and easier.

FAQ Section

Here are some frequently asked questions about Thai Peanut Noodles with Veggies:

  1. Can I use other types of noodles?
    Yes, you can substitute rice noodles with soba noodles, spaghetti, or even zucchini noodles for a low-carb option.
  2. How do I store leftovers?
    Store leftovers in an airtight container in the refrigerator for up to 3 days. Reheat in the microwave or enjoy them cold.
  3. What can I use instead of cilantro?
    If you’re not a fan of cilantro, fresh basil or parsley can be used as alternatives.
  4. Can I make this dish vegan?
    Absolutely! This dish is naturally vegan if you use maple syrup instead of honey.
  5. Is this dish suitable for meal prep?
    Yes, it’s perfect for meal prep. Prepare all the components in advance and store them separately to maintain freshness.

Beefless Meatballs with Marinara

There’s something truly magical about gathering around the dining table with family and friends, especially when you present a dish that surprises and delights everyone. Recently, I decided to try a recipe for beefless meatballs with marinara sauce, and it was an absolute hit! Even the most ardent meat-lovers among us were astonished by the rich flavors and satisfying textures. This dish not only catered to the vegetarians in the family but also opened the palates of those who were skeptical about plant-based meals. The meatballs, made primarily from lentils, oats, and a variety of spices, combined with a robust marinara sauce, offered a delightful blend of flavors and a hearty, comforting meal that everyone loved. Let’s dive into the details of this delicious recipe that has now become a staple in our household.

Ingredients

The key to these delightful beefless meatballs lies in their carefully chosen ingredients that provide both flavor and nutrition. Here’s what you’ll need:

  • 1 cup of cooked lentils
  • 1/2 cup of breadcrumbs
  • 1/4 cup of rolled oats
  • 1/4 cup of grated Parmesan cheese (or nutritional yeast for a vegan option)
  • 2 tablespoons of chopped fresh parsley
  • 1 teaspoon of garlic powder
  • 1 teaspoon of onion powder
  • 1/2 teaspoon of smoked paprika
  • Salt and pepper to taste
  • 1 egg (or flax egg for a vegan option)
  • 2 cups of marinara sauce, store-bought or homemade
  • Olive oil for frying

Instructions

Creating these beefless meatballs is a straightforward process, but it’s important to follow each step to ensure they hold together and taste fantastic.

  1. Prepare the Mixture: In a large bowl, combine the cooked lentils, breadcrumbs, oats, Parmesan cheese, parsley, garlic powder, onion powder, smoked paprika, salt, and pepper. Mix well to ensure the spices are evenly distributed.
  2. Add the Binder: Incorporate the egg into the mixture (or flax egg if you’re keeping it vegan). The mixture should be moist but firm enough to shape into balls. If it’s too wet, add more breadcrumbs to achieve the desired consistency.
  3. Shape the Meatballs: Using your hands, shape the mixture into small balls, roughly the size of a golf ball. Place them on a plate or a baking sheet as you go.
  4. Cook the Meatballs: Heat a generous amount of olive oil in a large skillet over medium heat. Carefully add the meatballs to the pan, making sure not to overcrowd them. Cook for about 7-10 minutes, turning occasionally, until they are golden brown on all sides.
  5. Simmer in Marinara: Once the meatballs are browned, transfer them to a pot with the marinara sauce. Simmer on low heat for 15-20 minutes to allow the flavors to meld and the meatballs to absorb some of the sauce.

Nutrition Facts

When it comes to nutrition, these beefless meatballs pack a punch! This recipe makes about 4 servings, and each serving contains approximately 350 calories. It’s a wholesome meal that provides a good balance of proteins, carbohydrates, and fats, ensuring you feel full and satisfied.

Preparation Time

One of the fantastic aspects of this recipe is that it doesn’t require an entire afternoon to prepare. From start to finish, you’re looking at about 45 minutes of total preparation and cooking time. This makes it a perfect choice for a weeknight dinner or a leisurely weekend meal.

How to Serve

These beefless meatballs with marinara can be served in a variety of delicious ways:

  • Over Pasta: Classic and comforting, serve the meatballs over a bed of spaghetti or your favorite pasta variety.
  • With Crusty Bread: Enjoy them with a side of warm, crusty bread to soak up all the luscious marinara sauce.
  • In a Sub Sandwich: Create a hearty sub sandwich with the meatballs, topped with melted cheese and fresh basil.
  • On a Salad: For a lighter option, serve the meatballs atop a fresh, crisp salad.
  • As an Appetizer: Serve them as bite-sized appetizers at a party, using toothpicks for easy grabbing.

Additional Tips

To ensure your beefless meatballs turn out perfectly every time, consider the following tips:

  1. Ensure Lentils are Well-Cooked: Make sure your lentils are thoroughly cooked and tender, as this will help them blend seamlessly into the meatball mixture.
  2. Adjust Seasonings to Taste: Don’t hesitate to adjust the spices to suit your personal preferences. A little more garlic powder or smoked paprika can add an extra punch of flavor.
  3. Use a Non-Stick Skillet: A non-stick skillet will help prevent the meatballs from sticking during the frying process, ensuring they maintain their shape.
  4. Experiment with Sauces: While marinara is a classic choice, feel free to experiment with different sauces like spicy arrabbiata or creamy Alfredo for a unique twist.
  5. Make Ahead: These meatballs can be made ahead of time and stored in the refrigerator for up to three days. They also freeze well for up to a month, making them a convenient meal prep option.

FAQ Section

Here are some frequently asked questions about making beefless meatballs with marinara:

Q: Can I use canned lentils instead of cooking them from scratch?

A: Yes, canned lentils can be a convenient alternative. Just be sure to drain and rinse them well before using them in the recipe.

Q: Is there a gluten-free option for the breadcrumbs?

A: Absolutely! You can substitute gluten-free breadcrumbs or even crushed gluten-free crackers to keep the recipe gluten-free.

Q: What can I use as a binder instead of an egg?

A: A flax egg is a great vegan alternative. Simply mix one tablespoon of ground flaxseed with three tablespoons of water and let it sit for a few minutes until it thickens.

Q: Can I bake the meatballs instead of frying them?

A: Yes, baking is a healthier alternative. Place the meatballs on a baking sheet lined with parchment paper and bake at 375°F (190°C) for about 25 minutes, turning them halfway through.

Q: How can I store leftovers?

A: Store any leftover meatballs in an airtight container in the refrigerator for up to three days. They can be reheated in the microwave or on the stovetop.

With these detailed insights and instructions, you’re all set to create a delicious and satisfying meal that will impress even the most discerning of taste buds. Whether you’re serving it to family, friends, or simply enjoying a cozy dinner for yourself, these beefless meatballs with marinara will surely become a favorite in your culinary repertoire. Enjoy!