Chai-Spiced Rice Pudding

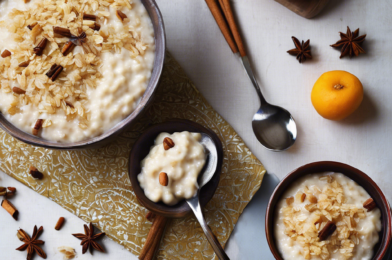
There’s something incredibly comforting about a steaming bowl of chai-spiced rice pudding. This dessert, with its rich and creamy texture, filled with the aromatic spices of chai, is a delight that my family has come to adore. The first time I made it, I was pleasantly surprised by how the spices perfectly complemented the sweet creaminess of the pudding. It quickly became a family favorite, with everyone eagerly anticipating the warm, spicy-sweet aroma that fills the kitchen as it cooks. Each spoonful is like a cozy hug, making it the perfect dessert for chilly evenings.

Ingredients

To create this delectable treat, you’ll need the following ingredients:

  • 1 cup of basmati rice
  • 4 cups of whole milk
  • 1 cup of heavy cream
  • 1/2 cup of granulated sugar
  • 1/4 cup of brown sugar
  • 1 teaspoon of vanilla extract
  • 1/2 teaspoon of ground cinnamon
  • 1/2 teaspoon of ground cardamom
  • 1/4 teaspoon of ground cloves
  • 1/4 teaspoon of ground ginger
  • 1/4 teaspoon of ground allspice
  • 1/4 teaspoon of salt
  • 1/4 cup of raisins (optional)
  • Chopped nuts for garnish (optional)

Instructions

Creating chai-spiced rice pudding is a straightforward process. Follow these steps for a dessert that’s sure to impress:

  1. Begin by rinsing the basmati rice under cold water until the water runs clear. This step is crucial in removing excess starch, which could otherwise make the pudding too sticky.
  2. In a large saucepan, combine the rinsed rice, whole milk, and heavy cream. Bring the mixture to a gentle simmer over medium heat, stirring frequently to prevent the rice from sticking to the bottom of the pan.
  3. Once the rice begins to soften, usually after about 20 minutes, add the granulated sugar, brown sugar, vanilla extract, and all the spices. Continue to cook, stirring occasionally, until the rice is tender and the pudding has thickened to your desired consistency.
  4. If you are using raisins, stir them in during the last 10 minutes of cooking. They will plump up and add a delightful chewiness to the pudding.
  5. Once the pudding is done, remove it from the heat and let it cool slightly. It will continue to thicken as it cools.
  6. Serve the pudding warm or chilled, garnished with chopped nuts if desired.

Nutrition Facts

This recipe serves 6 people. Each serving contains approximately 350 calories. The calorie count may vary slightly depending on the specific ingredients used and any optional additions like nuts or raisins.

Preparation Time

The preparation time for chai-spiced rice pudding is about 10 minutes, with an additional cooking time of approximately 40 minutes. This brings the total time to just under an hour, making it a relatively quick dessert to prepare while still delivering on flavor and comfort.

How to Serve

  • Serve warm for a comforting winter treat.
  • Chill in the refrigerator for a refreshing summer dessert.
  • Top with a dollop of whipped cream for extra indulgence.
  • Sprinkle with a pinch of extra cinnamon or nutmeg before serving.
  • Add a scoop of vanilla ice cream on the side for an à la mode experience.

Additional Tips

Here are some additional tips to ensure your chai-spiced rice pudding turns out perfectly every time:

  1. Use fresh spices: Freshly ground spices will enhance the flavor of your pudding, making it more aromatic and flavorful.
  2. Adjust the sweetness: Feel free to adjust the amount of sugar to suit your taste preference. Less sugar will allow the spices to shine more.
  3. Experiment with milk: For a richer flavor, try substituting part of the milk with coconut milk or almond milk.
  4. Don’t rush the process: Cook the pudding slowly over low heat to prevent burning and ensure the rice is cooked through.
  5. Stir frequently: This will prevent the rice from sticking to the bottom of the pan and help achieve a creamy consistency.

FAQ Section

Here are some frequently asked questions about chai-spiced rice pudding:

  1. Can I use a different type of rice? Yes, you can use other varieties like jasmine or arborio rice, but the cooking time and liquid ratio may need to be adjusted.
  2. Is it necessary to soak the rice? Soaking is not required, but rinsing the rice thoroughly is important to remove excess starch.
  3. Can I make this pudding dairy-free? Absolutely! Substitute the milk and cream with your favorite non-dairy alternatives like almond milk, coconut milk, or oat milk.
  4. How long will the pudding keep? Store the pudding in an airtight container in the refrigerator for up to 3-4 days.
  5. Can I freeze rice pudding? Yes, you can freeze rice pudding, but be aware that the texture may change slightly. Thaw it in the fridge and stir well before serving.

Pistachio Shortbread Cookies

There’s something truly magical about the aroma of freshly baked cookies wafting through the house, and pistachio shortbread cookies take that experience to a whole new level. Recently, I decided to try out a new recipe for these delightful treats, and my family couldn’t have been happier. As the cookies cooled on the rack, the kids hovered around the kitchen, eager to sample the fruits of my labor. It was an instant hit! The subtle nuttiness from the pistachios combined with the buttery texture of the shortbread created a symphony of flavors that was both comforting and indulgent. Even my husband, who usually prefers his desserts on the simpler side, couldn’t resist reaching for seconds. These cookies have quickly become a family favorite, and I’m excited to share the recipe with you.

Ingredients

To create these delectable pistachio shortbread cookies, you will need the following ingredients:

  • 1 cup unsalted butter, softened
  • 1/2 cup granulated sugar
  • 1 teaspoon vanilla extract
  • 2 cups all-purpose flour
  • 1/2 teaspoon salt
  • 1 cup shelled pistachios, chopped
  • Optional: 1/4 cup powdered sugar for dusting

These ingredients come together to create a delightful balance of flavors, with the pistachios providing a unique twist on the classic shortbread recipe. Be sure to use high-quality butter and fresh pistachios for the best results.

Instructions

Making pistachio shortbread cookies is a straightforward process that even novice bakers can master. Follow these steps to create your own batch of delicious cookies:

  1. Preheat your oven to 350°F (175°C) and line a baking sheet with parchment paper.
  2. In a large mixing bowl, cream together the softened butter and granulated sugar using an electric mixer until the mixture is light and fluffy. This should take about 3-4 minutes.
  3. Add in the vanilla extract and mix until combined.
  4. In a separate bowl, whisk together the all-purpose flour and salt. Gradually add this dry mixture to the butter and sugar, mixing on low speed until the dough just comes together.
  5. Fold in the chopped pistachios until they are evenly distributed throughout the dough.
  6. Divide the dough into two equal portions and shape each into a log, approximately 2 inches in diameter. Wrap the logs in plastic wrap and refrigerate for at least 1 hour, or until firm.
  7. Once the dough has chilled, slice the logs into 1/4-inch thick rounds and place them on the prepared baking sheet, spacing them about 1 inch apart.
  8. Bake the cookies in the preheated oven for 12-15 minutes, or until the edges are lightly golden. Be careful not to overbake, as shortbread cookies should remain pale in color.
  9. Allow the cookies to cool on the baking sheet for 5 minutes before transferring them to a wire rack to cool completely.
  10. Optional: Dust the cooled cookies with powdered sugar before serving for an extra touch of sweetness.

And there you have it! Freshly baked pistachio shortbread cookies that are perfect for any occasion.

Nutrition Facts

This recipe makes approximately 24 cookies, with each serving consisting of one cookie. Here are the nutrition facts per serving:

  • Calories: 120
  • Total Fat: 8g
  • Saturated Fat: 4g
  • Cholesterol: 20mg
  • Sodium: 60mg
  • Total Carbohydrates: 11g
  • Dietary Fiber: 0.5g
  • Sugars: 4g
  • Protein: 2g

These cookies are a rich and indulgent treat, so enjoy them in moderation as part of a balanced diet.

Preparation Time

One of the best things about this pistachio shortbread cookie recipe is how quick and easy it is to prepare. Here’s a breakdown of the time you’ll need:

  • Preparation Time: 20 minutes
  • Chill Time: 1 hour
  • Cooking Time: 15 minutes
  • Total Time: Approximately 1 hour and 35 minutes

This makes them an ideal choice for a last-minute dessert or a quick afternoon baking project.

How to Serve

These pistachio shortbread cookies are incredibly versatile and can be served in a variety of ways:

  • With Tea or Coffee: The buttery texture of the cookies pairs perfectly with a hot cup of tea or coffee.
  • As a Dessert Platter: Arrange them on a dessert platter with other cookies and treats for a beautiful presentation at gatherings.
  • As a Gift: Package them in a decorative tin or box for a thoughtful homemade gift.
  • With Ice Cream: Crumble the cookies over a scoop of vanilla ice cream for an indulgent dessert.
  • During Holidays: These cookies make a festive addition to holiday cookie exchanges and parties.

No matter how you choose to serve them, these cookies are sure to be a hit with everyone who tries them.

Additional Tips

To ensure your pistachio shortbread cookies turn out perfectly every time, consider these additional tips:

  1. Use Cold Butter: For the best texture, make sure your butter is cold and just softened, not melted.
  2. Don’t Overmix: Overmixing the dough can lead to tough cookies, so mix just until the ingredients are combined.
  3. Chill the Dough: Chilling the dough is crucial for maintaining the shape of the cookies during baking.
  4. Experiment with Flavors: For a different twist, try adding a hint of lemon zest or almond extract to the dough.
  5. Store Properly: Store the cookies in an airtight container to keep them fresh and crisp.

These tips will help you achieve the perfect batch of pistachio shortbread cookies every time you bake.

FAQ Section

Here are some frequently asked questions about pistachio shortbread cookies:

  1. Can I use salted butter instead of unsalted? Yes, you can use salted butter, but reduce the added salt in the recipe to balance the flavors.
  2. Can I freeze the cookie dough? Absolutely! You can freeze the dough logs for up to 3 months. Just thaw in the refrigerator before slicing and baking.
  3. What if I don’t have pistachios? You can substitute other nuts like almonds or hazelnuts, but the flavor profile will change.
  4. How long do these cookies last? When stored in an airtight container, the cookies can last up to a week.
  5. Can I make these cookies gluten-free? Yes, you can use a gluten-free flour blend in place of all-purpose flour, but the texture may vary.

I hope these answers help you in making the best pistachio shortbread cookies possible!

Frozen Banana Bites with Dark Chocolate

There’s something magically delightful about the combination of bananas and chocolate. The sweetness of the banana paired with the richness of dark chocolate creates a treat that’s not only delicious but also surprisingly healthy. When I first stumbled upon the recipe for Frozen Banana Bites with Dark Chocolate, I was intrigued by its simplicity and potential to satisfy my family’s sweet tooth without the guilt of indulging in less healthy desserts.

Ingredients

To create these delectable bites, you’ll need just a handful of ingredients that are likely already in your pantry. The star of the show is, of course, the bananas. Opt for ripe bananas with a few brown spots for the best flavor. You’ll also need high-quality dark chocolate chips or bars, coconut oil for smooth melting, and optionally, toppings like crushed nuts, shredded coconut, or a sprinkle of sea salt to add an extra layer of flavor and texture.

Instructions

  1. Start by peeling the bananas and slicing them into half-inch rounds. Aim for uniform slices to ensure even freezing and coating.

  2. Arrange the banana slices on a parchment-lined baking sheet, making sure they don’t touch each other. Freeze them for at least an hour or until they’re firm.

  3. In a microwave-safe bowl or using a double boiler, melt the dark chocolate along with a teaspoon of coconut oil. Stir until the chocolate is smooth and glossy.

  4. Dip each frozen banana slice into the melted chocolate, ensuring it’s completely covered. Use a fork to lift the slice out, letting any excess chocolate drip back into the bowl.

  5. Place the chocolate-coated banana back onto the parchment paper. If desired, sprinkle with toppings before the chocolate sets.

  6. Return the tray to the freezer for another hour or until the chocolate is firm.

  7. Once set, transfer the banana bites to an airtight container for storage in the freezer. They can be enjoyed straight from the freezer for a refreshing treat.

Nutrition Facts

This recipe yields approximately four servings. Each serving contains around 150 calories, making it a guilt-free indulgence for those looking to maintain a balanced diet while satisfying their cravings. It’s worth noting that the nutrition facts can vary slightly based on the specific brands of chocolate and additional toppings used.

Preparation Time

The preparation of Frozen Banana Bites with Dark Chocolate is refreshingly quick and easy. The active preparation time is about 20 minutes, with an additional 2 hours required for freezing. This makes it a perfect dessert to prepare ahead of time, especially when entertaining guests or planning a family movie night.

How to Serve

  • As a Snack: Enjoy these bites straight from the freezer for a quick and satisfying snack.

  • With Ice Cream: Serve alongside a scoop of vanilla or coconut ice cream for a decadent dessert.

  • On a Dessert Platter: Include them in a mixed dessert platter with other fruits and chocolate treats.

  • With Coffee or Tea: Pair with a hot beverage for a delightful afternoon treat.

  • As a Sweet Treat in Lunchboxes: Pack them in lunchboxes for a sweet surprise.

Additional Tips

  1. Chocolate Selection: Use high-quality dark chocolate with at least 70% cocoa for a richer flavor and health benefits.

  2. Freezing Tips: Ensure bananas are fully frozen before dipping in chocolate to prevent them from slipping off the fork.

  3. Storage: Store in a single layer to prevent them from sticking together.

  4. Toppings Variety: Experiment with different toppings like chia seeds, finely chopped dried fruits, or crushed pretzels for added crunch.

  5. Serving Temperature: Let them sit at room temperature for a minute before eating if they’re too hard straight from the freezer.

FAQ Section

  1. Can I use milk chocolate instead of dark chocolate?
    Yes, you can substitute milk chocolate if you prefer a sweeter flavor, though this will alter the nutritional profile.

  2. How long can I store the banana bites in the freezer?
    They can be stored for up to two weeks in an airtight container for optimal freshness.

  3. Can I use other fruits instead of bananas?
    Absolutely. Strawberries, pineapple chunks, or apple slices work well, though freezing times may vary.

  4. What if I don’t have coconut oil?
    Butter or vegetable oil can be used as alternatives for melting the chocolate smoothly.

  5. Are these banana bites suitable for a vegan diet?
    Yes, as long as you use vegan dark chocolate and ensure any additional toppings are vegan-friendly.

Raspberry Swirl Cheesecake

When I first stumbled upon the Raspberry Swirl Cheesecake recipe, I was intrigued by its visual appeal and the promise of a fruity, creamy delight. The idea of the tartness of raspberries intertwining with the rich, smoothness of cheesecake seemed like a match made in dessert heaven. As a lover of both raspberries and cheesecake, I knew I had to give it a try. Upon serving this delightful dessert to my family, their reactions were priceless. Each bite was met with a chorus of “mmm’s” and “wow’s,” as the cheesecake’s creamy texture complemented the raspberry’s vibrant flavor. It quickly became a family favorite, with requests for repeat performances at every special occasion. This Raspberry Swirl Cheesecake is not just a treat; it’s an experience that captivates the senses.

Ingredients

Creating this luscious Raspberry Swirl Cheesecake requires careful selection of ingredients, each contributing to the overall taste and texture of the dessert. Here’s what you’ll need:

For the crust:

  • 1 1/2 cups graham cracker crumbs
  • 1/4 cup granulated sugar
  • 1/2 cup unsalted butter, melted

For the raspberry sauce:

  • 1 cup fresh or frozen raspberries
  • 2 tablespoons granulated sugar
  • 1 teaspoon cornstarch
  • 1 teaspoon lemon juice

For the cheesecake filling:

  • 4 packages (8 ounces each) cream cheese, softened
  • 1 1/4 cups granulated sugar
  • 1 teaspoon vanilla extract
  • 4 large eggs
  • 2/3 cup sour cream
  • 2/3 cup heavy cream

Instructions

Making a Raspberry Swirl Cheesecake from scratch requires patience and attention to detail, but the end result is more than worth the effort. Follow these steps to create a cheesecake that is as beautiful as it is delicious:

Step 1: Prepare the crust

In a medium bowl, combine the graham cracker crumbs and sugar. Stir in the melted butter until the mixture resembles wet sand. Press the mixture firmly into the bottom of a 9-inch springform pan to form the crust. Chill in the refrigerator while you prepare the filling.

Step 2: Make the raspberry sauce

In a small saucepan over medium heat, combine the raspberries, sugar, cornstarch, and lemon juice. Stir constantly until the raspberries break down and the sauce thickens, about 5 minutes. Strain the sauce through a fine-mesh sieve to remove seeds. Set aside to cool.

Step 3: Prepare the cheesecake filling

Preheat the oven to 325°F (163°C). In a large bowl, beat the cream cheese and sugar with an electric mixer until smooth and creamy. Add the vanilla extract and mix well. Beat in the eggs one at a time, ensuring each is fully incorporated before adding the next. Gently fold in the sour cream and heavy cream until smooth.

Step 4: Assemble the cheesecake

Pour the cream cheese mixture over the prepared crust. Drop spoonfuls of the raspberry sauce on top and use a toothpick or skewer to swirl the sauce into the cheesecake batter, creating a marbled effect.

Step 5: Bake the cheesecake

Place the springform pan in a roasting pan. Pour hot water into the roasting pan until it reaches halfway up the sides of the springform pan. Bake for 55-60 minutes or until the edges are set but the center still jiggles slightly. Turn off the oven, crack the door open slightly, and let the cheesecake cool in the oven for 1 hour. Remove from the oven and refrigerate for at least 4 hours or overnight before serving.

Nutrition Facts

Understanding the nutritional content of your Raspberry Swirl Cheesecake is essential for those who keep track of their dietary intake. Here’s a breakdown based on a typical serving:

  • Servings: 12
  • Calories per serving: Approximately 450 calories

Preparation Time

Preparation is key when making a Raspberry Swirl Cheesecake. Here’s an estimated timeline to help you plan your baking session:

  • Preparation Time: 30 minutes
  • Cooking Time: 1 hour
  • Cooling Time: 5 hours (including chilling time)
  • Total Time: 6 hours and 30 minutes

How to Serve

Serving your Raspberry Swirl Cheesecake can be as simple or as elaborate as you like. Consider these ideas to enhance the experience:

  • Serve chilled, straight from the fridge for the best texture.
  • Garnish with fresh raspberries for an added burst of flavor and color.
  • Dust with powdered sugar for a touch of elegance.
  • Add a dollop of whipped cream for extra decadence.
  • Pair with a cup of freshly brewed coffee or a glass of dessert wine.

Additional Tips

Here are some tips to ensure your Raspberry Swirl Cheesecake turns out perfectly every time:

  1. Room Temperature Ingredients: Ensure all ingredients, especially the cream cheese and eggs, are at room temperature for a smoother filling.
  2. Prevent Cracks: Bake the cheesecake in a water bath to prevent the top from cracking.
  3. Chill Thoroughly: Allow the cheesecake to chill completely in the refrigerator to set properly before serving.
  4. Swirl with Care: Don’t over-swirl the raspberry sauce to maintain a distinct pattern and flavor.
  5. Use Fresh Raspberries: For the best flavor, use fresh raspberries if they are in season.

FAQ Section

Q: Can I use frozen raspberries for the sauce?

A: Yes, frozen raspberries can be used if fresh ones are not available. Just ensure they are thawed and drained before use.

Q: How can I tell if my cheesecake is done baking?

A: The cheesecake is done when the edges are set, but the center still has a slight jiggle. It will continue to set as it cools.

Q: Can I freeze Raspberry Swirl Cheesecake?

A: Yes, you can freeze the cheesecake. Wrap it tightly in plastic wrap and aluminum foil before placing it in the freezer for up to 2 months. Thaw in the refrigerator before serving.

Q: What if my cheesecake cracks?

A: If your cheesecake cracks, don’t worry! It will still taste delicious, and you can cover the cracks with fresh raspberries or whipped cream.

Q: Can I make this cheesecake a day in advance?

A: Absolutely! In fact, making it a day ahead allows the flavors to meld together beautifully. Just keep it chilled in the refrigerator until ready to serve.

Chocolate Hazelnut Truffles

Chocolate Hazelnut Truffles have become a beloved treat in our household, and for good reason. When I first stumbled upon this recipe, I was curious yet skeptical about how these truffles would fare against the store-bought ones we were used to. To my delight, the homemade version surpassed all expectations. The rich, decadent flavor with a hint of hazelnut paired beautifully with the smooth chocolate. My family couldn’t get enough of them, and they quickly became a staple dessert for special occasions and cozy family gatherings. The recipe is straightforward enough to make with kids, turning the process into a fun family activity that ends with delicious rewards. The satisfaction of crafting these treats at home adds an extra layer of enjoyment that you simply can’t get from anything store-bought.

Ingredients

  • 1 cup (240 ml) heavy cream
  • 8 oz (225 g) high-quality dark chocolate, finely chopped
  • 1/4 cup (60 g) hazelnut spread (such as Nutella)
  • 1/4 cup (30 g) unsweetened cocoa powder
  • 1/2 cup (70 g) chopped toasted hazelnuts
  • 1 tsp vanilla extract
  • Pinch of salt

Instructions

  1. Begin by pouring the heavy cream into a small saucepan and heating it over medium heat until it just begins to simmer. Be careful not to let it boil.

  2. Remove the saucepan from the heat and add the finely chopped dark chocolate. Let it sit for a minute to allow the chocolate to soften.

  3. Gently stir the mixture until the chocolate has completely melted and the mixture is smooth and glossy.

  4. Stir in the hazelnut spread, vanilla extract, and a pinch of salt until everything is well combined.

  5. Transfer the mixture to a shallow dish and refrigerate it for about 2 hours or until it is firm enough to scoop.

  6. Once firm, use a teaspoon or a melon baller to scoop out small amounts of the chocolate mixture and roll it into balls. Work quickly as the mixture can soften in your hands.

  7. Roll each truffle in the unsweetened cocoa powder followed by the chopped toasted hazelnuts.

  8. Place the finished truffles on a baking sheet lined with parchment paper and refrigerate until firm, about 30 minutes.

  9. Store the truffles in an airtight container in the refrigerator for up to two weeks.

Nutrition Facts

Servings: 24 truffles

Calories per serving: Approximately 110 calories

Preparation Time

Total time: Approximately 3 hours

This includes about 2 hours of chilling time to ensure the truffles are firm enough to roll and coat.

How to Serve

  • As a decadent dessert at dinner parties.
  • Accompanied by a glass of dessert wine or port for a sophisticated finish.
  • As a luxurious gift, packaged in a beautiful box lined with parchment paper.
  • Paired with coffee or espresso for an indulgent afternoon treat.
  • Served alongside a cheese platter for a sweet and savory experience.

Additional Tips

  1. Choose Quality Chocolate: The better the chocolate, the richer the truffles. Opt for a high cocoa content for the best results.

  2. Consistent Rolling: Use a melon baller for even-sized truffles, ensuring uniformity in presentation and texture.

  3. Experiment with Flavors: Add a hint of orange zest or a splash of liqueur to the chocolate mixture for a unique twist.

  4. Maintain Temperature: Keep your hands cool while rolling to prevent the chocolate from melting. Run hands under cold water if needed.

  5. Alternative Coatings: Consider rolling truffles in shredded coconut, chopped pistachios, or even matcha powder for variety.

FAQ

  1. Can I use milk chocolate instead of dark chocolate?
    Yes, you can substitute milk chocolate, but it will result in a sweeter truffle. Adjust the amount of hazelnut spread to balance the sweetness.

  2. Can these truffles be frozen?
    Absolutely. Freeze the truffles in a single layer on a baking sheet before transferring them to an airtight container for up to three months.

  3. What if I don’t have a melon baller?
    A teaspoon can work just as well. Aim for uniform sizes for even presentation.

  4. How can I make these truffles vegan?
    Use coconut cream in place of heavy cream and ensure your chocolate and hazelnut spread are dairy-free.

  5. Can I add spices to the truffle mix?
    Yes! Spices like cinnamon or chili can add an interesting depth to your truffles. Start with a small amount and adjust to taste.

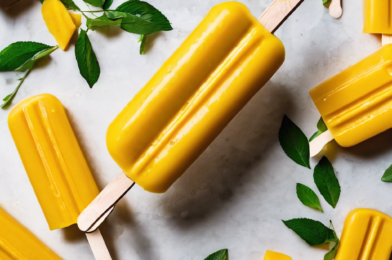
Mango Lassi Popsicles

There’s something incredibly satisfying about creating a treat that not only tantalizes the taste buds but also brings smiles to the faces of your loved ones. Recently, I took on the culinary adventure of making Mango Lassi Popsicles, and it turned out to be an absolute hit with my family. The blend of creamy yogurt, ripe mangoes, and a hint of cardamom transported us to a tropical paradise, each bite a refreshing escape from the mundane. The popsicles were devoured within minutes, leaving everyone craving more. It’s safe to say that these Mango Lassi Popsicles will be a staple in our household, particularly during the sweltering summer months.

Ingredients

The beauty of Mango Lassi Popsicles lies in their simplicity and the ease with which you can find the ingredients. To make a batch, you’ll need:

  • 2 ripe mangoes, peeled and pitted
  • 1 cup plain yogurt
  • 1/4 cup milk
  • 3 tablespoons honey or sugar (adjust to taste)
  • 1/4 teaspoon ground cardamom
  • A pinch of salt
  • 2 tablespoons lemon juice

These ingredients, when combined, create a luscious and creamy base that captures the essence of a traditional mango lassi, but in a frozen and portable form.

Instructions

Creating these delightful popsicles is a straightforward process that even novice cooks will find manageable. Here is how you can make them:

  1. Prepare the mangoes: Start by peeling and pitting the ripe mangoes. Chop them into small pieces and place them in a blender.
  2. Blend the ingredients: Add the yogurt, milk, honey or sugar, ground cardamom, salt, and lemon juice to the blender. Blend until smooth and creamy. Taste the mixture and adjust sweetness if necessary.
  3. Pour into molds: Carefully pour the blended mixture into popsicle molds, leaving a small gap at the top to allow for expansion as they freeze.
  4. Insert sticks: Place the popsicle sticks in the center of each mold.
  5. Freeze: Transfer the molds to the freezer and let them freeze for at least 4 hours, or until completely solid.
  6. Serve: To release the popsicles, run the molds under warm water for a few seconds and gently pull the sticks. Enjoy immediately!

These Mango Lassi Popsicles are the perfect balance of sweet and tangy, with a rich creaminess that makes them irresistible.

Nutrition Facts

Each batch of Mango Lassi Popsicles yields approximately 6 servings. Here are the nutrition facts per serving:

  • Calories: 100
  • Carbohydrates: 22g
  • Protein: 3g
  • Fat: 1.5g
  • Sodium: 25mg
  • Sugar: 20g

These popsicles are not only delicious but also a relatively healthy treat, making them a guilt-free indulgence.

Preparation Time

The preparation time for Mango Lassi Popsicles is brief, requiring only about 15 minutes of active work. However, freezing time adds an additional 4 hours. Here’s a breakdown:

  • Preparation: 15 minutes
  • Freezing: 4 hours

While the wait might test your patience, the end result is definitely worth it!

How to Serve

Once your Mango Lassi Popsicles are ready, here are some delightful ways to serve them:

  • As a refreshing dessert after a spicy meal.
  • As a cooling snack on a hot afternoon.
  • At a summer party, arranged on a platter with other frozen treats.
  • Garnished with fresh mint leaves for an added touch of freshness.
  • Accompanied by a sprinkle of chili powder for a spicy twist.

These serving suggestions are sure to enhance the enjoyment of the popsicles, making them a memorable part of any gathering.

Additional Tips

To ensure your Mango Lassi Popsicles turn out perfectly every time, consider these additional tips:

  • Choose ripe mangoes: The sweetness and flavor of the popsicles heavily depend on the quality of the mangoes. Opt for ripe, juicy ones for the best results.
  • Adjust sweetness: Taste the mixture before freezing and adjust the sweetness according to your preference. Remember, the sweetness can diminish slightly when frozen.
  • Use Greek yogurt: For a thicker and creamier texture, consider using Greek yogurt instead of regular yogurt.
  • Add a pinch of saffron: For a luxurious touch, soak a few strands of saffron in warm milk and add it to the mixture before blending.
  • Experiment with flavors: Feel free to add other fruits like berries or pineapple to create your own unique version of these popsicles.

FAQ Section

Here are some frequently asked questions about Mango Lassi Popsicles:

  • Can I use frozen mangoes? Yes, frozen mangoes can be used if fresh ones are not available. Just make sure to thaw them before blending.
  • Can I make these popsicles dairy-free? Absolutely! Substitute the yogurt and milk with coconut yogurt and coconut milk for a dairy-free version.
  • How long can I store the popsicles? These popsicles can be stored in an airtight container in the freezer for up to two weeks.
  • What if I don’t have popsicle molds? You can use small paper cups as molds. Simply fill them with the mixture, cover with foil, and insert a stick through the foil.
  • Can I skip the cardamom? Yes, if you’re not a fan of cardamom, you can omit it or replace it with a different spice like cinnamon or nutmeg.

With these tips and answers, you’re all set to make and enjoy your own batch of delicious Mango Lassi Popsicles. Happy freezing!

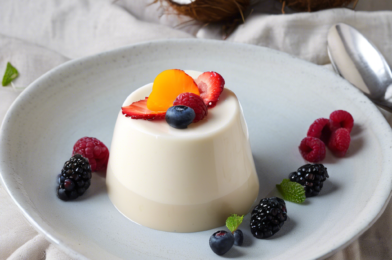
Coconut Milk Panna Cotta

Coconut Milk Panna Cotta is a delightful twist on the classic Italian dessert, and it has quickly become a favorite in my household. The creamy texture combined with the subtle sweetness of coconut milk makes it a perfect treat for any occasion. When I first introduced this dish to my family, their eyes lit up with delight. The smooth and luscious panna cotta, topped with a hint of fresh fruit, was a hit at our dinner table. My family couldn’t stop raving about how the coconut flavor added an exotic touch to a traditional favorite. It’s now a staple in our home, especially during festive gatherings.

Ingredients

To make the perfect Coconut Milk Panna Cotta, you will need the following ingredients:

  • 2 cups of coconut milk
  • 1 cup of heavy cream
  • 1/2 cup of granulated sugar
  • 1 packet (2 1/4 teaspoons) of unflavored gelatin
  • 1 teaspoon of vanilla extract
  • Fresh berries or fruit for garnish
  • A pinch of salt

Instructions

Follow these simple steps to create a smooth and delicious Coconut Milk Panna Cotta:

  1. Start by sprinkling the gelatin over 1/4 cup of cold water in a small bowl. Let it sit for about 5 minutes to bloom.
  2. In a saucepan, combine the coconut milk, heavy cream, sugar, and salt. Heat the mixture over medium heat, stirring occasionally until the sugar has dissolved completely.
  3. Once the sugar is dissolved, remove the saucepan from the heat. Stir in the bloomed gelatin until it is completely dissolved in the warm liquid.
  4. Add the vanilla extract to the mixture and stir well.
  5. Pour the mixture into ramekins or serving glasses, and let it cool to room temperature.
  6. Once cooled, cover with plastic wrap and refrigerate for at least 4 hours, or until set.
  7. Before serving, top with fresh berries or your choice of fruit for a refreshing touch.

Nutrition Facts

This recipe makes approximately 6 servings. Each serving contains about 250 calories, depending on the size and garnish used. It’s a relatively low-calorie dessert that doesn’t compromise on taste or satisfaction.

Preparation Time

The preparation time for Coconut Milk Panna Cotta is about 20 minutes. However, keep in mind that the dessert requires at least 4 hours of chilling time in the refrigerator to set properly. It’s best to prepare it in advance if you’re planning to serve it for a special occasion or dinner party.

How to Serve

Here are a few serving suggestions to enhance your Coconut Milk Panna Cotta experience:

  • Classic: Serve it in small ramekins or dessert glasses for individual servings.
  • Fruit Topping: Add a variety of fresh fruits like strawberries, blueberries, or mango slices on top.
  • Herb Infusion: Garnish with a sprig of mint or a sprinkle of finely chopped basil for an aromatic touch.
  • Drizzle: Consider drizzling with a bit of honey or a fruit coulis for added sweetness.
  • Chilled Plates: Serve on chilled plates to keep the panna cotta cool and refreshing.

Additional Tips

Here are some tips to ensure your Coconut Milk Panna Cotta turns out perfectly every time:

  1. Gelatin Blooming: Make sure the gelatin is fully bloomed before adding it to the heated mixture. This ensures a smooth texture without any lumps.
  2. Temperature Control: Don’t let the mixture boil, as this can affect the gelatin’s setting abilities. Keep it at a gentle heat.
  3. Vanilla Quality: Use high-quality vanilla extract or even a vanilla bean for a richer flavor.
  4. Chill Time: Allow ample time for chilling. The panna cotta should be firm enough to hold its shape but still jiggle slightly.
  5. Experiment with Flavors: Don’t be afraid to infuse other flavors like almond or cardamom for a unique twist.

FAQ Section

Here are some frequently asked questions about Coconut Milk Panna Cotta:

  1. Can I use light coconut milk? Yes, but the panna cotta may be slightly less rich. Full-fat coconut milk provides the best texture and flavor.
  2. Is there a non-dairy alternative? Absolutely! Substitute the heavy cream with a non-dairy cream or additional coconut milk for a vegan version.
  3. How long can I store panna cotta? It can be stored in the refrigerator for up to 3 days. Make sure it’s covered to prevent it from absorbing other odors.
  4. Can I make it in advance? Yes, Coconut Milk Panna Cotta is perfect for making ahead of time since it needs to chill for several hours.
  5. What if my panna cotta doesn’t set? This might be due to insufficient gelatin or boiling the mixture. Ensure correct measurements and gentle heating.

Oatmeal Raisin Cookies

When it comes to homemade cookies, oatmeal raisin cookies often spark a delightful debate among cookie enthusiasts. In our household, these cookies are a beloved treat, often surpassing the usual chocolate chip alternative in popularity. Their rich, chewy texture combined with a hint of cinnamon and the subtle sweetness of raisins makes them an irresistible snack. Whether enjoyed fresh from the oven or as a quick grab-and-go breakfast, oatmeal raisin cookies deliver a nostalgic comfort that many of us cherish.

Ingredients

To embark on the journey of crafting these delightful cookies, you’ll need a set of carefully chosen ingredients. Here’s what you’ll need:

  • 1 cup (2 sticks) unsalted butter, softened
  • 1 cup packed brown sugar
  • 1/2 cup granulated sugar
  • 2 large eggs
  • 1 teaspoon vanilla extract
  • 1 1/2 cups all-purpose flour
  • 1 teaspoon baking soda
  • 1 teaspoon ground cinnamon
  • 1/2 teaspoon salt
  • 3 cups rolled oats
  • 1 cup raisins
  • Optional: 1/2 cup chopped nuts (such as walnuts or pecans)

Instructions

Baking these cookies is a simple yet rewarding experience. Follow these steps to achieve the perfect oatmeal raisin cookie:

  1. Preheat your oven to 350°F (175°C) and line a baking sheet with parchment paper.
  2. In a large mixing bowl, cream together the softened butter, brown sugar, and granulated sugar until the mixture is light and fluffy. This typically takes about 3 minutes with an electric mixer.
  3. Add the eggs one at a time, mixing well after each addition. Stir in the vanilla extract.
  4. In a separate bowl, whisk together the flour, baking soda, cinnamon, and salt.
  5. Gradually add the dry ingredients to the wet ingredients, mixing until just combined.
  6. Stir in the oats and raisins (and nuts, if using) until they are evenly distributed throughout the dough.
  7. Drop rounded tablespoons of dough onto the prepared baking sheet, spacing them about 2 inches apart.
  8. Bake for 10 to 12 minutes, or until the edges are golden brown. The centers may look slightly underbaked, but they will set as they cool.
  9. Allow the cookies to cool on the baking sheet for 5 minutes before transferring them to a wire rack to cool completely.

Nutrition Facts

This recipe yields about 24 cookies, with each serving containing approximately 150 calories. These cookies are not only a delicious treat but also provide a small amount of dietary fiber from the oats and raisins, making them a slightly healthier option compared to other cookies.

Preparation Time

The preparation time for these oatmeal raisin cookies is relatively short, making them an excellent choice for spontaneous baking sessions. You can expect to spend about 15 minutes on preparation and another 10 to 12 minutes on baking. In less than half an hour, you’ll have a batch of warm, freshly baked cookies ready to enjoy.

How to Serve

Oatmeal raisin cookies are versatile and can be enjoyed in various ways. Here are some serving suggestions:

  • With Milk: Serve with a cold glass of milk for a classic and comforting combination.
  • As a Dessert: Pair with a scoop of vanilla ice cream for an indulgent dessert.
  • On-the-Go Snack: Pack in lunchboxes or take along on trips as a convenient snack.
  • With Tea or Coffee: Enjoy alongside a warm cup of tea or coffee for a cozy afternoon treat.
  • Gift Idea: Wrap them in decorative packaging for a thoughtful homemade gift.

Additional Tips

To ensure your oatmeal raisin cookies turn out perfectly every time, consider these helpful tips:

  1. Use Fresh Ingredients: Ensure your baking soda and spices are fresh for the best flavor and texture.
  2. Don’t Overmix: When combining the wet and dry ingredients, mix until just combined to avoid tough cookies.
  3. Chill the Dough: If time allows, chill the dough for at least 30 minutes to help prevent spreading during baking.
  4. Experiment with Add-ins: Feel free to add chocolate chips or dried cranberries for a unique twist.
  5. Store Properly: Keep cookies in an airtight container to maintain their freshness and chewiness.

FAQ Section

Q: Can I use quick oats instead of rolled oats?

A: While quick oats can be used, they may result in a slightly different texture. Rolled oats are preferred for their chewy consistency.

Q: Can I substitute the raisins with other dried fruits?

A: Yes, you can substitute raisins with other dried fruits such as cranberries, cherries, or apricots for a different flavor profile.

Q: How do I prevent the cookies from spreading too much?

A: Chilling the dough before baking and using parchment paper can help prevent excessive spreading.

Q: Can I make these cookies gluten-free?

A: Yes, you can use a gluten-free flour blend and certified gluten-free oats to make these cookies suitable for a gluten-free diet.

Q: How should I store leftover cookies?

A: Store leftover cookies in an airtight container at room temperature for up to a week. They can also be frozen for longer storage.

In conclusion, oatmeal raisin cookies are a timeless classic that bring warmth and satisfaction with every bite. Their simplicity and versatility make them a favorite for many, providing a delicious treat that can be enjoyed in numerous ways. Whether you’re baking for a special occasion or simply to satisfy a sweet craving, this recipe promises to deliver delightful cookies every time.

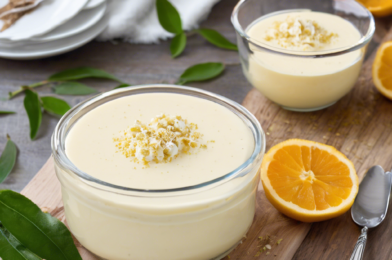
Vanilla Bean Pudding

Vanilla bean pudding is a timeless classic that never fails to impress, whether served as a comforting dessert after a family meal or a sophisticated treat at a dinner party. Recently, I had the pleasure of making this delightful dessert for a family gathering, and it was an absolute hit. The rich, creamy texture combined with the intoxicating aroma of real vanilla beans had everyone asking for seconds. There’s something incredibly satisfying about making a dessert from scratch, and this vanilla bean pudding truly elevates the simple pleasures of vanilla to an entirely new level. My family, who aren’t usually dessert enthusiasts, found themselves reaching for another spoonful, a testament to its irresistible charm.

Ingredients

The magic of this vanilla bean pudding starts with a few simple ingredients that come together to create a symphony of flavors. The star of the show is, of course, the vanilla bean. When you split a vanilla bean pod, the room fills with a fragrance that promises something extraordinary. You’ll need:

  • 2 cups of whole milk
  • 2/3 cup of granulated sugar
  • 1/4 cup of cornstarch
  • 1/4 teaspoon of salt
  • 1 vanilla bean (or 2 teaspoons of pure vanilla extract)
  • 3 large egg yolks
  • 2 tablespoons of unsalted butter

Instructions

Creating this pudding is not only about the end result but also about enjoying the process of combining these ingredients into a silky, luscious dessert. Here’s how you make it:

Begin by splitting the vanilla bean lengthwise and scraping out the seeds. In a medium saucepan, combine the milk, sugar, cornstarch, and salt. Add the vanilla seeds and the bean pod to the mixture. Cook over medium heat, stirring constantly, until the mixture is hot but not boiling.

In a separate bowl, whisk the egg yolks until smooth. Gradually add a small amount of the hot milk mixture to the egg yolks, whisking constantly to temper them. Once combined, pour the egg mixture back into the saucepan. Continue to cook, stirring constantly, until the mixture thickens and begins to boil gently. Remove from heat and discard the vanilla bean pod. Stir in the butter until melted and well incorporated.

Pour the pudding into individual serving dishes or a large bowl. To prevent a skin from forming, press a piece of plastic wrap directly onto the surface of the pudding. Let it cool to room temperature, then refrigerate until fully chilled, about 2 hours.

Nutrition Facts

This recipe makes approximately 4 servings, with each serving containing around 250 calories. It’s a treat that can be enjoyed in moderation, offering an indulgent experience without overwhelming your dietary goals.

Preparation Time

One of the appealing aspects of this recipe is its efficiency. The active preparation time is about 20 minutes, while the refrigeration takes approximately 2 hours. This makes it a great option for planning your dessert well in advance, allowing you to focus on other aspects of your meal.

How to Serve

Vanilla bean pudding is versatile and can be served in various delightful ways. Here are some ideas to inspire your presentation:

  • Top with fresh berries like strawberries or raspberries for a burst of color and flavor.
  • Sprinkle with a dusting of cocoa powder or shaved chocolate for a touch of elegance.
  • Layer with crushed cookies or biscotti for added texture.
  • Drizzle with caramel or chocolate sauce for an extra layer of indulgence.
  • Garnish with a sprig of fresh mint for a refreshing touch.

Additional Tips

To ensure your vanilla bean pudding turns out perfectly every time, consider these helpful tips:

  • Use fresh vanilla beans: The quality of your vanilla beans significantly impacts the flavor. Opt for plump, moist beans for the best results.
  • Whisk constantly: Stirring continuously while cooking prevents the pudding from scorching and ensures a smooth, lump-free texture.
  • Temperature control: Keep the heat at medium to avoid curdling the eggs. Patience is key to achieving the perfect consistency.
  • Strain if necessary: If you notice lumps, strain the pudding through a fine-mesh sieve before chilling.
  • Experiment with flavors: Feel free to add a splash of almond extract or a pinch of cinnamon for a unique twist on the traditional recipe.

FAQ Section

Here are some common questions about making vanilla bean pudding, answered for your convenience:

  1. Can I use vanilla extract instead of vanilla bean? Yes, you can substitute 2 teaspoons of pure vanilla extract for the vanilla bean. Add it after removing the pudding from heat.
  2. What if I don’t have cornstarch? You can use an equal amount of arrowroot powder or potato starch as a substitute for cornstarch.
  3. Can I make this pudding in advance? Absolutely! The pudding can be made up to 2 days in advance. Just keep it covered and refrigerated until ready to serve.
  4. Is it possible to make this pudding dairy-free? Yes, you can use almond milk or coconut milk as a substitute for whole milk, though it may slightly alter the flavor and texture.
  5. How can I prevent a skin from forming on the pudding? Press a piece of plastic wrap directly onto the surface of the pudding while it cools to prevent a skin from forming.

In conclusion, vanilla bean pudding is a simple yet sophisticated dessert that promises to delight with its rich flavor and creamy texture. Whether you’re serving it to family or guests, it’s sure to be a memorable addition to any meal.

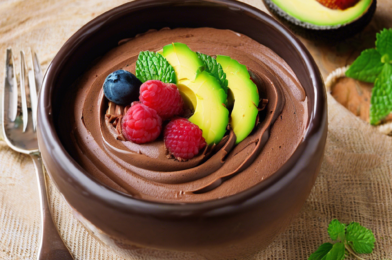
Chocolate Avocado Mousse

When I first stumbled upon the idea of a chocolate avocado mousse, I was admittedly skeptical. The thought of combining ripe avocados with rich cocoa seemed unconventional, if not downright peculiar. However, curiosity got the better of me, and I decided to give it a try. The result was a revelation. The mousse was velvety, luscious, and deeply chocolatey, with the avocado lending a creamy texture that was nothing short of perfection. My family, initially wary of this odd-sounding dessert, quickly became converts. This has now become a staple in our household, especially when a healthier dessert option is desired without compromising on flavor.

Ingredients

The beauty of this recipe lies in its simplicity and the quality of the ingredients. To make the perfect chocolate avocado mousse, you will need the following:

  • 2 ripe avocados: Choose avocados that yield slightly to gentle pressure, indicating ripeness.
  • 1/4 cup unsweetened cocoa powder: Opt for high-quality cocoa for a richer flavor.
  • 1/4 cup honey or maple syrup: Depending on your preference for sweetness and dietary restrictions.
  • 1/4 cup almond milk: Substitute with any milk of your choice, such as coconut or oat milk.
  • 1 teaspoon vanilla extract: Enhances the overall flavor profile of the mousse.
  • Pinch of salt: Balances the sweetness and enhances the chocolate flavor.
  • Optional toppings: Fresh berries, shredded coconut, or chopped nuts for garnish.

Instructions

Creating this delicious mousse is straightforward and requires minimal effort. Follow these steps to achieve a delightful dessert:

Step 1: Begin by preparing the avocados. Cut them in half, remove the pits, and scoop the flesh into a blender or food processor. Ensure the avocados are ripe for a smooth texture.

Step 2: Add the cocoa powder, honey or maple syrup, almond milk, vanilla extract, and a pinch of salt to the blender. Blend until the mixture is smooth and creamy. You may need to stop and scrape down the sides to ensure all ingredients are well combined.

Step 3: Taste the mixture and adjust sweetness if necessary. Depending on your preference, you might want to add a little more honey or maple syrup.

Step 4: Spoon the mousse into individual serving bowls or glasses. Refrigerate for at least 30 minutes to allow the flavors to meld and the mousse to set.

Step 5: Before serving, garnish with your choice of toppings such as fresh berries, a sprinkle of cocoa powder, or a handful of chopped nuts for added texture and flavor.

Nutrition Facts

This recipe serves 4 and is surprisingly healthy, making it a guilt-free indulgence. Each serving contains approximately 200 calories, depending on the type of milk and sweetener used. The avocados provide healthy fats, while the cocoa powder is rich in antioxidants.

Preparation Time

The preparation time for this chocolate avocado mousse is delightfully quick. From start to finish, you can expect to spend no more than 10 minutes preparing the ingredients and blending them into a creamy dessert. The only waiting period is the 30 minutes required for the mousse to chill in the refrigerator, allowing the flavors to develop fully.

How to Serve

This mousse is versatile and can be served in various ways to suit your occasion or personal preference:

  • As a standalone dessert: Serve the mousse in elegant glasses for a sophisticated presentation.
  • Accompanied by fresh fruit: Pair with sliced strawberries or raspberries to enhance the chocolate flavor.
  • With a dollop of whipped cream: Add a touch of indulgence for those who desire a richer dessert.
  • In a parfait: Layer with granola and yogurt for a nutritious breakfast or snack.
  • As a cake filling: Use it as a healthier alternative to buttercream in cakes or cupcakes.

Additional Tips

Here are some tips to ensure your chocolate avocado mousse turns out perfectly every time:

  • Choose ripe avocados: The key to a creamy mousse is using avocados that are perfectly ripe. They should be soft but not mushy.
  • Blend thoroughly: To achieve a smooth texture, make sure to blend the ingredients until completely homogenous. No one wants lumps in their mousse!
  • Adjust sweetness to taste: Everyone’s palate is different, so feel free to adjust the amount of sweetener to suit your taste.
  • Experiment with flavors: Add a dash of cinnamon or a pinch of cayenne pepper for a unique twist on the classic recipe.
  • Chill for best results: Allow the mousse to chill for at least 30 minutes. This not only improves the texture but also enhances the flavor.

FAQ Section

Q: Can I make this mousse vegan?

A: Yes, simply use maple syrup as the sweetener and ensure your milk choice is plant-based, like almond or coconut milk.

Q: How long can I store the mousse?

A: Store the mousse in an airtight container in the refrigerator for up to 3 days. The mousse may brown slightly but will still taste delicious.

Q: Can I freeze the mousse?

A: While freezing might alter the texture slightly, it is possible. Thaw in the refrigerator before serving.

Q: What can I use instead of cocoa powder?

A: If you prefer, you can use melted dark chocolate for a richer flavor, but this will increase the calorie content.

Q: Is this dessert suitable for children?

A: Absolutely! This mousse is a great way to sneak healthy fats into your child’s diet, and the chocolate flavor is sure to win them over.